So you want to grow your blog traffic with Pinterest, but you’re not sure how to optimize your Pinterest profile to generate more clicks?
You see other bloggers in your niche generate massive free traffic to their websites from Pinterest, but you’re only seeing a handful of clicks to your blog?
If that sounds familiar, I know what you’re going through.
Pinterest is a fun way to grow your blog traffic. But it can also feel overwhelming sometimes.
The platform is quite complex, so it’s important to start with the basics.
Especially if you are new to Pinterest, you should invest your time in simple tasks that can make a big difference to your traffic.
To help you get started, in this guide I will walk you through 8 simple steps to optimize your Pinterest profile today.
With these quick tips, your profile will be seen by the right users who are likely to engage with your content and visit your website.
Whether you are brand new to Pinterest or you have been pinning your blog posts to your boards for a while, I will give you actionable, hands-on tips you can apply to your Pinterest marketing strategy right away.
Ready for some serious blog traffic? Then let’s jump right in!
- Step 1: Set up a Pinterest business account
- Step 2: Claim your website
- Step 3: Use a bright photo of yourself
- Step 4: Use keywords in your profile name
- Step 5: Add a call-to-action (CTA) to your Pinterest profile description
- Step 6: Create at least 10–15 relevant boards
- Step 7: Add keywords to your board titles and descriptions
- Step 8: Add at least 30 pins to every board
- Final thoughts: How to optimize your Pinterest profile to grow blog traffic faster
Disclosure: This page contains affiliate links, meaning I receive a commission if you decide to purchase using my links, but at no additional cost to you. Please read my disclosure for more information.
Step 1: Set up a Pinterest business account
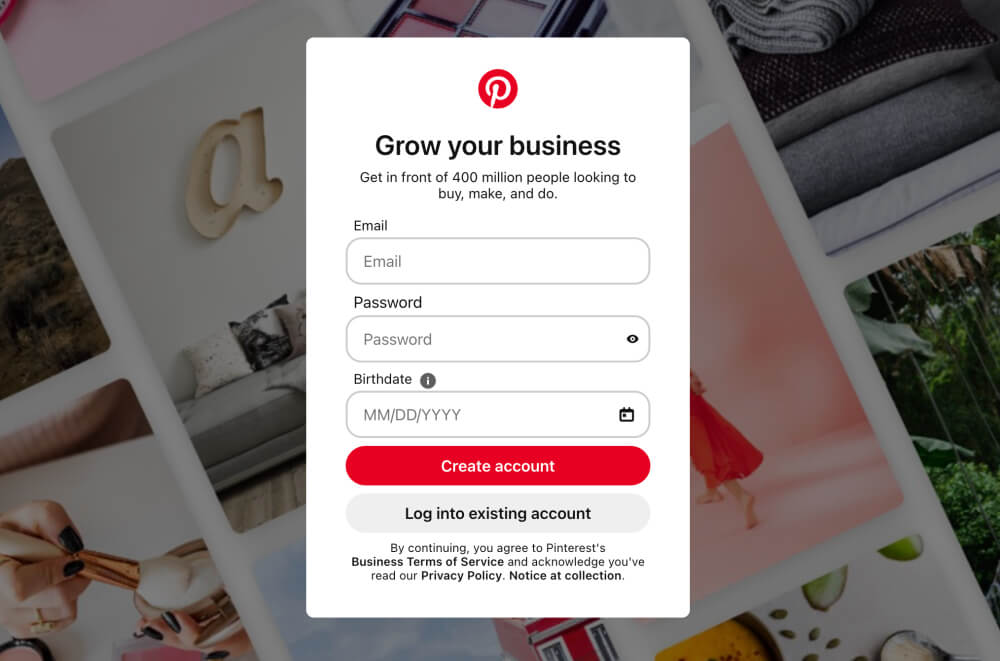
First things first: if you want to grow your blog traffic like a pro, you should use a Pinterest business account.
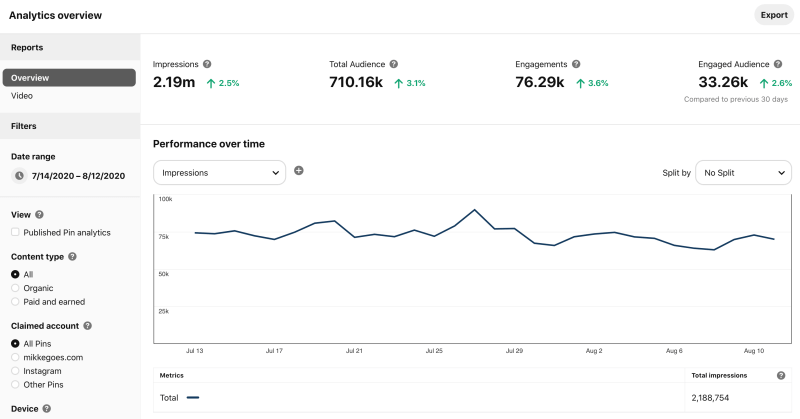
It’s 100% free, easy to set up, and it unlocks a variety of helpful tools for tracking your performance on Pinterest.
For example, you will gain access to Pinterest Analytics, where you can see how your Pinterest traffic strategy is working.
Also, a business account will unlock Pinterest Ads, which you can use for Pinterest keyword research.
Convert to a business account or create a new account
You already have a personal Pinterest account?
Here’s how you can convert a personal account into a business account:
- Log into your Pinterest account
- Head over to https://pinterest.com/business/convert/
- Fill out your blog name and website URL, then select a business type
- Finish by clicking Create account
If you are brand new to Pinterest, you can create a new business account here.
Step 2: Claim your website
Once your Pinterest business account is set up, what’s next?
You want to claim your website.
This is a way of verifying that you’re the owner of the blog website on your profile.
Claiming your Pinterest account will give you access to a lot more useful tools on Pinterest.
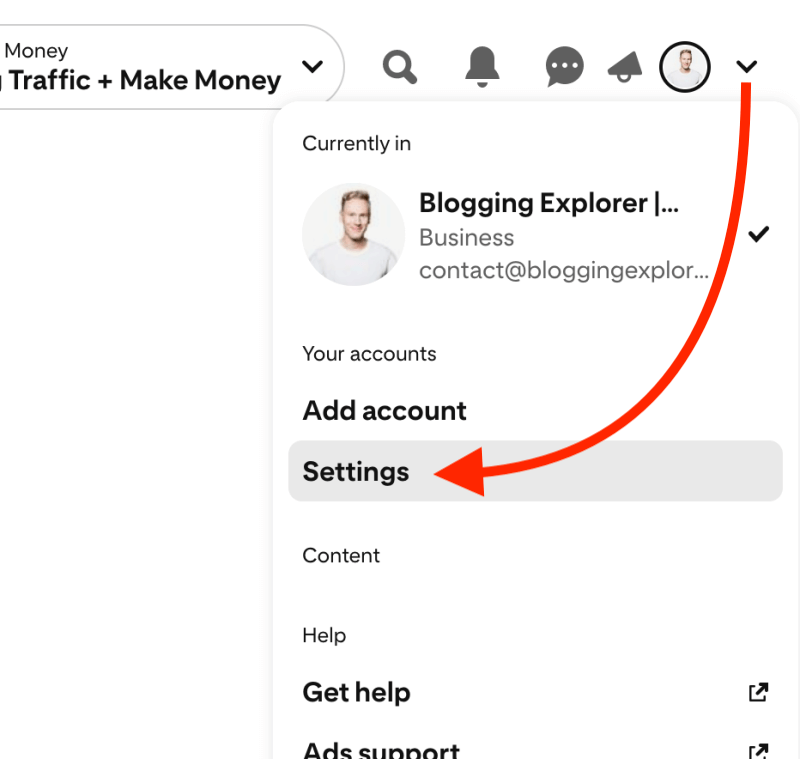
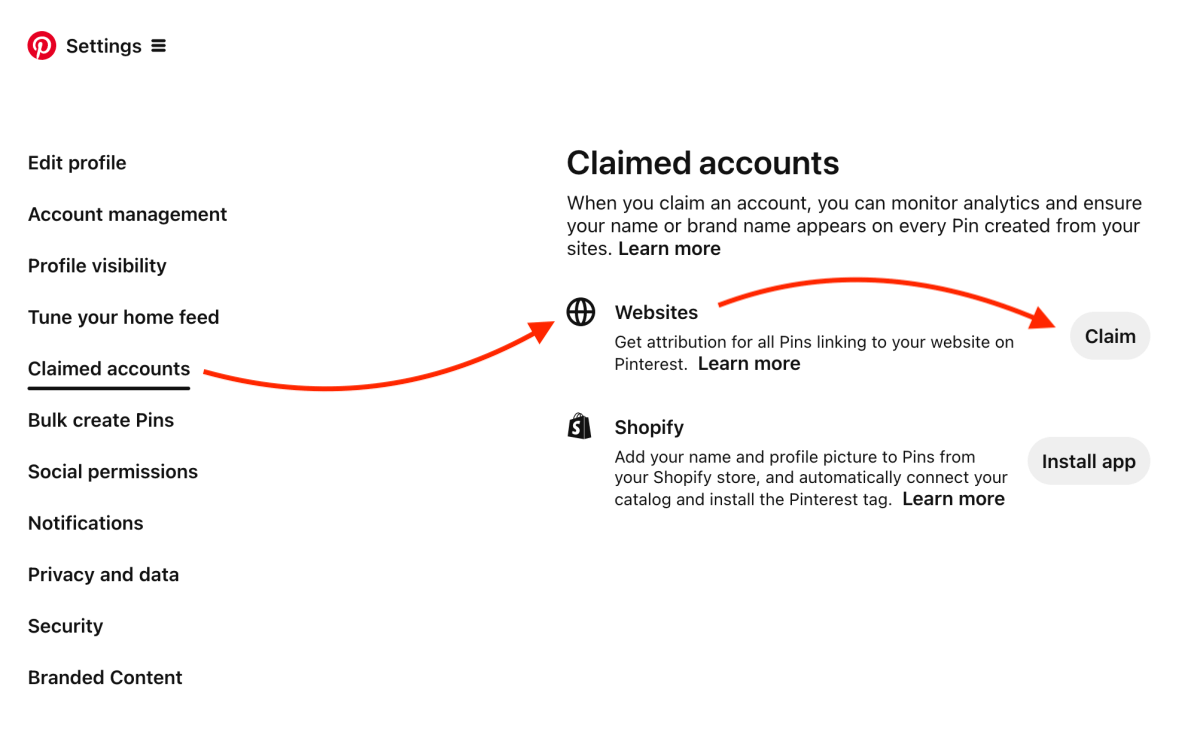
To claim your website, head over to your account Settings in the top right menu on Pinterest:
Now, navigate to Claimed accounts, choose Websites and click the red Claim button:
You have three options to claim your website with Pinterest:
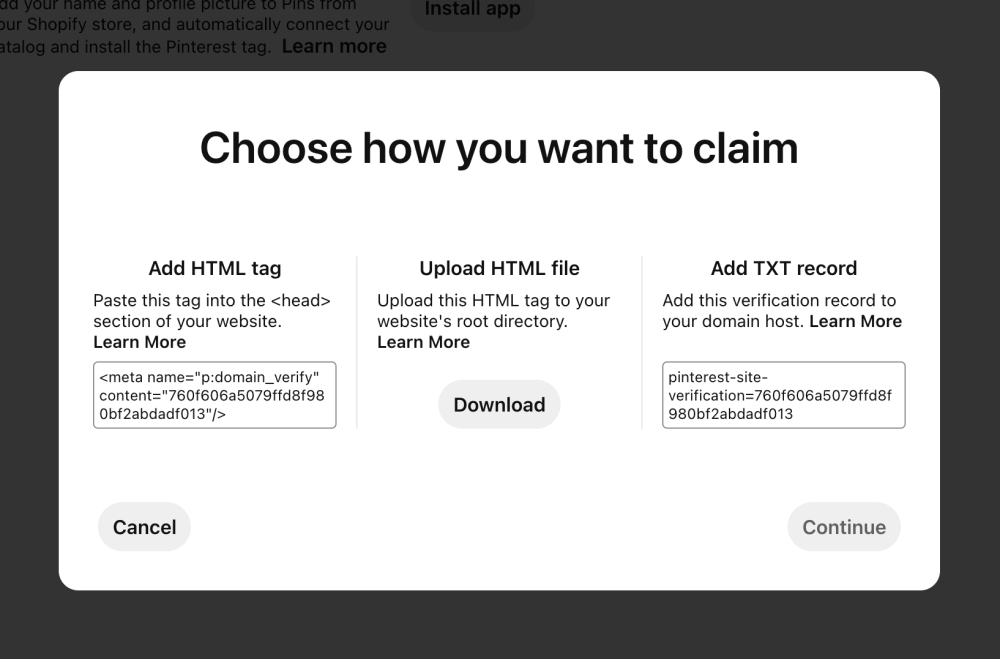
- Add HTML tag:
You can insert a small tag text into the <head> section of your website. If you use the Elementor Page Builder like I do, you can insert this HTML tag in your WordPress dashboard under Elementor > Custom Code > Add New. Alternatively, you can use the Insert Headers and Footers plugin. - Upload HTML file:
For this, you need to log in to your blog website dashboard with your blog hosting provider, and upload a small file to the root folder of your website. Sounds technical, I know, but it’s surprisingly easy. My provider, Bluehost, has a beginner-friendly interface where I can browse my website folders and upload files as I need. - Add TXT record:
This is perhaps the most technical and error-prone method for claiming your website. But if you know how to edit DNS records with your domain registrar, it’ll be a piece of cake.
Once you’re finished with any of these claiming methods, you can submit your website for review in the next step.
Pinterest will then check your claimed website and get back to you within the next 24 hours.
For more details, follow my step-by-step tutorial for claiming your website on Pinterest (in 5 minutes).
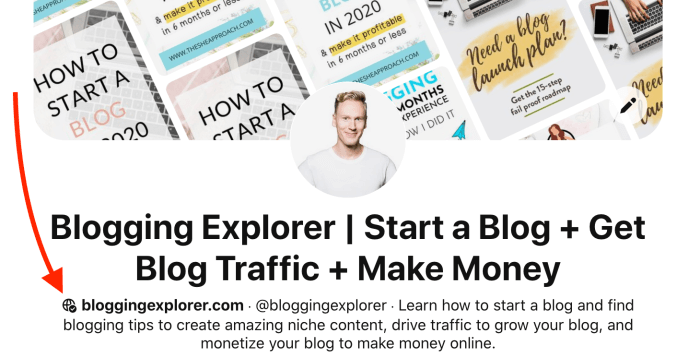
When you see that little globe icon next to your domain name on your profile, that means you’ve claimed your website successfully:
Step 3: Use a bright photo of yourself
Your profile photo has a massive impact on your Pinterest performance. After all, it’s the first thing users see when they visit your profile.
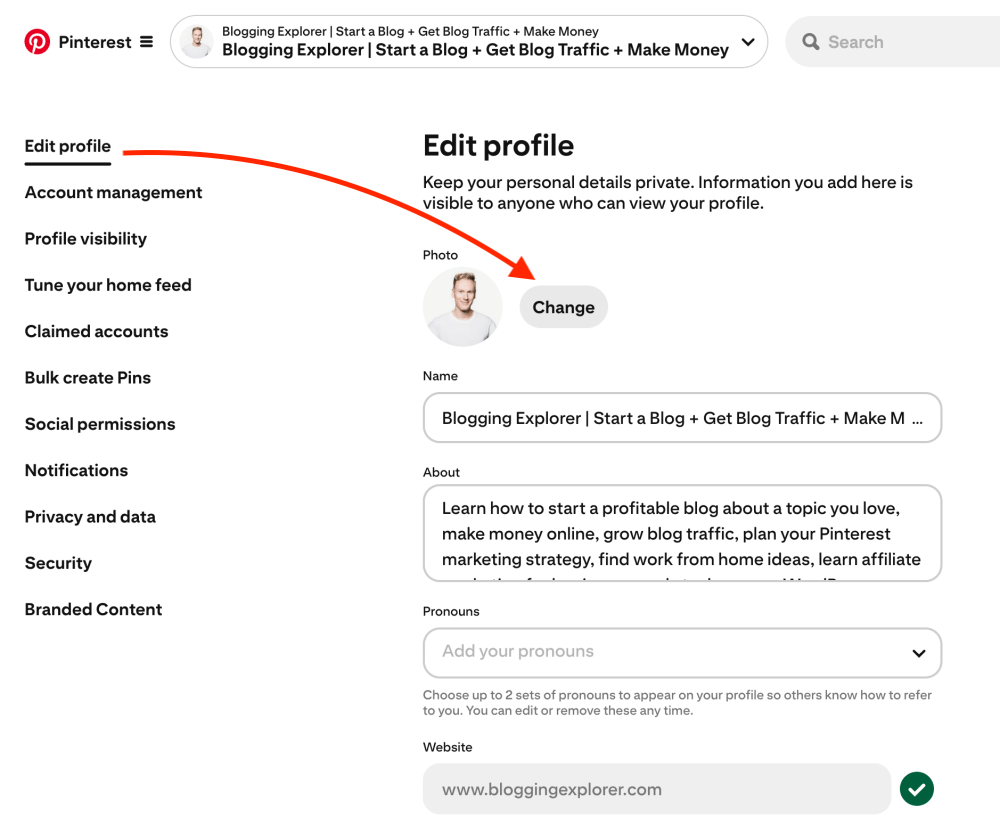
You can update your profile photo in Settings > Edit Profile > Photo:
So what makes for a good Pinterest profile photo?
Here are a few helpful tips:
- If you represent your brand and blog alone, use a photo of yourself.
- If your profile stands for a business that people need to recognize, use a logo, for instance.
Sometimes it helps to do some research within your niche. What types of profile photos are other bloggers in your niche using?
And when it’s time for a photoshooting, don’t fret. You don’t need a professional photographer to take your headshot for $500.
All you need is good lighting, a friendly smile, and your smartphone. Have fun with it!
Step 4: Use keywords in your profile name
If you are new to Pinterest, here’s the most important thing you need to know:
Pinterest is not social media. It is a search engine.
People use Pinterest to find ideas and inspiration in a visual format.
Hence, when you submit your content to the platform, it becomes part of a massive directory of information.
And when users search for content using a specific keyword, Pinterest shows them the best results for their search.
Thus, you need to treat the platform as a search engine, not a social network.
Why keywords are so important on Pinterest
But what does this mean for creating the perfect Pinterest profile?
If you want to optimize your Pinterest profile, you need to use the right keywords.
Keywords are the heart and soul of any search engine, and Pinterest is no exception.
Keywords help Pinterest display your profile to the right people — the users who are most likely interested in your content.
The better your keyword strategy is, the more users will see your boards and pins. That, of course, means more traffic to your blog website.
How to add the right keywords to your Pinterest profile
Before you add keywords to your profile, make sure to read my free Pinterest keyword research guide.
You want to be 100% sure that you’re not using just any keywords, but the right keywords that will bring you results.
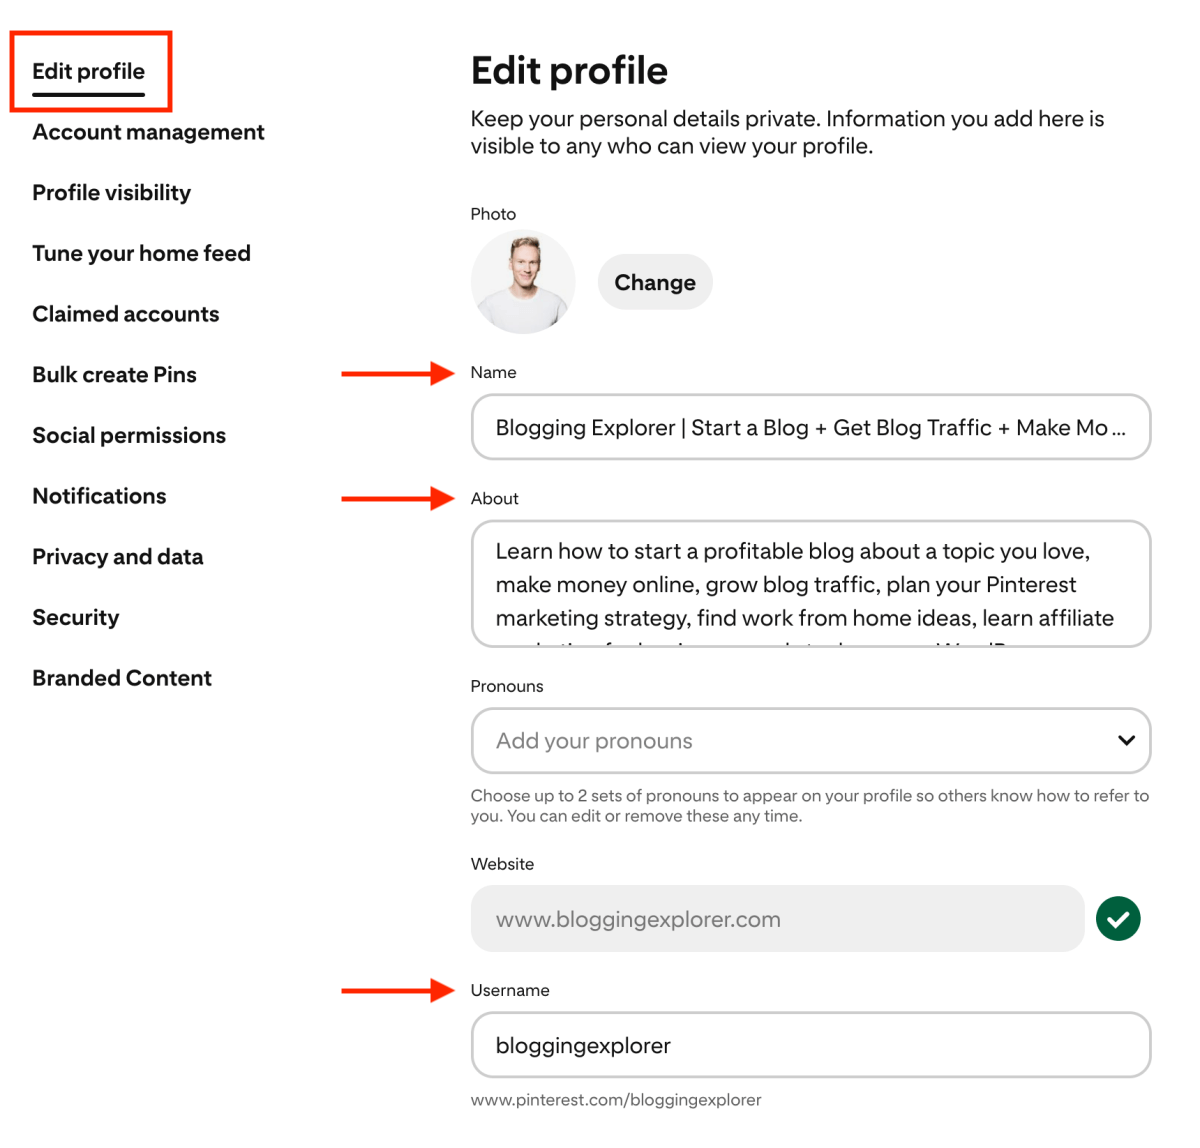
Next, head over to your Settings:
Here you can add keywords to:
- Name — this is your display name on Pinterest.
- About — this is your bio displayed on your Pinterest profile.
- Username — if you can, make sure your username and brand include a relevant keyword, too.
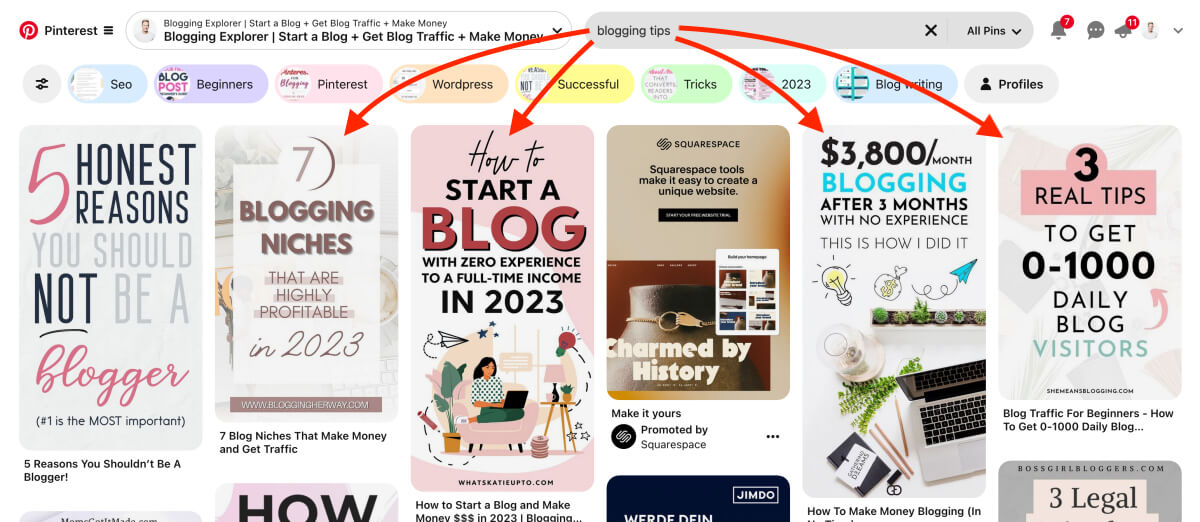
Quick example: My Pinterest profile keywords
When you look at my display name, you see three major keyword phrases:
- Start a blog
- Get blog traffic
- Make money
These are the three content pillars of my website, so they are perfect keywords for me.
This is fantastic real estate that users see whenever they see my profile name on the platform.
Similarly, when you look at my profile bio, you see further keywords such as:
- how to start a blog
- grow blog traffic
- Pinterest marketing strategy
- work from home ideas
- affiliate marketing
- monetize your blog
- make money online
These keywords are essentially what my content is about:
I help my readers learn more about blogging so that they can achieve great results like I have.
Thus, these relevant keywords in my bio help Pinterest know what my profile is about. That way, the search engine knows which users are most likely interested in visiting my website.
Now it’s your turn!
Head over to Settings > Edit profile, and add some keywords to your display name and bio.
Step 5: Add a call-to-action (CTA) to your Pinterest profile description
While you’re editing your profile bio, there’s one more thing to keep in mind:
You should incorporate a quick call-to-action (or CTA for short) in your text snippet.
A CTA is simply a way to engage users and give them an impulse to act right away.
For example, if you offer a freebie to your new email subscribers, your CTA could be something like:
- Grab your free e-book today
- Download your free guide now
- Sign up today for a freebie
In short, your call-to-action is a quick way to:
Not bad for a little detail like this, huh?
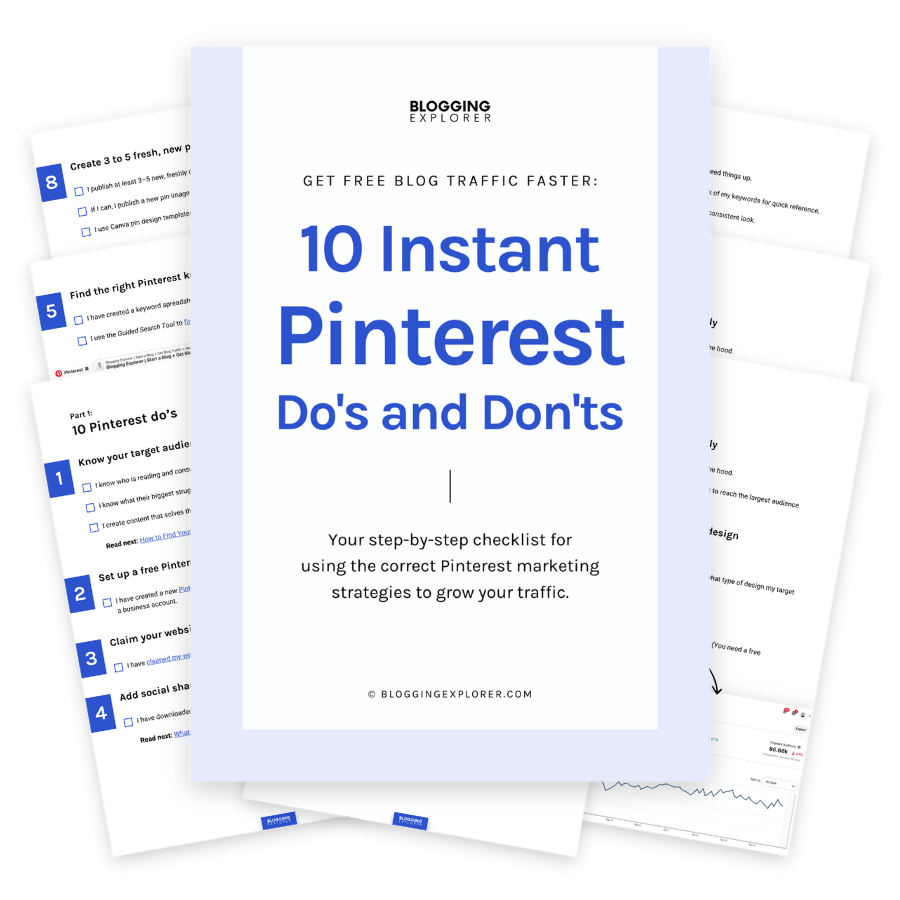
And speaking of a freebie, don’t forget to grab your free Pinterest marketing guide below:
Step 6: Create at least 10–15 relevant boards
When you are done with your profile display name and description, it’s time to create your first Pinterest boards.
If you are entirely new to Pinterest, here’s a quick intro:
Pinterest boards help you categorize your pins into logical sections on your profile.
You will find your boards on the Saved tab in your profile. For example, here are my saved boards:

Hence, my boards include topics such as:
- How to Start a Blog
- Pinterest Marketing
- Blogging Tips
- How to Make Money Blogging
- Pinterest for Bloggers
- etc.
See how each board is like a small directory of pins and content that is relevant to a specific sub-topic that I cover in my blog posts?
Hence, this relevance is what makes a huge difference to your blog traffic in the long run.
You want to offer Pinterest users helpful, inspirational content on your boards. That content has to be relevant to what you blog about.
So if you blog about desserts and baking, you shouldn’t create boards that are about travel tips and fashion trends. Those topics aren’t relevant to your blog niche.
Instead, your boards could cover topics such as:
- Easy dessert recipes
- Vegan baking tips
- Chocolate cake recipes
- Gluten-free baking etc.
Now, what topics are you going to cover on your Pinterest boards?
Step 7: Add keywords to your board titles and descriptions
Let’s dive a bit deeper with our Pinterest boards.
I’m beginning to sound like a broken record, but this bears repeating:
Pinterest is a search engine.
Hence, you want to do your best to help the Pinterest algorithm understand what type of content you save and publish to your profile.
When you create a new Pinterest board, the algorithm looks at your board title and description. It scans them for keywords to see what your board is all about.
So when you create a new board, you want to be very specific about the title and description. Again, use relevant keywords only.
Here’s an example of my board titled “Pinterest Marketing”:
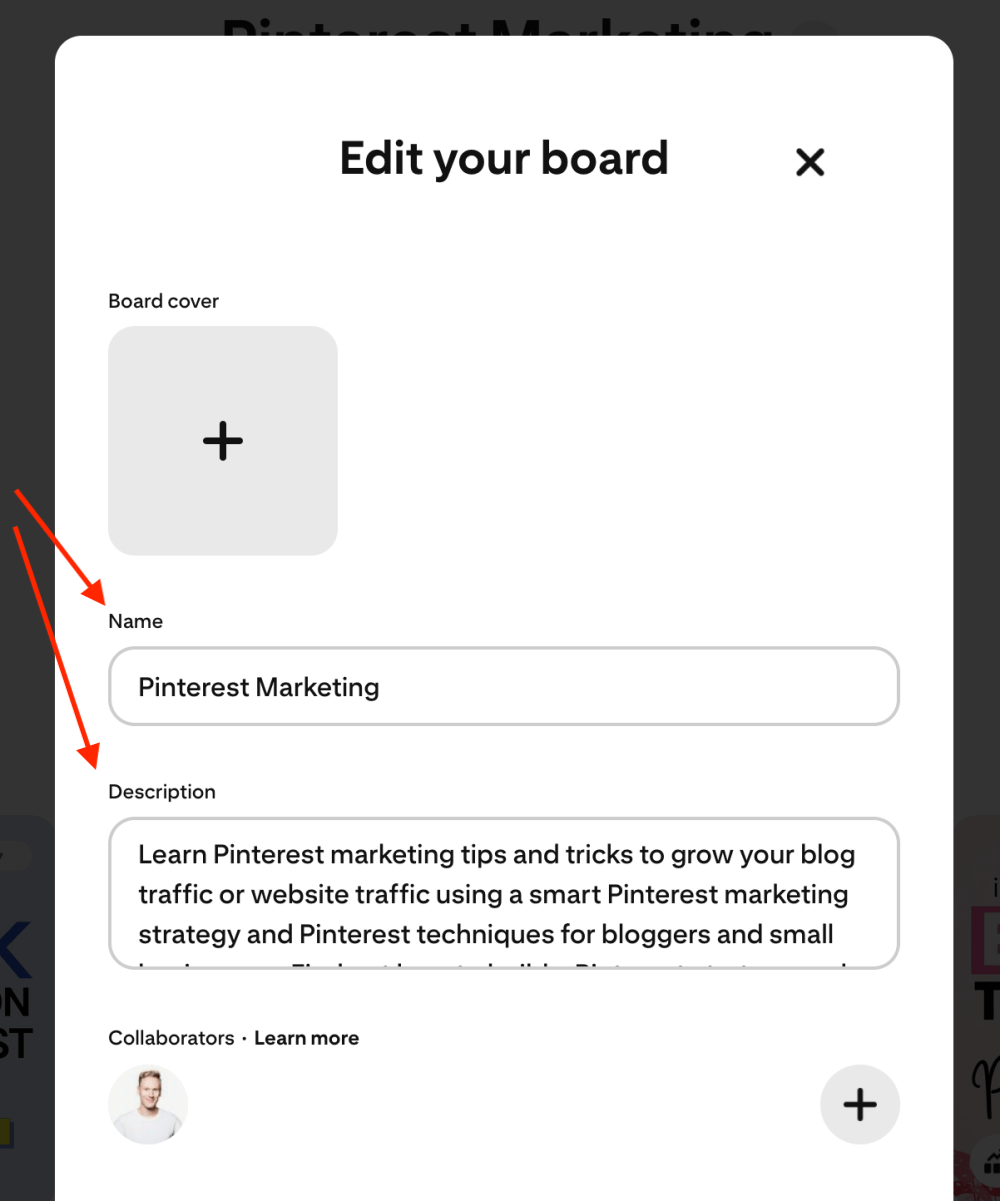
Pinterest marketing is an important topic on my blog. Therefore, I created this board to save the best tips, strategies, and guides for anyone interested in my proven strategies and hacks.
If you haven’t already, browse through my Pinterest marketing guides here.
In the board description, I explain what this board is about by using relevant keywords:
- Grow your blog traffic
- Pinterest marketing strategies
- How to build a Pinterest strategy etc.
All in all, your board title should be a keyword or keyphrase that users actually search with on Pinterest.
And your board description should be an explanation of how the pins on that board help users learn more about that specific topic.
Hence, your board title should be as clear as possible. Your board description is excellent real estate to give your target audience a better idea of what they will find.
Don’t overthink it. Keep it simple.
For a more thorough guide, check out my article on how to optimize your Pinterest boards.
Step 8: Add at least 30 pins to every board
Last but not least, let’s see how you can start saving content to your Pinterest boards.
Remember: each board should focus on a very specific topic that you cover on your blog.
Thus, you don’t want to create a board called “California Travel Tips” and pin your travel articles for New York City to that board.
Instead, you could pin these California travel tips to the same board:
- California road trips
- Things to do in Los Angeles
- San Francisco restaurant tips
- California travel tips for families
- Napa Valley wineries etc.
Think of each board as a labeled box. Every pin you save to that box belongs to that specific label. Don’t try to mix and match.
Now, when you create a new board, add at least 30 relevant pins to it right away.
You can save pins from other people or use your own if you already have that many.
However, I recommend using popular pins from other accounts.
Why?
Because the Pinterest algorithm knows exactly what those pins are about, and who are interested in them.
So when you save a pin like that to your board, you are giving the algorithm a strong signal about what your board is going to be about.
In the future, when you save your own pins to that board, the algorithm will distribute them to the right users who are likely to click through to your blog.
Now, head over to your profile and go through your boards.
If some of your boards are empty or only have a handful of pins on them, go ahead and find additional relevant content to save to them.
Double-check that each pin links to a legit website that’s truly helpful and valuable to your target audience. Never save spammy or low-quality pins to your boards. Also, never save pins with broken links.
For more tips, check out my post on what not to repin to your Pinterest boards to grow your reach faster.
Final thoughts: How to optimize your Pinterest profile to grow blog traffic faster
Phew, that was quite a long post! I hope you’re still with me, and that you found a few helpful tips for setting up your Pinterest profile properly.
If you are new to Pinterest marketing, I know things can quickly feel a tad overwhelming. There are so many details to pay attention to, and even the smallest things can make a big difference in your blog traffic.
But remember this: it’s perfectly OK to take it slow. In fact, it’s better to build up your profile and momentum in baby steps on Pinterest.
Whatever work you put into creating the perfect Pinterest profile will pay off, trust me.
As long as you follow the tips we covered above, your traffic will grow.
And that, my fellow blogger, means more email subscribers and more blog income for you.
Now, what do you think? Where will you start?
If you haven’t created your Pinterest profile yet, you can simply follow the steps above to set up everything correctly.
If you already have an account set up, use the steps above as a checklist. Go through your profile and see if you can find anything to optimize and improve.
Remember to grab my FREE Pinterest marketing quick guide here:
Here are a few Pinterest marketing guides you may find helpful, too:
- Pinterest Marketing for Beginners: The Ultimate Guide
- 15+ Quick Pinterest Marketing Tasks You Can Do In 5 Minutes
- 8 Easy Steps to Prepare Your Blog for Pinterest Marketing Success
P.S. If you found this guide on how to optimize your Pinterest profile helpful, please share it with others, too! Thanks!