Do you feel like your Pinterest marketing strategy isn’t bringing the results you need?
Or are you new to Pinterest marketing and not sure where to start?
With 522 million monthly users, Pinterest is a blog traffic powerhouse with virtually endless opportunities to drive engaged visitors to your business website, blog, or online shop.
There’s a ton of Pinterest marketing information and guides available out there. If you are new to the platform, it can feel overwhelming to digest everything.
And if you’ve been using the platform for a while, your Pinterest marketing strategy could even be outdated.
But what if I told you I had a Pinterest marketing strategy blueprint you can use right now to double your blog traffic in the next few weeks and months?
When you start a blog or launch a website for your business, you want to start driving traffic to your content asap. Why? Because more traffic equals:
- More email subscribers
- More product sales
- More display ad income
In short: more traffic will generate more conversions for you.
Luckily, learning how to get website visitors and blog traffic from Pinterest isn’t rocket science.
I’ve been a Pinterest marketing enthusiast and Pinterest strategy expert since 2018. Throughout the years, I’ve grown my main Pinterest account to 40,000 followers and managed my clients’ accounts with one simple goal: to create an evergreen Pinterest marketing strategy that doesn’t need constant adjusting.
Today I’ll show you actionable Pinterest marketing strategy tips to grow your blog and attract massive traffic for free. My tips are evergreen, they work for any niche, and you can start implementing them right away.
Let’s go!
- How I doubled my blog traffic with this Pinterest strategy
- How is Pinterest different from other blog traffic tools?
- Before we start: This is what you need
- How to build a Pinterest marketing strategy to grow website traffic faster
- 1: Set up a Pinterest business account
- 2: Claim your business account website
- 3: Find the right Pinterest keywords
- 4: Use Pinterest keywords in the right places
- 5: Update your Pinterest profile
- 6: Set up your first Pinterest boards
- 7: Create images that generate clicks
- 8: Write benefit-driven pin descriptions
- 9: Pin your own content
- 10: Create multiple pins for your post
- 11: Share new posts on Pinterest right away
- 12: Save new pins to the most relevant board first
- 13: Pin to further, relevant boards sparingly
- 14: Boost your performance with Pinterest Analytics
- 15: Automate your pinning asap
- Final thoughts: How to create a surefire Pinterest strategy for blog traffic
Please note: This post contains affiliate links to products I use, trust, and recommend. If you choose to purchase a helpful product using these links, I may receive a small commission for referring you – at no extra cost to you. These funds help me keep this blog up and running.
How I doubled my blog traffic with this Pinterest strategy
Before we get started, I want to make sure you’ll stick around. Therefore, let me share my quick story about how I used Pinterest to grow my blog.
The Pinterest marketing techniques I teach are evergreen. They have worked for me for years, and they will work for you, too.
It all started in 2018. I had been blogging for about two years when I realized I could use Pinterest to grow my blog traffic.
My blog was getting around 500 daily visitors, but the traffic wasn’t growing fast enough.
My niche was very competitive. So although my content was top-notch, it was taking longer than usual to see organic traffic from Google.
That was until I discovered Pinterest and a little magic tool called Tailwind (which I’ll come back to later). No worries, whether you end up using Tailwind is entirely up to you.
Now, I was skeptical at first because I thought Pinterest is all about cupcake recipes, parenting tips, and home decor trends.
Turns out: I was wrong.
Once I figured out how to really use Pinterest the right way, I doubled my blog traffic in just six weeks:
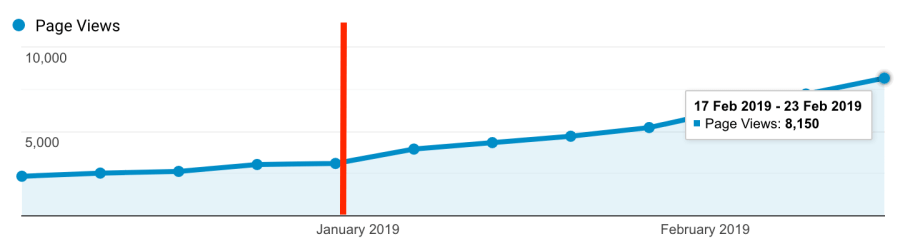
The more I kept using Pinterest as a marketing tool, the more my traffic grew.
Obviously, the results were just way too good to keep to myself — which is why you’re reading this now.
Hence, this article covers all the lessons I learned about how you can make Pinterest work for you. I’ll reveal 15 effective Pinterest traffic techniques you can use right now to leverage your blog traffic faster.

How is Pinterest different from other blog traffic tools?
So why should you use Pinterest over other website and blog traffic channels? Let’s take a look.
Are you using social media to grow your traffic? Perhaps you’re actively using some of these:
- Facebook groups
- TikTok
They’re all amazing tools for boosting your website traffic. You can grow your following and attract new readers to your content with them.
Social media platforms work instantly. When you post something, you’ll see visitors flock to your site immediately. It’s like instant gratification.
But the problem is: once that first wave passes, your traffic will decrease again.
Hence, social networks only generate short-term results.
To maintain that growth curve, you have to be active every day to compete over people’s attention on Facebook, Twitter, and Instagram, for example.
Pinterest is different. You won’t see results right away. But when you do, your traffic ramps up and the results are long-term.
With that said, you need a different marketing strategy for Pinterest than for social networks. If you try to use it like Instagram, you won’t get far. That’s why I created this guide for you.
To get started, let’s look at a few key characteristics of Pinterest as a marketing tool:
1: Pinterest is a search engine

Did you know that Pinterest isn’t a social media platform?
People don’t use Pinterest to chit-chat or comment on each others’ outfits or holiday photos.
Instead, people use Pinterest to find inspiration, information, and ideas. They actively search for interesting content.
Thus, Pinterest is a visual search engine.
Therefore, the most important thing you need to learn is to use keywords on Pinterest properly.
This is something most beginning bloggers don’t get. They think they need to spend time on the platform and inteact with others. And when they don’t see the results they’re looking for, they give up.
I don’t want you to be that blogger.
So, what this means for you:
To build a solid Pinterest marketing strategy, you need to use Pinterest like a search engine. We’ll come back to this in a bit.
2: Pinterest pins have a long lifespan
If you’re using Instagram or Twitter to grow your blog traffic, you know how important it is to post frequently. Your posts and tweets have a short lifespan, so you need to share new posts daily.
Your readers scroll through tons of fresh content every day. Most often, they don’t see posts older than a few days.
It never happens that an old post from six months ago takes off, right?
Again, Pinterest is different.
Every pin you share gets shared and re-shared for a long time. I’ve seen some of my best-performing pins from years ago still generate tons of traffic to my blogs.
For example, here’s a screenshot from my Pinterest Analytics where I see my top pins:
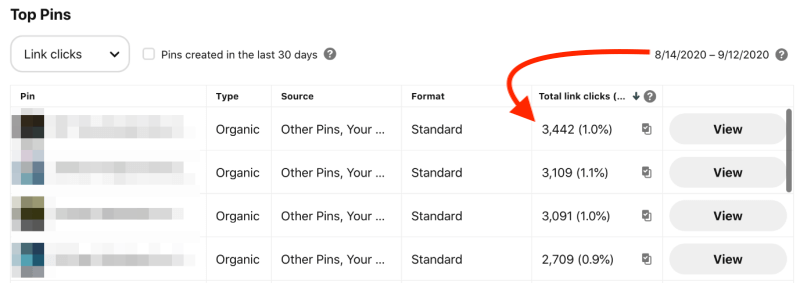
These are all pins I created months or even years ago. My most clicked pins are images I shared a while back and people still keep re-pinning and clicking them.
So, the good news is:
Once set up properly, your Pinterest marketing strategy will yield long-term results.
You’ll save heaps of time and money knowing your pins can generate traffic for years to come.
3: Pinterest traffic ramps up
Speaking of long lifespans, here’s another awesome benefit of pinning:
With the right Pinterest marketing strategy, you’ll see long-term results that ramp up.
Once you gain traction on Pinterest, you’ll see more and more blog traffic (with less effort invested).
That said, don’t feel impatient or doubt your pinning strategy if you don’t see big results right away.
If you stay consistent and follow my techniques in this guide, Pinterest will rewards you with great results.
Before we start: This is what you need
Before we start building your Pinterest strategy, be mindful of these three essential points:
- Make sure you’ve started a self-hosted blog or website. It’s the only way to turn your blog into a successful online business.
- Know your readers. Figure out exactly who your blog target audience is. This will help you find the same audience to target on Pinterest.
- Follow a clear pattern for writing the perfect blog post every time you publish new content. This will help you save a bunch of your valuable time.
With that out of the way, let’s start with your Pinterest blog traffic strategy!
How to build a Pinterest marketing strategy to grow website traffic faster
Here are 15 essential steps to build a powerful Pinterest marketing strategy for more blog and website traffic:
- Set up a Pinterest business account
- Claim your business account
- Find the right Pinterest keywords
- Use Pinterest keywords in the right places
- Update your Pinterest profile
- Set up your Pinterest boards
- Create images that generate clicks
- Write benefit-driven pin descriptions
- Pin your own content
- Create multiple pins for your post
- Share new posts on Pinterest right away
- Save to the most relevant board first
- Pin to other relevant boards at intervals
- Boost your performance with Pinterest Analytics
- Automate your pinning
Save this post for later!

1: Set up a Pinterest business account
If you haven’t already, you need to sign up for a Pinterest business account. It’s easy to create and 100% free to use.
With a business account, you’ll get access to Pinterest Analytics and Pinterest Ads. You’ll use the former to track your performance and find out what type of content resonates with your audience. The latter allows you to do Pinterest keyword research.
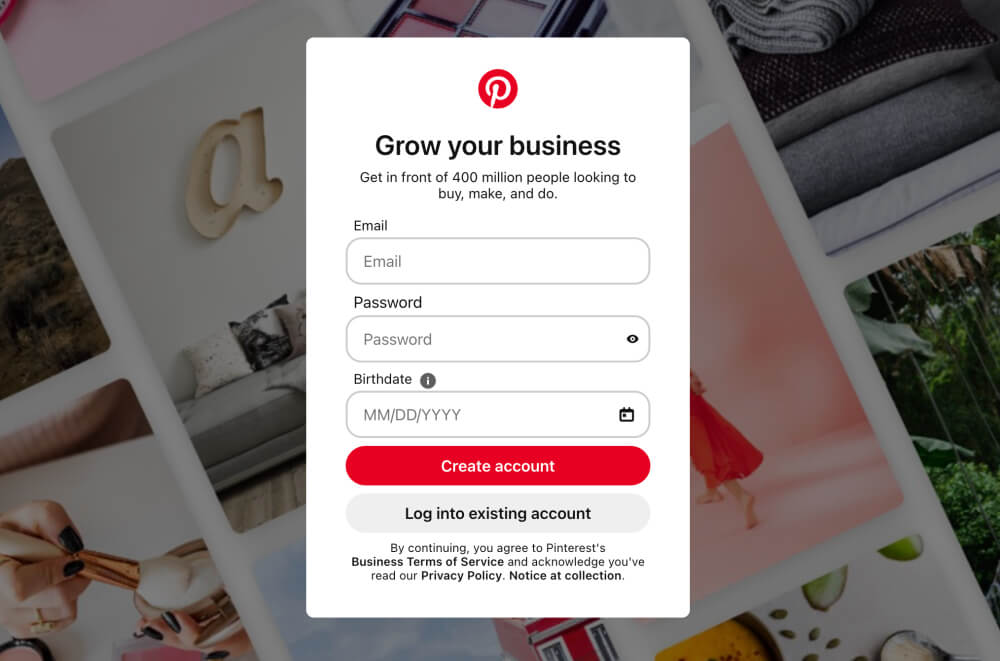
Click here to create your Pinterest business account.
Enter your email address, choose a password, and enter your birthdate. When you’re finished, click Create account:
Next, you’ll go through a few steps where you’ll give Pinterest some more details about your blog:
- Pick your language and country
- Add your business name
- Add the website link to your blog:
This is simply your blog’s URL, like bloggingexplorer.com. - Connect your other accounts to Pinterest:
This helps Pinterest attribute pins from your Instagram, Etsy, or YouTube account to you. - Set your advertising preference:
Pinterest wants to know whether you’d be interested in running ads on their platform at some point. - Choose a few topics of interest:
Select one or more topics that best describe your blog or business. - Install the Pinterest browser button:
Choose whether you’d like to add a Pinterest pinning button to your web browser. If you’re not sure, just skip this step. You can always install it later.
How to convert an existing Pinterest account into a business account
If you already have a personal Pinterest account, you can upgrade it to a business account.
Here are the four steps you need to take to convert a personal account into a business account:
- Log into your Pinterest account
- Head over to https://pinterest.com/business/convert/
- Fill out your blog name and website URL, then select a business type
- Finish by clicking Create account
Voilà!
2: Claim your business account website
Once you’ve created your Pinterest business account, it’s time to claim your website.
This is a way of verifying that you’re the owner of the blog website you entered into your profile in the previous step.
Claiming your Pinterest account will give you access to even more useful tools on Pinterest.
For all the details, check out my free guide on how to claim your website on Pinterest in 5 minutes.
Here’s a quick tutorial for you:
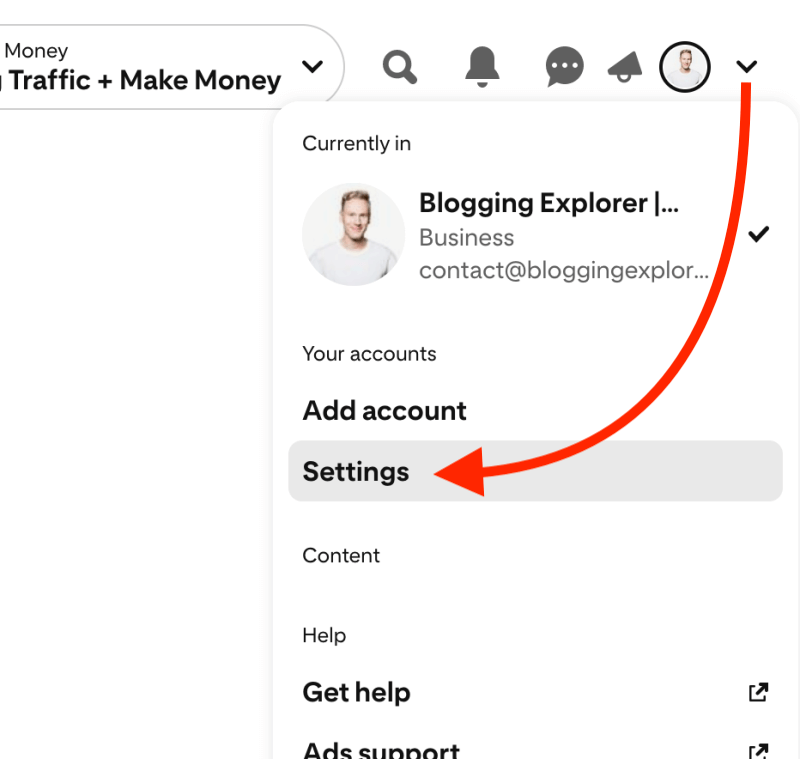
Step 1: Open your Pinterest account settings
To claim your website, head over to your account Settings. You’ll find them in the menu in the top right corner on Pinterest:
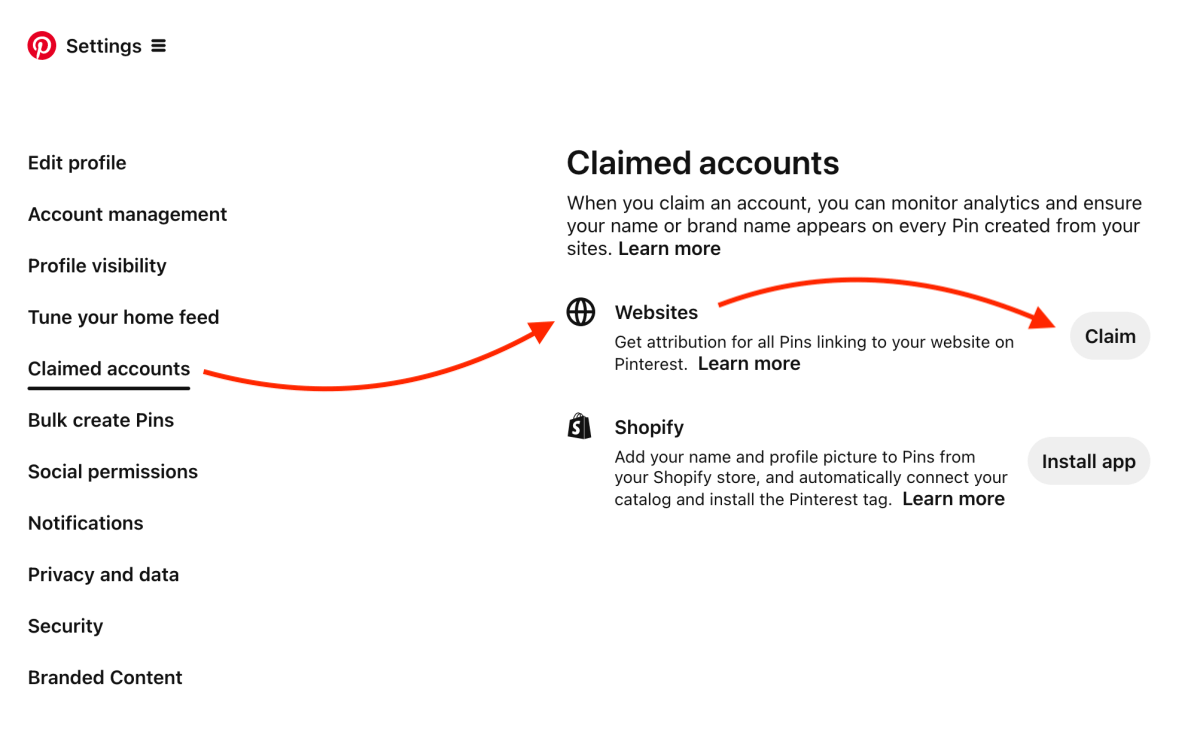
Step 2: Navigate to your Claimed accounts
Now, navigate to Claimed accounts > Websites > Claim:
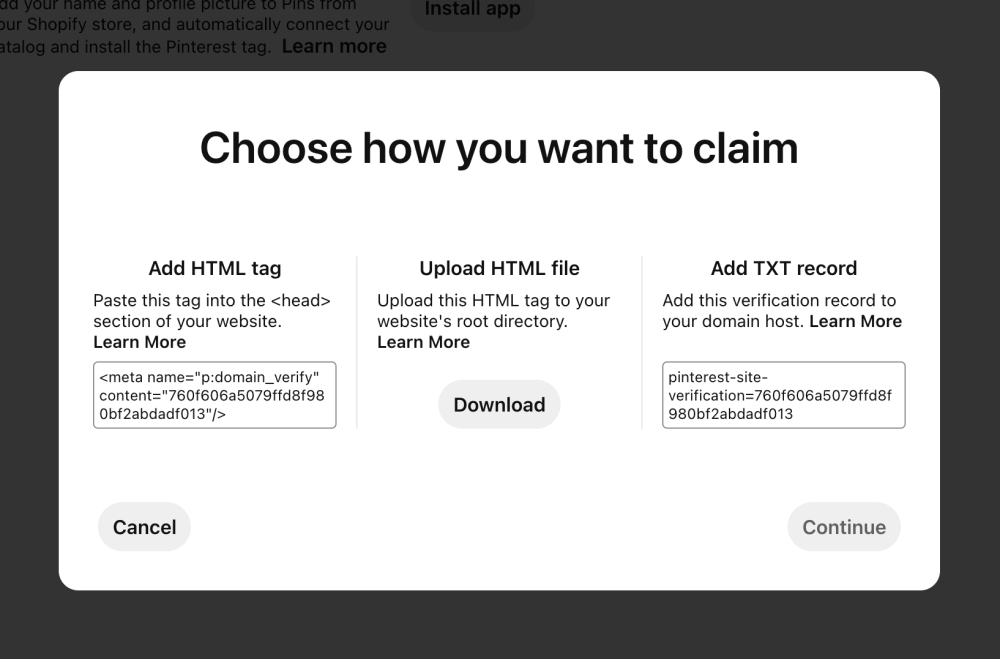
Step 3: Choose how you want to claim your website
You will now see a pop-up window with three different options for claiming your website:
- Add HTML tag
- Upload HTML file
- Add TXT record
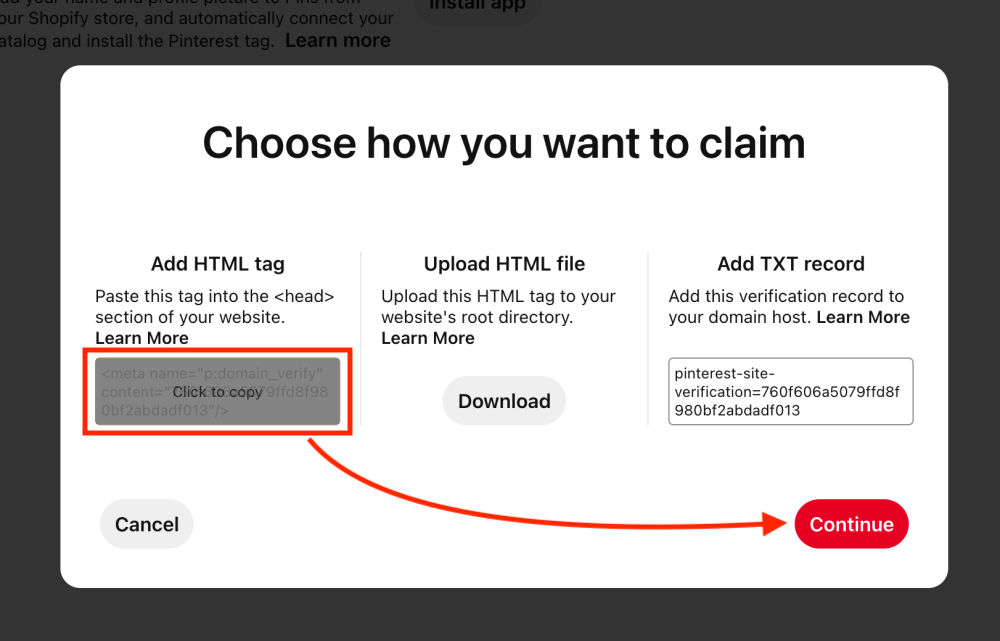
Step 4: Copy the HTML tag for claiming
We are going to copy the HTML tag from the left-hand side claiming method.
Hover your mouse over the text field and click on it to copy the meta tag, and then click on Continue at the bottom right:
Step 5: Paste your HTML tag into Yoast SEO
With your meta tag copied, open a new browser tab and head over to your WordPress dashboard.
Make sure you have installed and activated the free Yoast SEO plugin.
Navigate to Yoast SEO > Settings > General > Site connections, and paste your HTML tag or verification code into the field titled “Pinterest”:
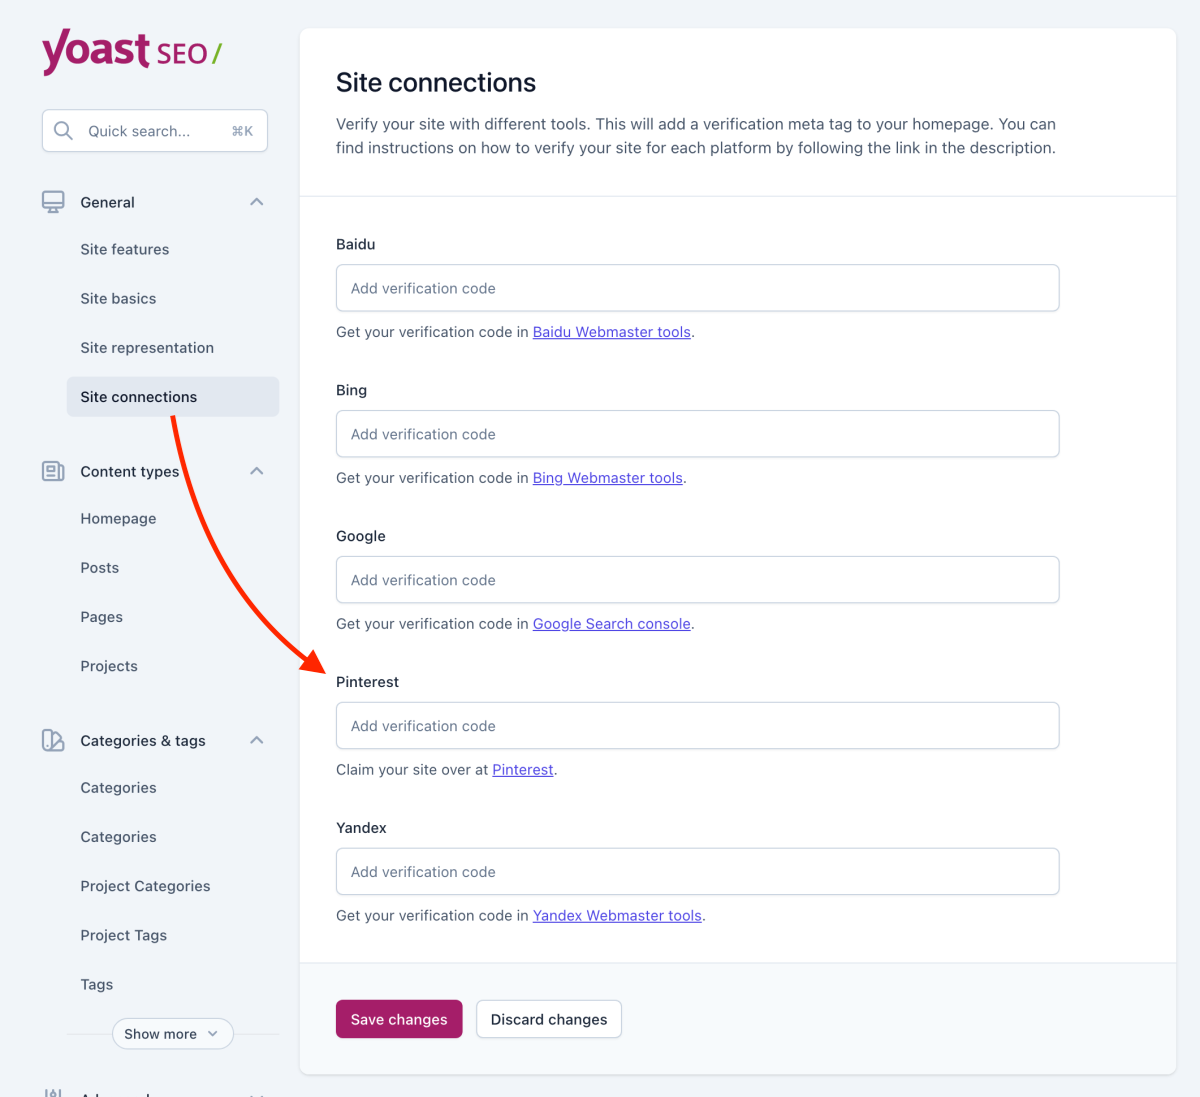
Finally, click Save changes.
Please note: After saving the changes you will only see the actual meta tag consisting of letters and numbers. This is normal, so don’t be alarmed that it’s looking different now than the code you pasted into the field.
Step 6: Verify your claimed website on Pinterest
Last but not least, head back to Pinterest. Type in your website URL or domain name into the verification field, and click Verify:
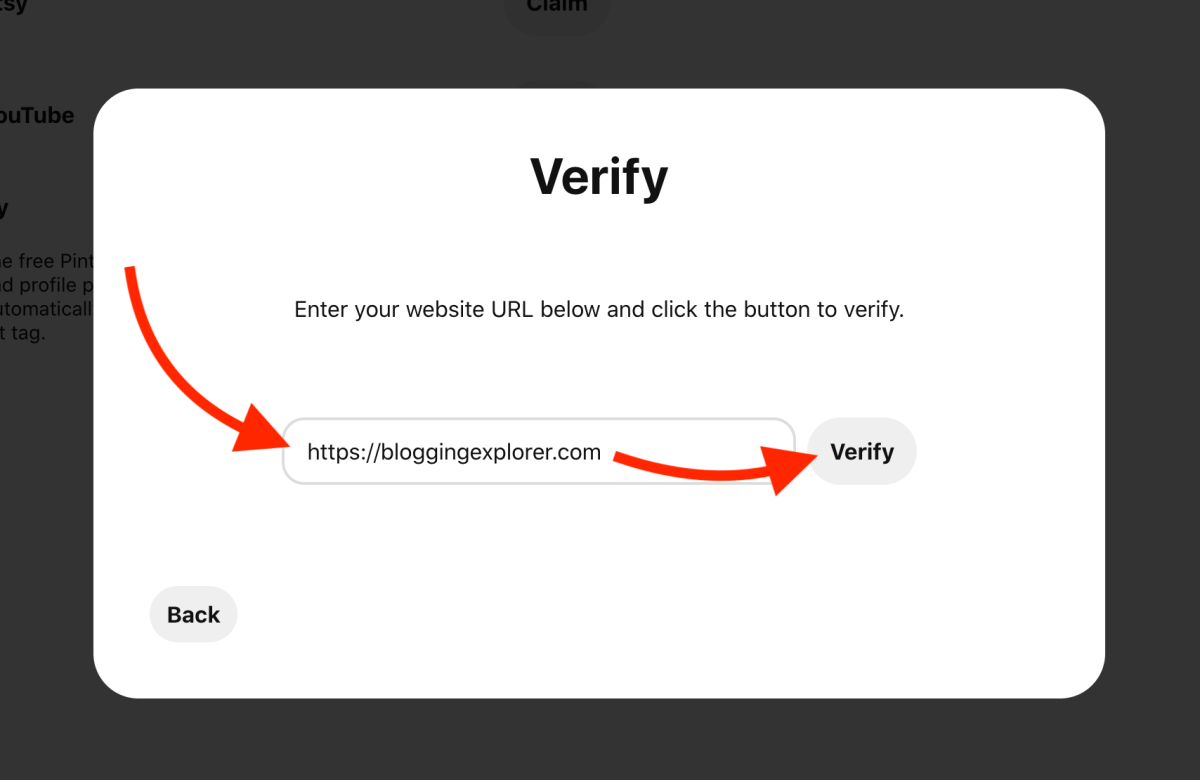
Pinterest will now check whether your HTML meta tag is working properly.
If everything’s working properly, you will see this confirmation message:
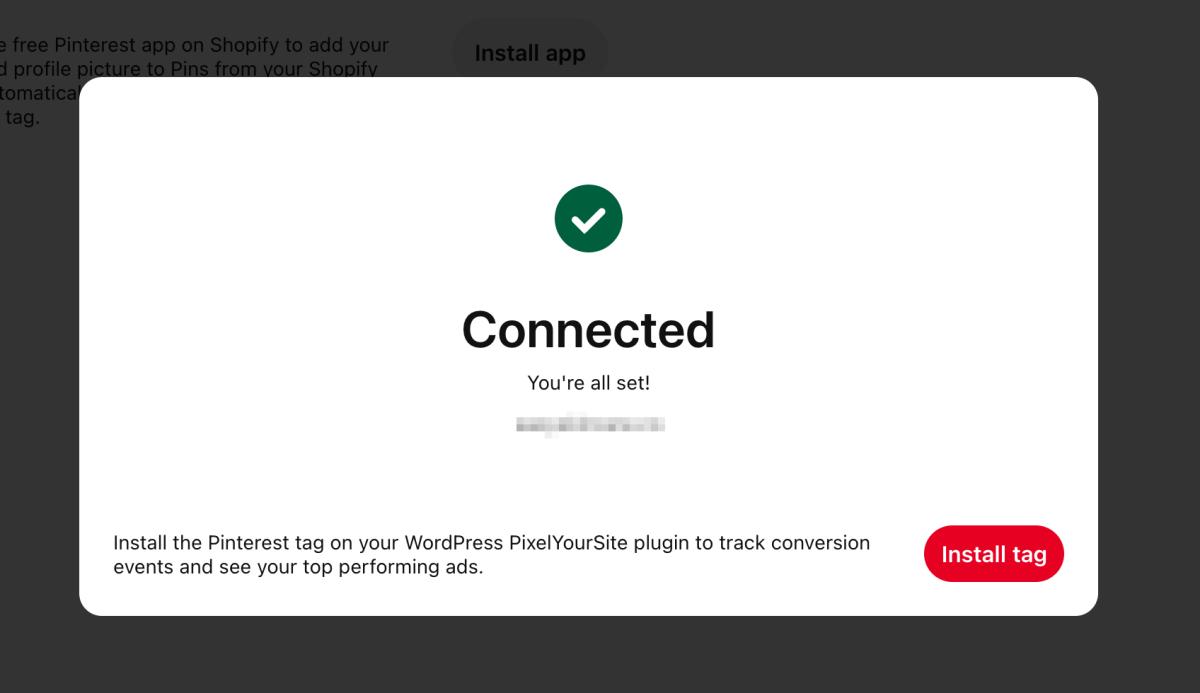
Also, you will receive an email confirmation from Pinterest saying that your website has now been claimed.
For a more thorough walkthrough, read my guide on how to claim your website on Pinterest.
3: Find the right Pinterest keywords
Before you do anything else, it’s time for Pinterest keyword research.
Remember: Pinterest is a search engine. People use search phrases and keywords to find interesting content on the platform.

When you start pinning content to your Pinterest boards, Pinterest draws conclusions about your interests. It starts expanding on what you’ve pinned so far, who created those pins, and how you found them.
And since Pinterest is a search engine, it only has one goal:
Pinterest wants to show you the best possible, most relevant search results for any search phrase or keyword you type into the search bar.
After all, better search results mean users stay happy. Happy users spend more time on the platform, which is the ultimate goal of any website out there, including Pinterest.
The Pinterest algorithm is constantly trying to find new, fresh content it thinks you might want to see.
When you start pinning, Pinterest will have to figure out which pins to show to you.
Look at your home feed, for example. It’s a collection of pins that Pinterest thinks you’d be interested in. For example, I use Pinterest for sharing content about Pinterest marketing, blogging, and online business ideas. Therefore, my home feed is filled with pins about these topics:
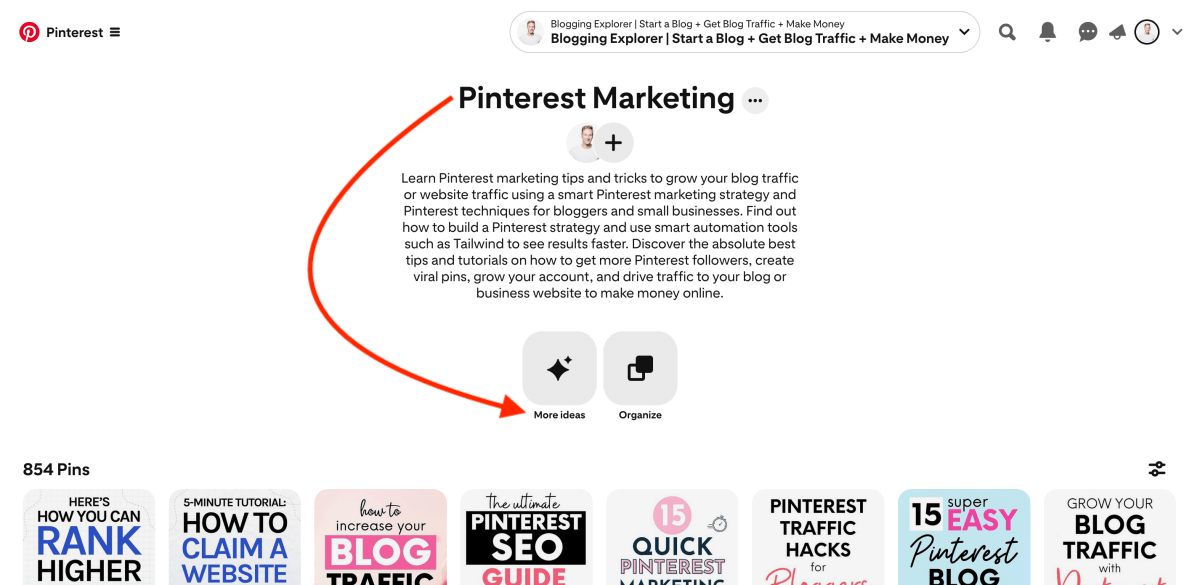
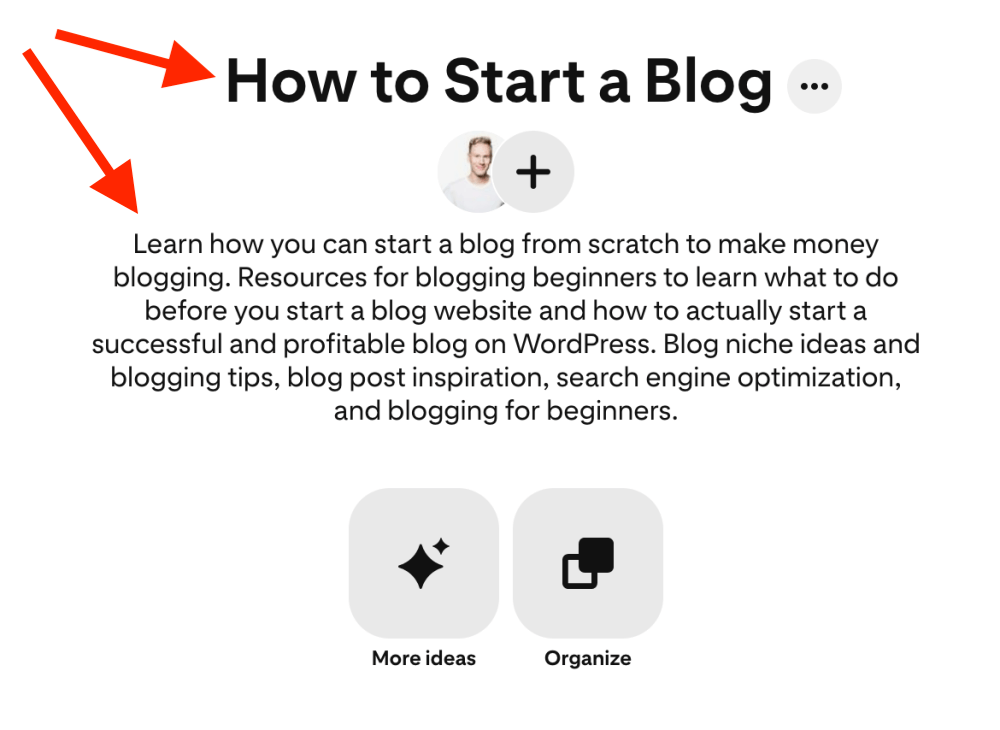
Also, for each Pinterest board on your profile, you can find related content under More ideas:
But what does this have to do with your Pinterest strategy?
Why are keywords so important on Pinterest?
When you publish a new pin, Pinterest needs to figure out a few things:
- Who should see this pin?
- When should it appear in a search?
- When should it appear in related pins?
Of course, we can’t know the finest specs on how the Pinterest algorithm works. But you should be mindful of what happens in the background when you share your blog posts on Pinterest.
You want to help Pinterest understand what your pin is about. And that’s where keywords step into the game.
Keywords are the only way Pinterest can figure out when and where to display your pins.
How to find the best Pinterest keywords?
The fastest way to find the best keywords is to use the search bar at the top of the page on Pinterest.
For example, let’s see what happens when we type in the keyword “Pinterest SEO”:
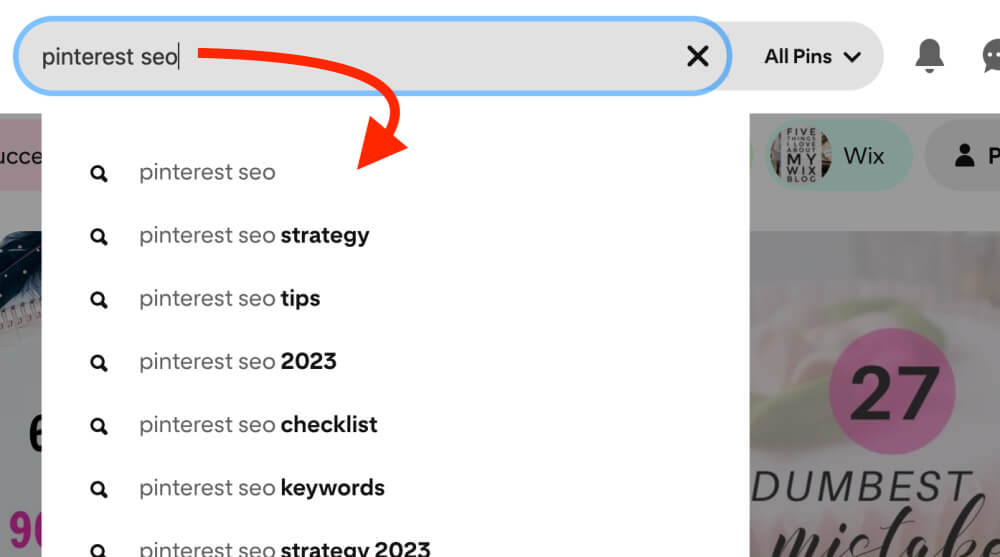
See how the tool suggests related, more specific keywords for this search?
These are valuable Pinterest keywords that help you find more targeted, long-tail search phrases people use on the platform.
All in all, Pinterest keyword research isn’t difficult. Write down your keywords and group them into sensible categories in Google Sheets, for example.
For more details and additional Pinterest keyword research tools, check out my full Pinterest keyword research guide.
4: Use Pinterest keywords in the right places
What are the best places to use Pinterest keywords?
Broadly speaking, you should use keywords pretty much everywhere on Pinterest.
But you must build a strategy for them. If you just start spamming all your keywords everywhere, your Pinterest strategy will be all over the place.
Learning how to use keywords on Pinterest is a crucial part of mastering Pinterest search engine optimization or SEO.
Here are a few smart places to use your keywords:
- Board titles and descriptions:
Keep your board titles short and simple, and focus on a single keyword or search phrase. Write a descriptive and engaging board description, using relevant keywords naturally. This helps Pinterest understand how the pins in a given board are related and fall under the same category. - Text overlays:
Pinterest can read text elements you place on your pin images. As a blogger, this is your best way to let your audience know what your pin and blog post are about. Adding text overlays to your pins is easy with free tools like Canva. - Pin titles and descriptions:
Use relevant keywords in your pin titles and descriptions. But don’t overdo it and stuff a dozen keywords into every description. Use the ones that are most likely to attract the readers who need to read your post. - Blog posts:
Pinterest looks at the website URL you link to from your pin. Make sure each blog post includes keywords related to the board you share it to.
Use your Pinterest keywords in a natural way. Don’t spam your pin descriptions with them. Nobody wants to read keyword-stuffed descriptions, right?
Also, be very specific about what your pins are about.
For instance, if you post a vegan chocolate cake recipe, don’t get sidetracked and talk about “kitchen” or “cooking”. Instead, only use closely related keywords you found in the previous step.
Again, you’ll learn all the details in my complete Pinterest keyword research guide.
5: Update your Pinterest profile
Now that you know what keywords you should use, it is time to update your Pinterest profile.
Setting up your profile helps users find you better when they do a quick search with keywords related to your blog niche.
Head over to Settings in the upper right corner menu on your Pinterest home screen:
In the settings, head over to Edit profile and update your profile name, account description, and username:
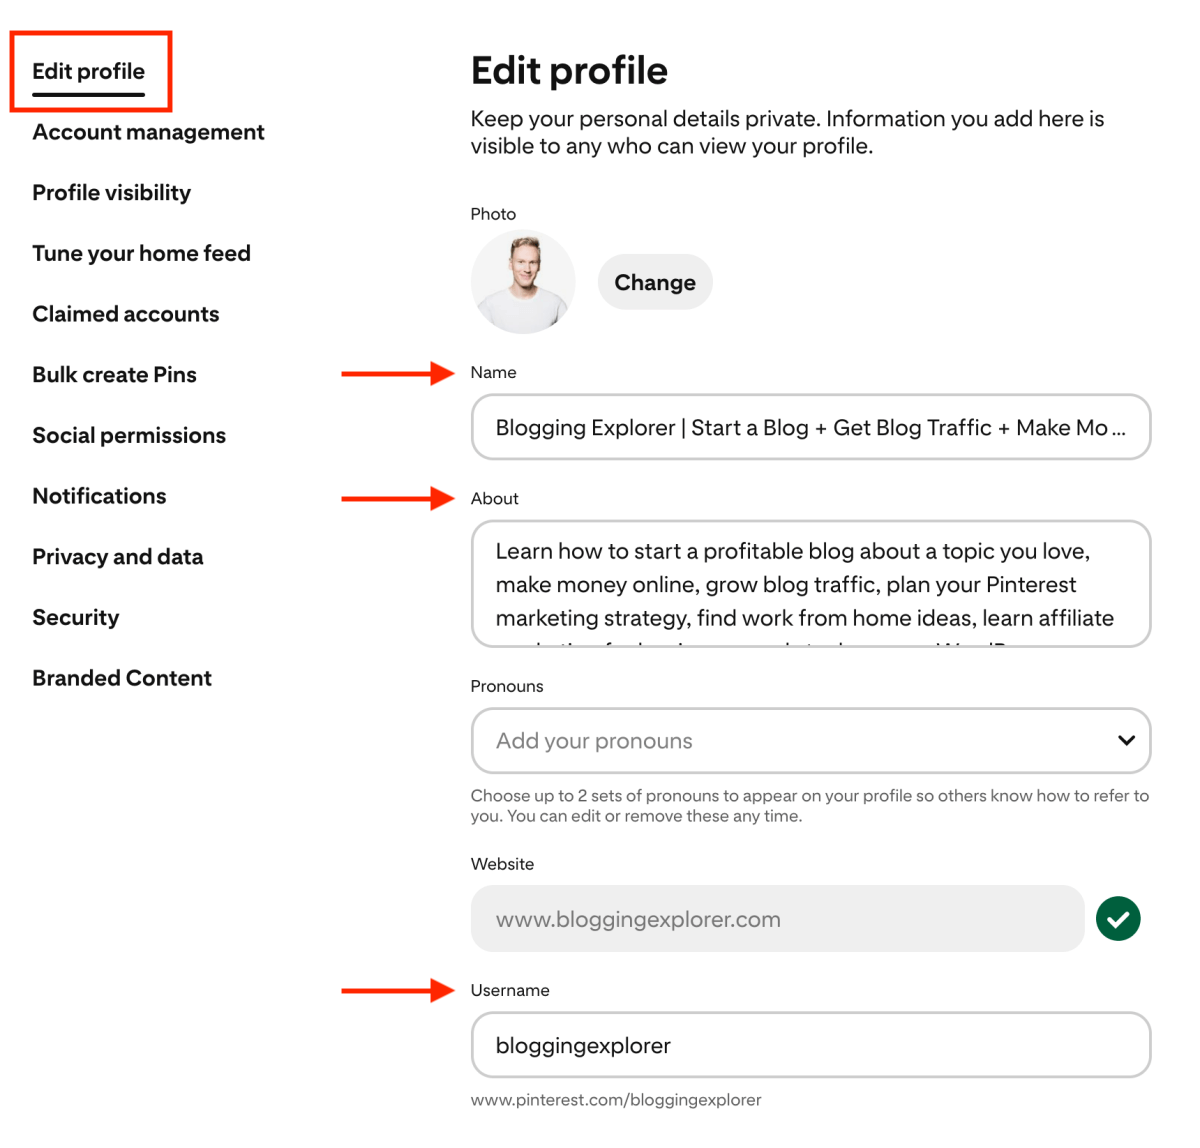
Use 1-2 keywords relevant to your niche in your profile name, and additional keywords in your About text. This can help a lot with SEO on Pinterest, which I’ll come back to later.
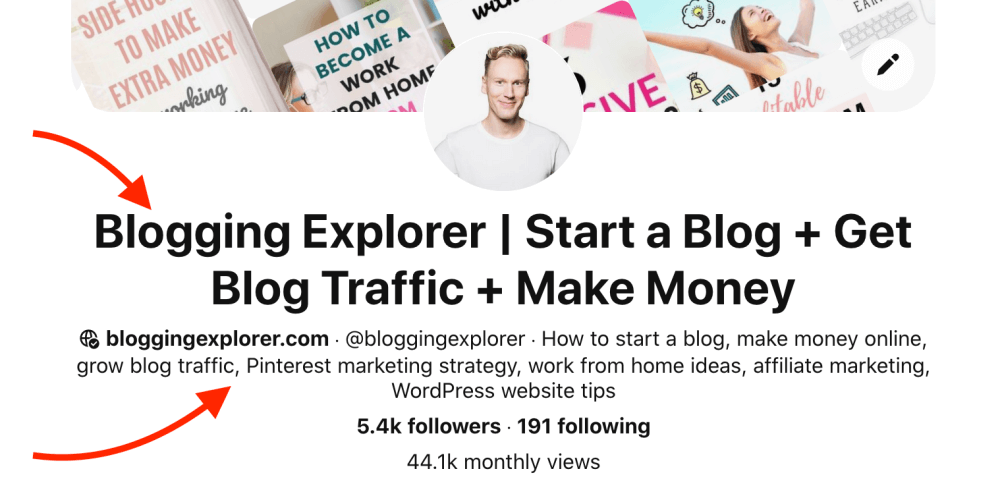
For example, I blog about:
- How to start a blog and blogging tips
- Blog traffic techniques and
- Monetization methods
Thus, my display name and description include keywords for each topic.
My username is “bloggingexplorer”, which aligns with my domain name and includes one of my most important keywords.
When you are done, remember to save your changes.
6: Set up your first Pinterest boards
Pinterest boards are collections of content that you save on Pinterest.
You will use boards to organize all the pins you save to your profile into logical categories.
To get started with your Pinterest marketing strategy, create at least 5 to 10 boards right now.
Here are a few questions to find ideas for your Pinterest boards:
- What’s your blog niche?
- What types of posts do you write?
- How do you help your readers with your articles?
- What is your target audience looking for on Pinterest?
You can always add more boards easily by opening the Saved tab on your profile. There, click on the plus icon and choose Board:

When naming your boards, you want to use relevant keywords in your niche. This is important for making sure people can find your pins.
Hence, you must use keywords for your board titles that your target audience is searching for.
For instance, let’s say you have a recipe blog. For your chocolate cake recipes, create a board titled “Chocolate Cake Recipes”. Simple as that.
Avoid creative board titles like “Let’s Bake It!” or “Sweet Temptations”. Nobody’s searching for that.
For all the details, check out my detailed Pinterest boards guide for growing your traffic faster.
7: Create images that generate clicks
Once you’ve set up your profile and boards, it’s time to start filling them with beautiful pin images.
But not just any pin images, nope.
I’m talking pins that actually generate traffic to your website.
Whether you want page views, email signups, or comments from people, getting them to click your pin is your primary goal here.
Everyone wants to create viral pins that generate thousands of clicks, right?
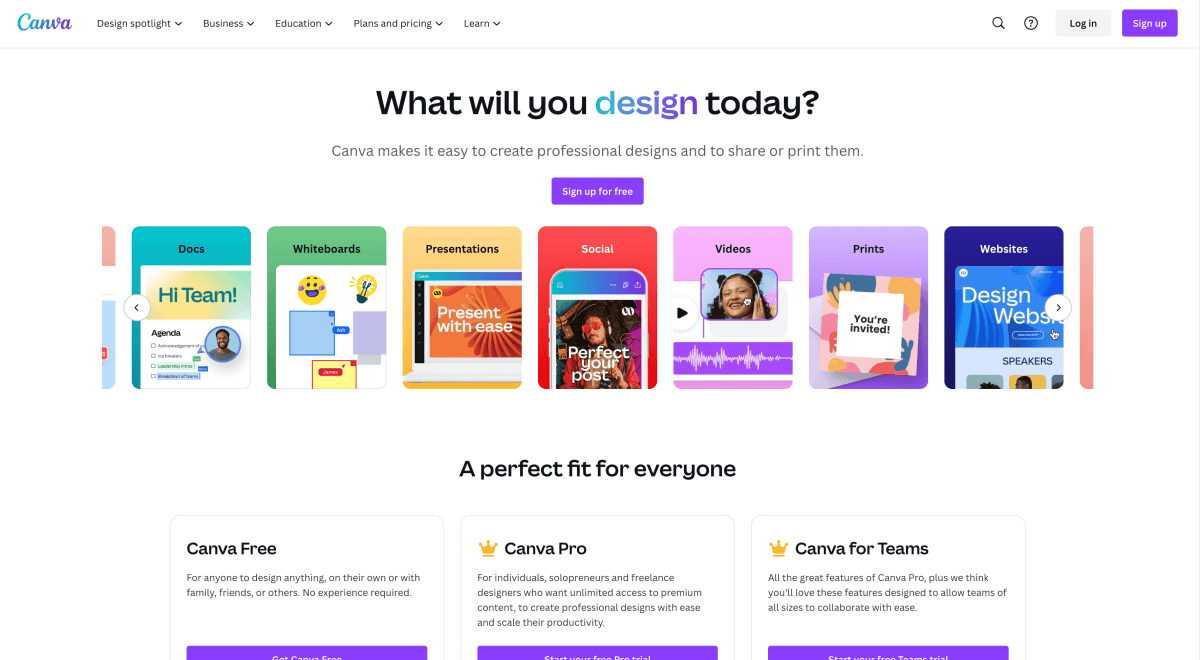
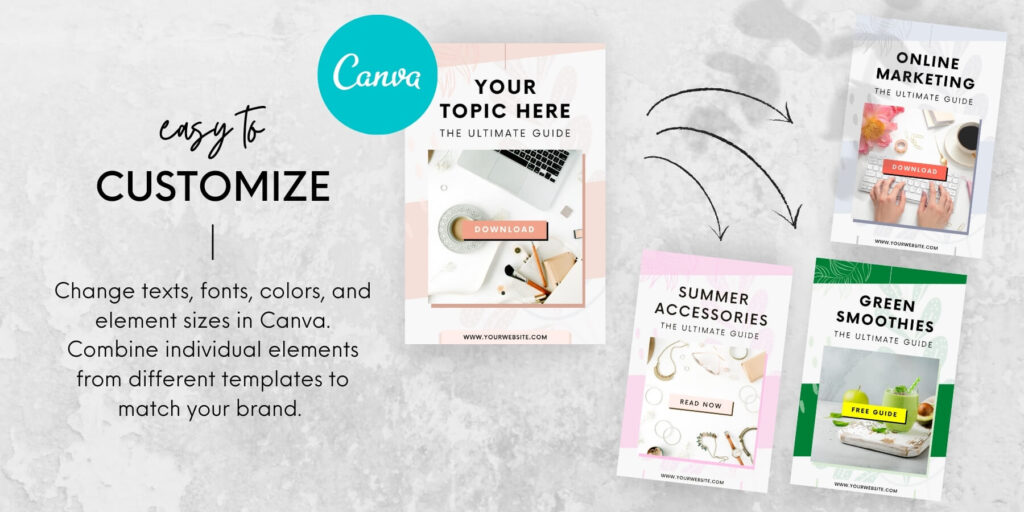
Even if you aren’t a designer, it is easy to create beautiful pins with free tools like Canva. I know a thing about two about graphic design, but I’m not a designer. Luckily, Canva has an intuitive interface and tons of free assets like icons and stock photos to spice up your pins.
But what about your pin design? What does the perfect pin image look like? How can you design pins that generate tons of clicks?
First, you need to think about your audience. Answer these questions:
- Who are they?
- How do they like spending their free time?
- What are they looking for on Pinterest?
- What questions and problems do they have?
- How can your content deliver answers and solutions to them?
Keep in mind that they might have a specific taste when it comes to images. Think about what colors they may like, whether they prefer light or dark images, etc.
Some of my most viral pins have been… well, rather meh.
For example, I use a lot of bright colors on dark backgrounds for my coding blog. It isn’t something I love, but it resonates well with my target audiene. Look at this pin, for example:
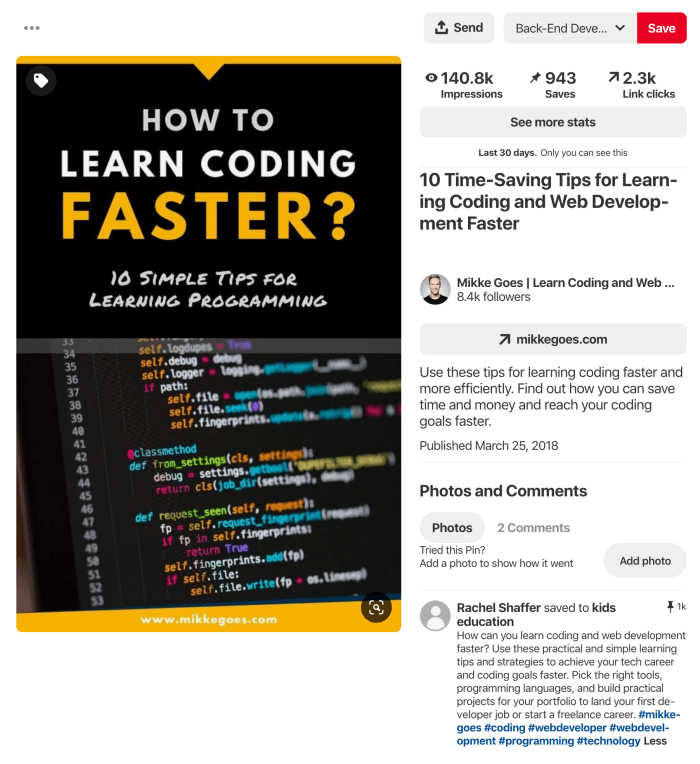
I’m not particularly proud of this design, but it did its job. It got me 2,300 clicks to a single blog post in one month.
Just imagine how my traffic numbers look when I have 30 to 50 pins like that flooding my blog with traffic.
So yes, Pinterest traffic definitely ramps up quickly once you get the ball rolling.
To create a viral Pinterest pin, you need to know what your blog target audience wants to see (and read) on Pinterest.
Here are a few super powerful tips for your next pin image:
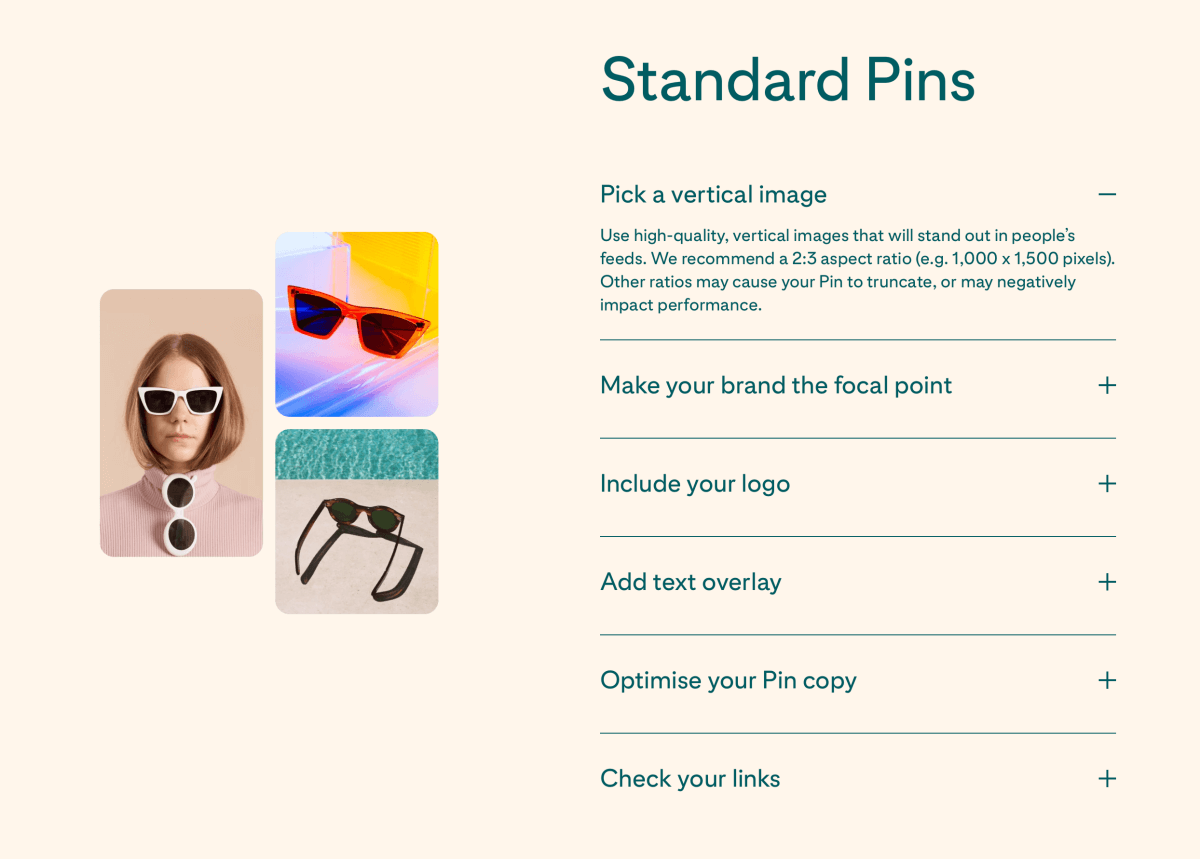
- Add a text overlay:
Tell your story and catch people’s attention with a benefit-driven text overlay. Why should they read your blog post? - Add a logo:
Place a branding element to give your pins a cohesive touch. Keep it subtle and put it in the middle, either top or bottom. - Use the right size:
Vertical images perform best on Pinterest. The recommended aspect ratio is 2:3, for example 1,000 x 1,500 pixels. - Use visually compelling images:
Start with free stock photos, for example. Check out Unsplash and Pexels for some great ideas.
For more details, make sure you check out these Pinterest creative best practices.
How to find ideas for your first pins
It’s a good idea to do a bit of research before investing your time in designing your pins. If something’s performing super well, why should you reinvent the wheel?
The best way to find some inspiration is to use Pinterest as your target audience does.
Just do a quick search with a relevant keyword and see what types of pins you find.
Can you notice any patterns in colors, fonts, or images?
However, by no means am I saying you should plagiarize and copy other users’ ideas on Pinterest.
But there’s nothing wrong with finding inspiration and new ideas in other people’s work.
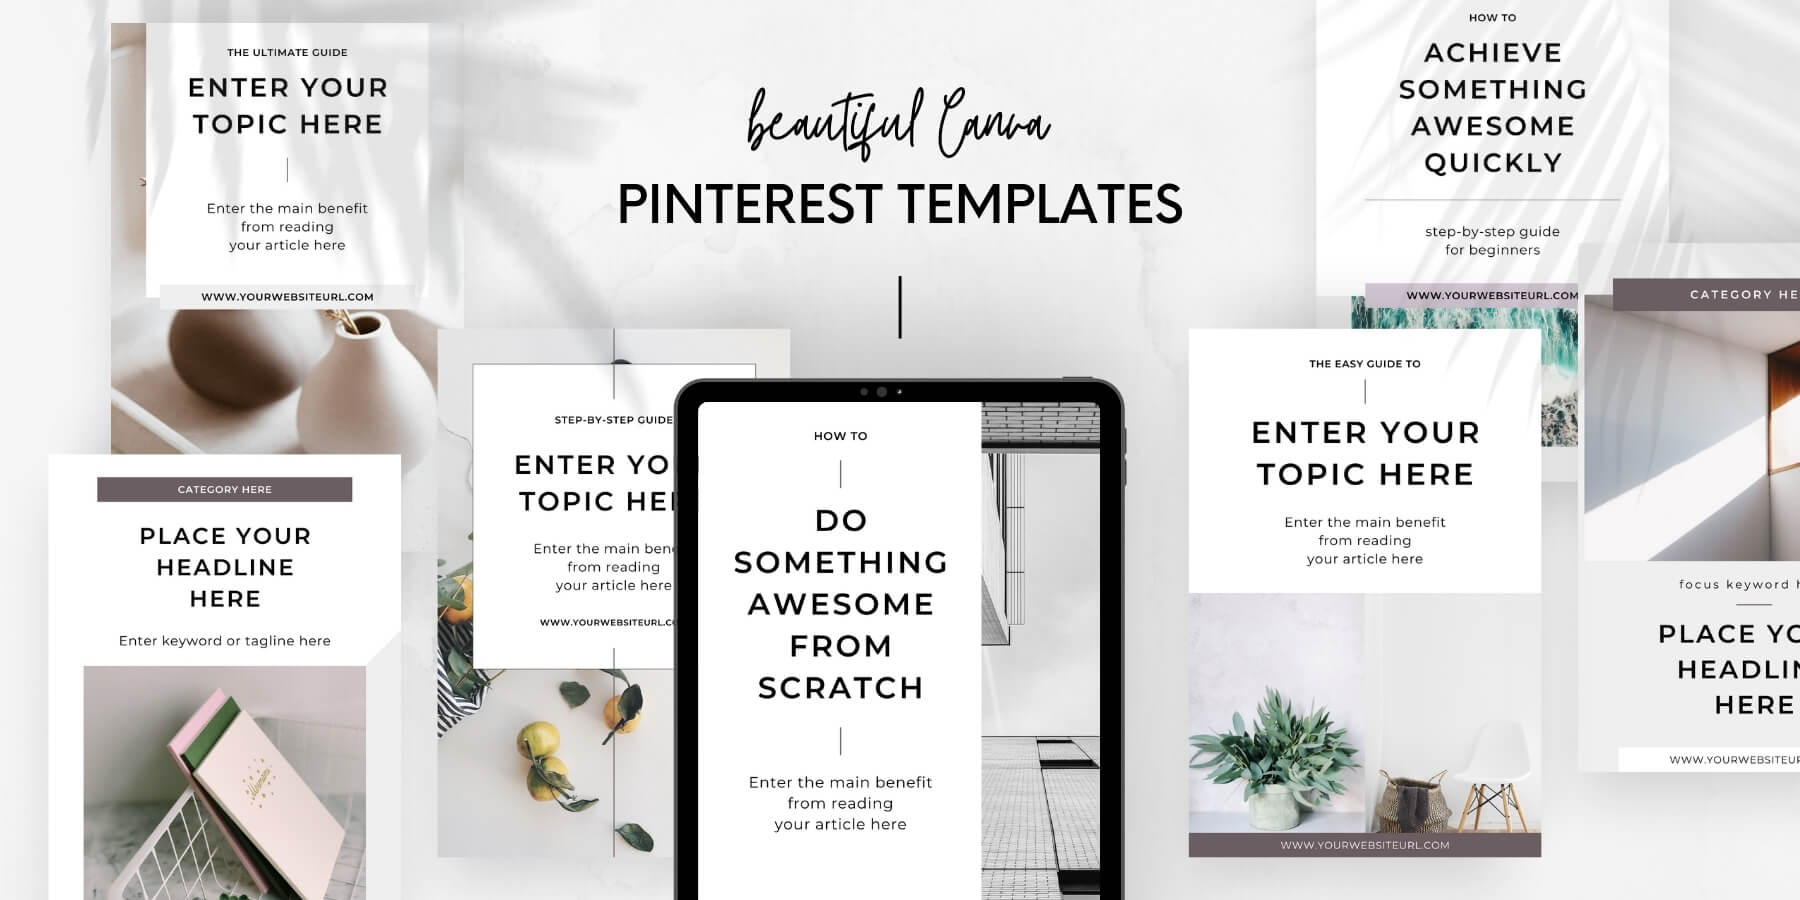
Need help? Use Pinterest templates to save heaps of time
I know it takes a lot of time to design beautiful Pinterest graphics that wow people and make them want to click. Not all of us have that kind of time.
Moreover, it’s sometimes difficult to come up with new ideas for creating click-worthy pins.
But there’s a shortcut:
To create dozens and hundreds of beautiful pin images quickly, you can grab my Viral Pinterest Templates bundle for Canva.
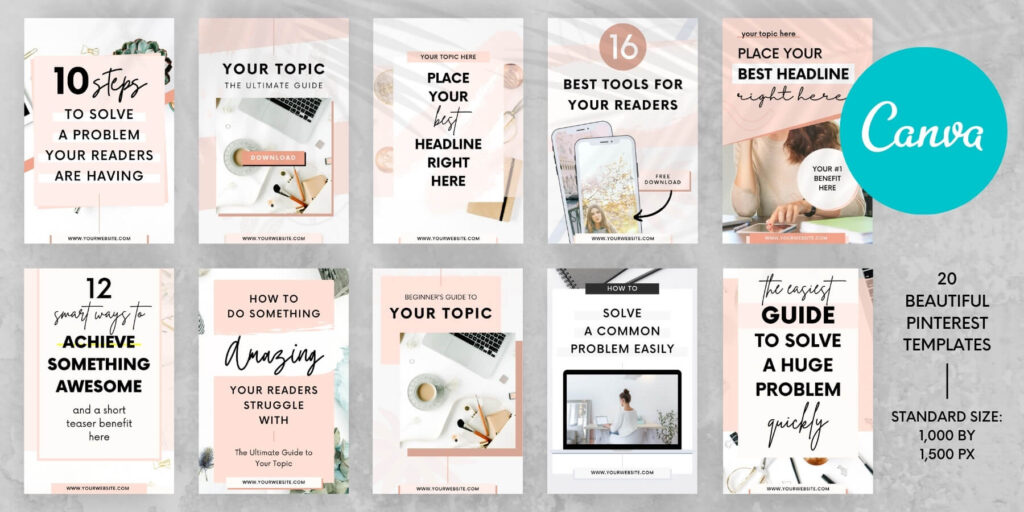
I created the package for busy bloggers like you and me who want a go-to selection of beautiful graphics we can customize easily.
These templates are a huge time saver because you can create an entire batch of stunning pins within minutes. And yes, they work with the free version of Canva, of course.
Grab your viral Pinterest templates here
8: Write benefit-driven pin descriptions
Once you’ve designed your pin image, it’s time to dive back into Pinterest SEO. Based on your keyword research earlier, it’s time to write a compelling pin description next.
Pin descriptions tell the Pinterest algorithm what your pin is about. With up to 500 characters, you have plenty of space to add relevant keywords here.
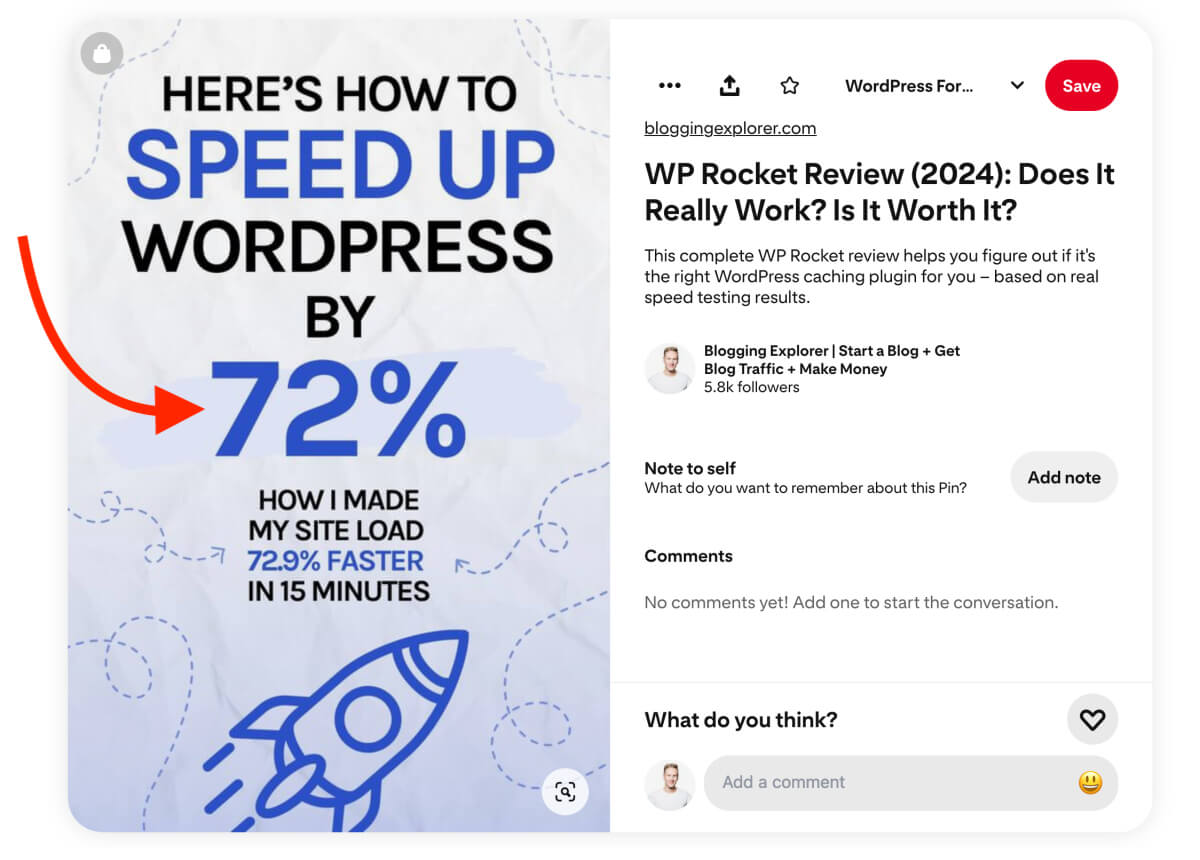
If you use clear, actionable wording and specific, proven numbers, facts, and outcomes in your pin text overlays and descriptions, you can expect great results.
For example, I recently created a thorough WP Rocket review where I share how my WordPress site loads 72.9% faster with the plugin. The results are pretty fantastic, which is why I feature this outcome prominently on one of my pins for that blog post:
To find the highest-converting actionable wording for your pin, think about what your audience wants to see:
- What are they really looking for?
- Why are they on Pinterest looking for answers?
- What are they struggling with?
- What questions are they asking?
In short, your audience has a pain point you need to figure out and solve.
Appeal to their feelings to attract their attention first. If they’re desperate to save time on something, use power words like quick, easy, simple, fast, smart, etc.
Also, include a solid call-to-action (CTA) in your pin description. If you can, write it at the top of your description to catch your followers’ attention right away.
All that matters is: your pin description needs to make people want to click it. Your pins are competing over their attention with tons of other pinners, so make yours stand out.
9: Pin your own content
When you start saving pins to your Pinterest boards, you’re probably asking:
Should I save other people’s pins to my boards, too? How often? How many?
The answer is: there really is no universal answer.
Your website is unique. Therefore, your Pinterest marketing strategy has to be unique, too.
There’s no golden ratio of pinning a certain number of other people’s pins to your boards.
When you create a new Pinterest board, it’s a good idea to save pins from other accounts to it. That way, you will help Pinterest understand what that board is about. In other words, other people’s pins add some context to new boards, helping them gain momentum faster.
For my new boards, I save between 20 to 40 beautiful, relevant pins from other people. I make sure that they link to a genuinely valuable, high-quality blog post or resource that my target audience will find helpful.
Moreover, I save pins from other accounts to any boards that have been inactive for a while.
But at the end of the day, you want to focus on creating and sharing as much of your own content as possible. Let’s see why:
Why you should pin your own content first
When you claim your website as we talked above, Pinterest knows it’s your website. And Pinterest loves active bloggers who publish and share fresh content consistently.
So, your first priority should be to write new posts and share them on Pinterest.
Now, that doesn’t mean you shouldn’t share relevant pins from other bloggers.
In fact, if you see content your audience would like, go ahead and share it. You’re not only helping yourself but also your readers and followers.
More importantly, when you start sharing other people’s content, you create connections on the platform.
If you are not creating enough content, you should share other bloggers’ content. Pinterest just wants to see that you are active and consistent.
But what if you don’t write new blog posts too often? How can you keep sharing enough of your own content on Pinterest?
Let’s take a look…
10: Create multiple pins for your post
If you can’t write a new blog post every day or every week, it’s perfectly OK to create new, fresh pins for your old posts.
Especially if you have a lot of evergreen content, you can easily drive traffic to your articles by designing and publishing new pins for them.
How many pins should you create for each post?
So, how many pins should you create for a single blog post?
There’s no straightforward answer to this, really. You need to experiment what works best for you.
I usually create 2 to 3 pin designs for each article I publish. This allows me to see what types of designs perform better for a given topic.
If a specific design takes off, I create 1-2 similar pins about a month later. And if they take off again, I just rinse and repeat.
You don’t need to create a dozen pins for every blog post you publish.
Just start with 2-3 pins to do some testing and see what resonates the best with your audience. When you see what people like, give them more by creating fresh pins that are similar.
Tip: To find out which pins perform the best for you, you should track them in your Pinterest Analytics. We’ll come back to this in a minute.
Which posts should you pin often?
I monitor my Pinterest traffic through Google Analytics every week. If you’re not doing this, you’re missing out on great traffic potential.
Here’s what I do:
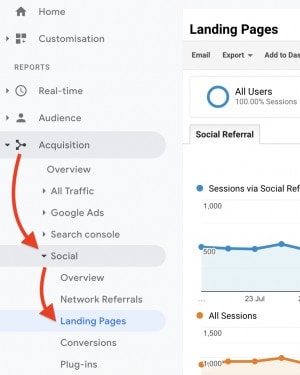
I start by looking at my top-performing posts in terms of Pinterest traffic.
You’ll find these number in Google Analytics under Acquisition > Social > Landing Pages:
There, add a secondary dimension to the interface under More Dimensions > Social > Social Networks.
Now you’ll see all your top-performing articles sorted by the traffic volume via social networks:
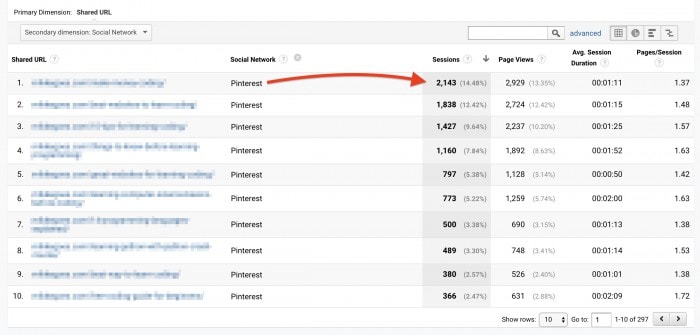
Most of my social traffic obviously comes from Pinterest. If you have a lot of traffic from other networks like Facebook or Twitter, you’ll see them listed here, too.
Clicking on each article URL in this report opens the traffic graph and details for that post and the selected social network.
These top-performing Pinterest posts are where the money is. Therefore, I spend most of my pinning time to boost (and re-boost) these articles.
When to create new pins for an old post?
Whenever I see a downward trend in a blog post, I simply create a couple of new pins for it.
When I start pinning them, starting with the most relevant boards, I usually see my traffic increase in a couple of days.
The bottom line is: you must analyze which pins perform best.
Head over to your Pinterest Analytics to see which pins get the most clicks and saves.
Then, find out why they’re taking off so well! Is it the pretty image, the catchy title, or the color combination?
How different should your new pin be?
Luckily, it’s not difficult to come up with an entirely new pin for your old post. Don’t just take an old pin and change a minor element in it and think that’s a new pin.
Because here’s the deal:
Pinterest wants to see fresh content. Would you consider it fresh if you just switch a few words or a background image?
Think about what your audience wants to see? Would they be happy to click on your new pin if they’ve seen it already? I doubt it.
So, make a habit of creating genuinely fresh pins for your old content.
The most important thing is to come up with a new pin description for every new pin you post.
Again, include your top-performing, most relevant keywords to help Pinterest show your pin to the right audience.
How to use this tip to save heaps of time?
All in all, creating a new pin for an old post can boost your blog traffic way more than you expect.
The best part?
Instead of writing a new blog post, you’ll save tons of time just by creating new pins. Use your time to build top-performing pins for your top posts.
Just think about what makes sense to you. If you need more traffic, what’s easier for you: writing a new blog post or creating a new pin?
My schedule gets pretty crazy, so I like to keep a go-to collection of simple, beautiful Pinterest templates in Canva. Whenever I need to create a batch of new pins, I can quickly customize the templates for a specific blog post and share them on Pinterest within minutes.
11: Share new posts on Pinterest right away
Raise your hand if you want your blog posts to take off asap after publishing them!
There’s no sweeter gratification than seeing your blog articles get traffic right after hitting the publish button, right?
So, here’s the good news:
You can use Pinterest to drive traffic to your new blog post almost instantly.
Before you publish a new blog post, create 1-2 pin images and embed them into your article.
Also, make sure you add social sharing buttons to your posts. This will make them much easier for your readers to save to their Pinterest boards.
I use the Social Warfare plugin for adding social sharing buttons for my blog websites. The plugin is super easy to set up and use, plus the free version is perfectly OK.
And while we’re at it, why not pin or share or pin this post right away *cough*?
Now, when you finally publish your article, share it to Pinterest right away! Let’s see how:
12: Save new pins to the most relevant board first
This very first time you save your pin to Pinterest is the most crucial one. It’s going to set the tone for your pin and your blog post for a long time.
Pinterest will use the information from your pin, blog post, and URL to understand what your blog post is about. Also, the algorithm will decide how to distribute your pin based on the first board you share your article to.
So what should you do exactly?
Let’s keep this simple. Ask yourself:
- Which board has the best title and description relevant to this piece of content?
- What other content is related to this new pin?
I’ve seen the best results when I’ve found a “pool” of related pins in a relevant board. That’s where I pin the new piece of content first.
But what if you don’t have a board that’s a good fit?
Create a new one! Chances are you’ll create more content related to that topic in the future.
When you’ve found a board and published your pin, that is just the beginning. If you have dozens of boards, it’s easy to find multiple relevant boards for the same pin.
Here’s what you should do next:
13: Pin to further, relevant boards sparingly
When I started using Pinterest a good while ago, it was easy to generate more clicks to my pins simply by re-pinning them to another, relevant board.
Hence, I could design a pin and post it to 10 boards at intervals to generate more impressions and clicks.
However, with recent algorithm changes, re-pinning the same pin isn’t a good idea anymore.
The algorithm now favors new, fresh pin images over ones you’ve already published. That said, you don’t want to spam the same pin to multiple boards anymore.
It’s perfectly OK to publish less pins as a whole as long as your pins haven’t been share on the platform before.
Anything new and fresh will make the algorithm happy — simple as that.
So when is it OK to re-pin old pins then?
I’d be very careful with re-pinning these days. Sure, it’s fine to re-pin your best-performing pins from a few weeks or months ago to another, relevant board. Or if you have seasonal content, you could re-pin a few of your top pins from last year.
Just remember that you’re always better off if you take a few minutes to create a new pin image for that popular post from last year instead of re-pinning something people have already seen.
Perhaps adjust your pin design slightly? Or switch up the wording in your text overlay? Little adjustments are easy and quick to do, and you’ll have a new, fresh pin image on your hands in no-time.
To save time, I handle my re-pins with Tailwind. It’s a nifty little automation tool for scheduling your pins that you want to share to multiple boards.
The best part? The Tailwind pin scheduling tool comes with a built-in interval tool to automate everything for you. Plus, they offer a forever free plan, so you can give it a try with zero risk.
When you share a new pin with Tailwind, you can select the boards you want to pin to.
Then, click the Interval button to set a pinning schedule with some space in between your pins:

14: Boost your performance with Pinterest Analytics
If you really want your Pinterest strategy to take off, you must use Pinterest Analytics.
I know not all bloggers do this, so it’s a huge opportunity to get ahead of your competition.
Here’s what you should do:
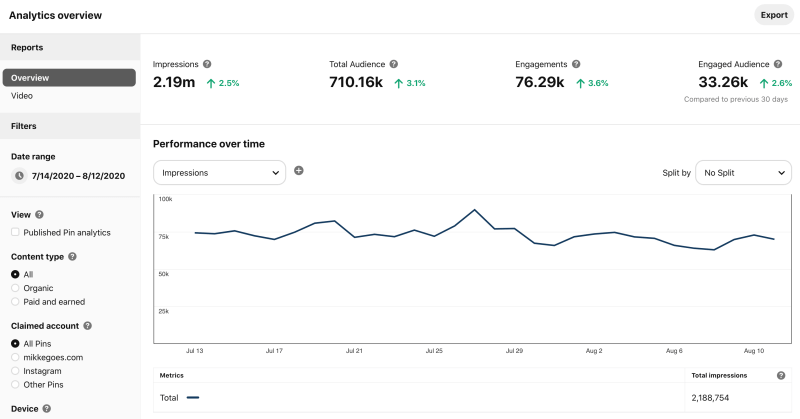
Head over to your Pinterest Analytics. You’ll find it in your top-left Pinterest navigation under Analytics > Overview:

You’ll find a ton of valuable information here. And although the interface may feel overwhelming at first, don’t worry. Take your time and get to know your way around it step-by-step.
The best way to figure it out is to start clicking around to see how everything works. After a while, you’ll feel more comfortable with the tools you find.
Start by looking at the following insights:
- Which pins to your blog people are clicking on?
Your pin clicks are the best indication of your best-performing pins! - Which pins to other blogs are people clicking on?
When you pin other people’s content, you can track the clicks to those blogs, too. Check out which pins from other blogs get the most clicks.
Draw conclusions of top-performing pins and use them when you brainstorm ideas for new blog posts or new pins.
15: Automate your pinning asap
If you’re new to blogging and Pinterest, you’re wearing a bunch of different hats right now. You brainstorm blog post ideas, write your articles, share them on social media, work on your SEO, and manage your email marketing all at the same time.
Now, wouldn’t you love to hand off at least some of the work? Especially if it’s something a machine can do?
How much time you spend on Pinterest
For example, let’s say you want to pin about 10 to 20 times a day. For this, you’d want to have about 5 to 10 pins of your own to share, right?
If you’re serious about your Pinterest strategy, you want to pin consistently like we discussed earlier.
Thus, you’d be pinning up to 7,300 pins in one year.
Now, assuming you’ll need a minimum of 30 seconds to find and post each pin, you’d spend over 60 hours every year just pinning to your boards.
And we’re didn’t even consider the time you’ll need to create your pin images!
Prioritize your time to tasks that matter
You want to use your time as blogger for stuff that makes a difference. Your daily tasks should contribute to growing your content pool, traffic, and income.
That said, filling your Pinterest boards with new pins is something you can easily automate right now. This will allow you to use your time more wisely.
Schedule your pins on autopilot to save time
If you want to skyrocket your blog traffic using Pinterest, you don’t want to add hours to your day. (Not that it would be possible anyway.)
Instead, you want to use a scheduler tool that automatically finds the best time to pin your content and does it even while you’re sleeping.
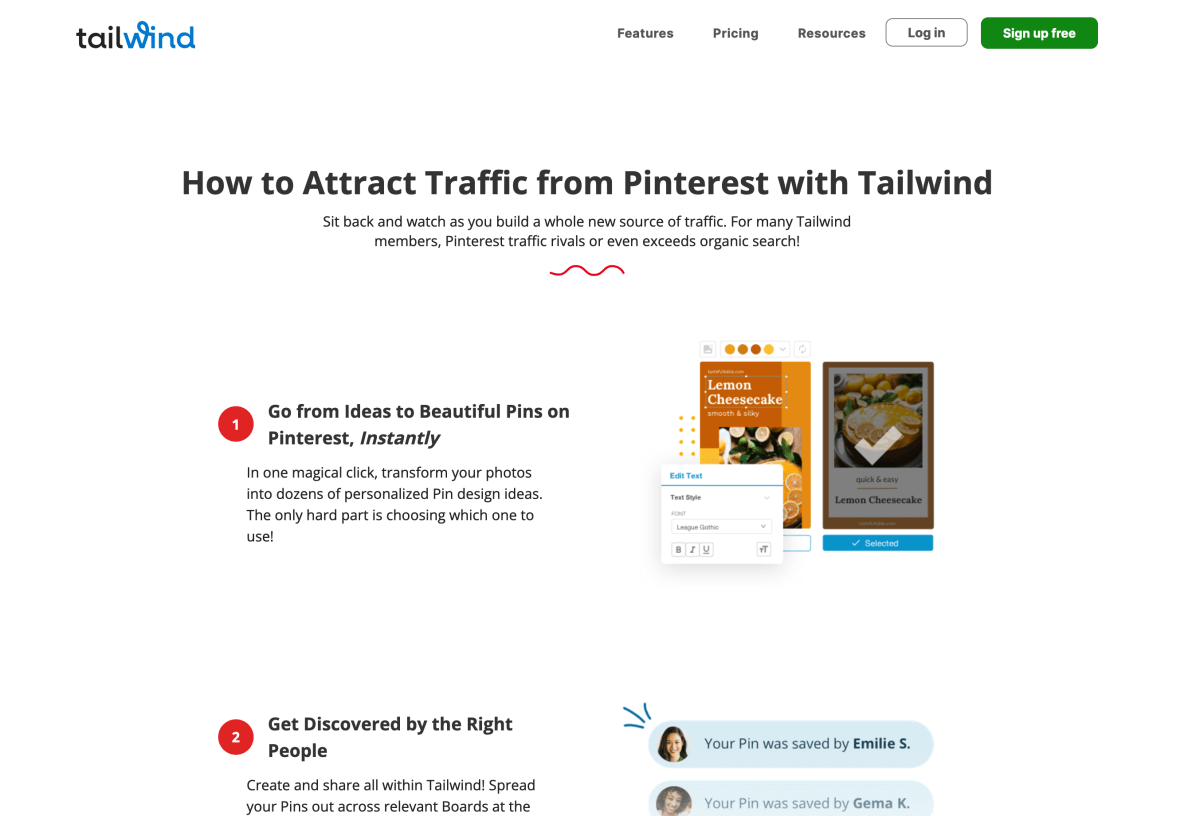
What’s the best Pinterest scheduler tool?
Now, there are a few great Pinterest automation tools you can choose from. I can only speak from my experience and recommend Tailwind.
It’s basically a tool that works like this:
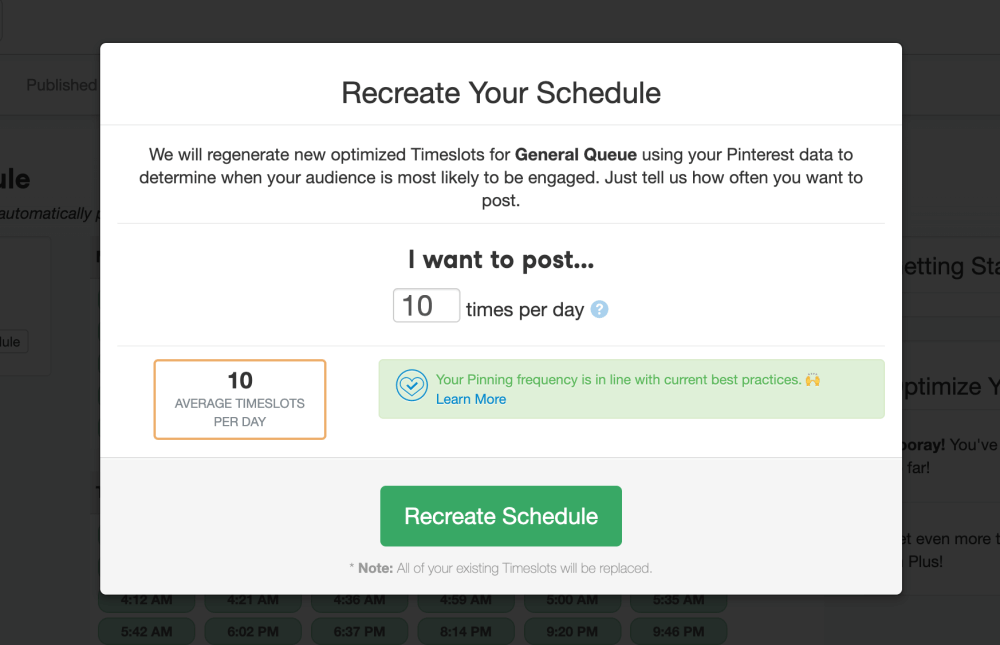
- Create your pinning schedule:
Tell Tailwind how many times a day you’d want to pin. The tool will find the perfect time slots when your pins will get maximum exposure. - Fill your pinning queue:
Either upload your pin images directly to Tailwind or pick pins directly from Pinterest. - Set it and forget it!
Tailwind will now make sure your scheduled pins get published at the best times, while you go back to doing stuff that a machine can’t do for you.
The best thing about Tailwind is that you can schedule a single image to be pinned to as many boards as you want.
You simply select the boards you wish to pin to, set a pinning interval, and Tailwind takes care of the rest.
I can’t say how much I love it. Tailwind has been an incredible time-saver for me, especially because I run a handful of different blogs.
I simply don’t have the time every day to pin my content manually. Let alone figure out which boards I’ve already pinned my content to. Tailwind has so much more to offer than what I can cover here.
Click here to start using Tailwind for free and see how you like it. Let me know how it goes!
Final thoughts: How to create a surefire Pinterest strategy for blog traffic
Thanks for following thorough, I’m happy you’re still with me. I hope you found helpful tips on how to build a Pinterest strategy for your blog here.
Here’s a recap of how to set up the perfect Pinterest marketing strategy to grow your blog traffic:
- Use Pinterest like a search engine:
Pinterest isn’t a social platform. Focus on nailing your Pinterest keyword research and building meaningful, benefit-driven boards and pins. - Stay consistent on Pinterest:
Publish new pins regularly and keep creating new ones for your old posts, too. Speed up your work with free tools like Canva and customizable Pinterest templates. - Save time with a scheduler:
Start using a scheduler like Tailwind right now to double your results in a matter of weeks. - Stay patient:
Give your Pinterest strategy enough time to take off. You should see real results in 2 to 4 months. Follow a consistent pinning schedule and your results will ramp up.
Ready to start? If you’re serious about Pinterest marketing and want to steal all my best techniques, grab your copy of my popular Smart Pinterest SEO e-book. It’s the most comprehensive Pinterest SEO guide available, packed with everything I’ve learned as a Pinterest marketing specialist and SEO expert.
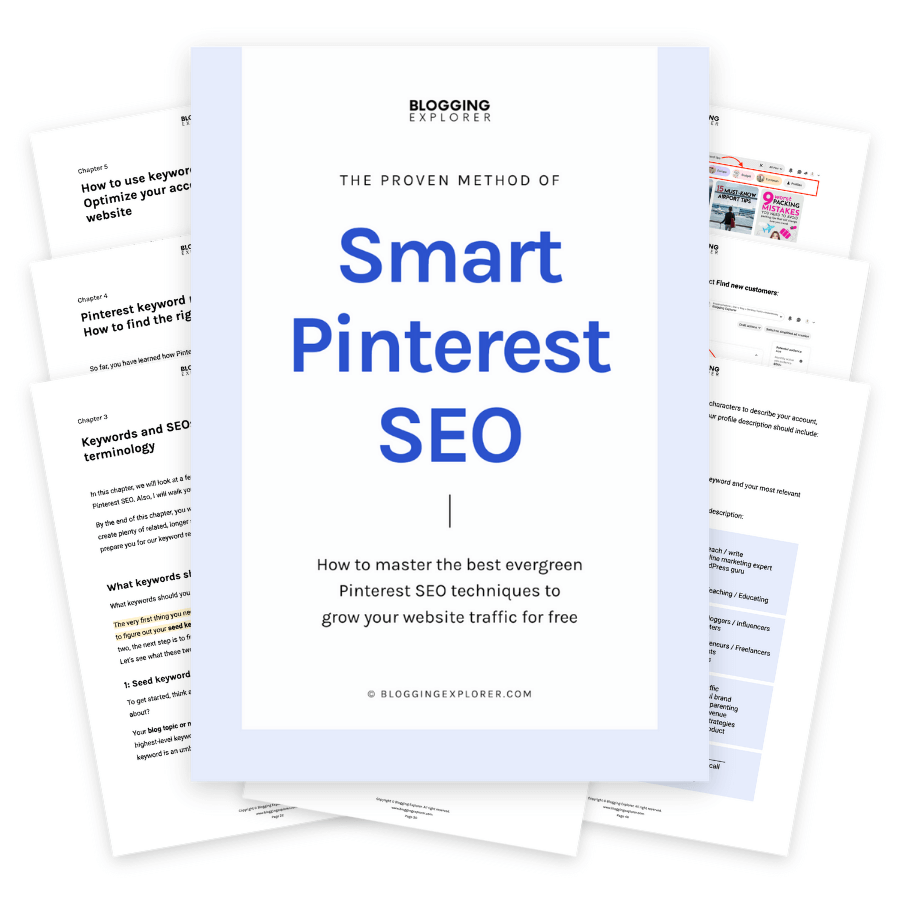
Inside the e-book, you will learn the ins and outs of how Pinterest works under the hood, so that you don’t have to worry about following outdated or ineffective techniques ever again. Even if you are new to Pinterest and blogging, you can follow along and implement my strategy step-by-step.
I’ll see you inside Smart Pinterest SEO!