
If you are serious about growing your website traffic with Pinterest, you want to make sure you follow all the latest best practices for Pinterest marketing, right?
Claiming your website on Pinterest is one of the most important steps for setting up a profesh Pinterest traffic strategy that brings the results you want to see.
But how can you claim your website on Pinterest exactly?
What steps do you need to take to verify your website with Pinterest?
If you are new to Pinterest, I know this may sound super technical. And I know you are already wearing so many hats that you don’t want to feel confused and overwhelmed with the technicalities of it all, right?
So what’s the easiest way to claim your website on Pinterest without feeling frustrated about all the technical stuff?
Well first of all: since you are reading this, you are in the right place.
In this step-by-step tutorial for absolute beginners, I’ll walk you through 6 easy steps to claim your website on Pinterest like a pro.
By the end of this guide, you will have submitted your website URL for verification to Pinterest, and you can lay back and relax while you wait for Pinterest to confirm your verification by email.
Seriously, it doesn’t get any easier than this. If you run into any questions throughout this guide, drop me a line in the comments section and I’ll do my best to help you asap.
Now, grab your favorite drink and let’s claim your website together to get this over with the smart way!
Disclosure: This page contains affiliate links, meaning I receive a commission if you decide to purchase using my links, but at no additional cost to you. Please read my disclosure for more information.
What does “claiming your website” mean on Pinterest?
If you are new to Pinterest, claiming your website is a smart thing to do.
But what does it really mean to claim your website with Pinterest?
Claiming your website is simply a way of letting Pinterest know that you are the owner of that specific website.
Since you need access to your website’s admin area to do this, nobody else can claim your website as their own, right?
So, once you have claimed it, Pinterest will see you as the sole owner and author of all pins saved to your website domain name and URL.
In short: all pins pointing to your domain will be attributed to your Pinterest account.
Why should you claim your website on Pinterest?
Claiming your website on Pinterest may sound like an unnecessary step for getting started with Pinterest marketing.
So why should you claim your website in the first place?
One massive benefit is this: Pinterest will prominently display your full website URL at the top of your Pinterest profile:
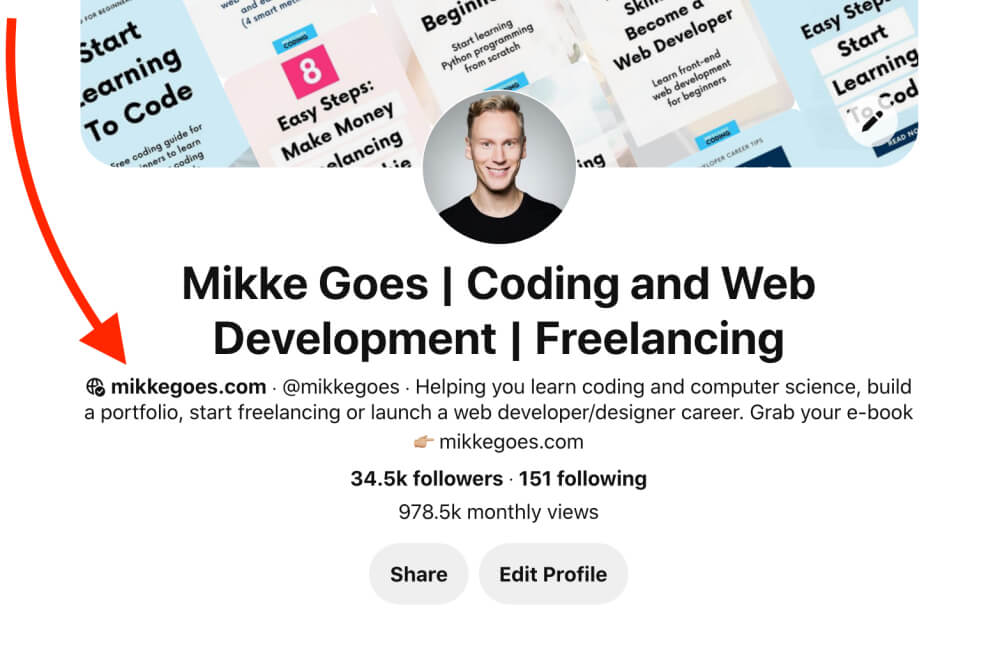
The URL is clickable, making it easier for people to visit your website to find out more about who you are and how you can help them.
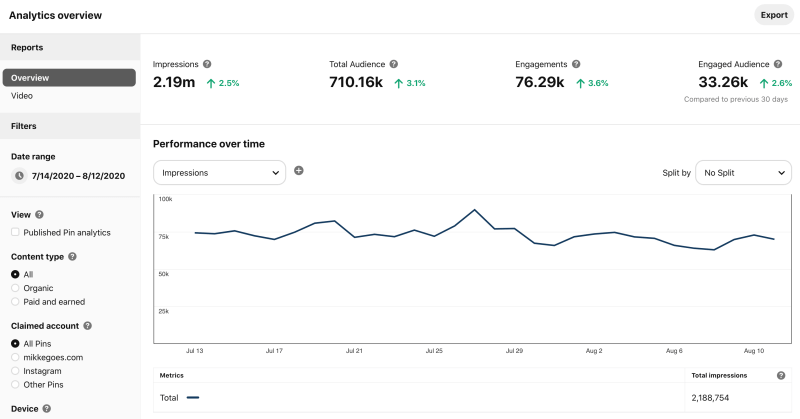
Moreover, claiming your website gives you access to Pinterest Analytics to monitor and track your performance more easily. This is an absolutely essential tool for growing your blog traffic with Pinterest.
Finally, you can enable rich pins for your account. Rich pins allow you to offer even more information and help through your pins and add a call-to-action to them.
What you need for this step-by-step tutorial
Before you follow my tutorial for claiming your website on Pinterest, here are three things you need to have:
1: WordPress website or blog
In this quick tutorial, I’ll show you how to claim your WordPress website with Pinterest.
Hence, if you don’t have a WordPress website or blog, unfortunately this isn’t the right tutorial for you.
If you are new to blogging, I’ve written a free step-by-step guide on how to start a WordPress blog with no experience. Check it out!
2: Yoast SEO WordPress plugin
In addition to WordPress, you will need the free Yoast SEO plugin for this tutorial.
To claim your website with Pinterest, you will need to copy and paste a little code snippet into your website. I know this may feel too technical, which is why I recommend using the Yoast SEO plugin. It makes the whole process much easier.
3: Pinterest business account
Last but not least, you will need a Pinterest business account.
Using a business account is 100% free and it gives you access to helpful tools for growing your website traffic even faster, such as Pinterest Analytics.
To set up your business account, you have two options:
- Create an entirely new business account here
- Convert an existing personal account into a business account by following this help article

Now that you’re all set, let’s get started!
How to claim your website on Pinterest: Step-by-step tutorial
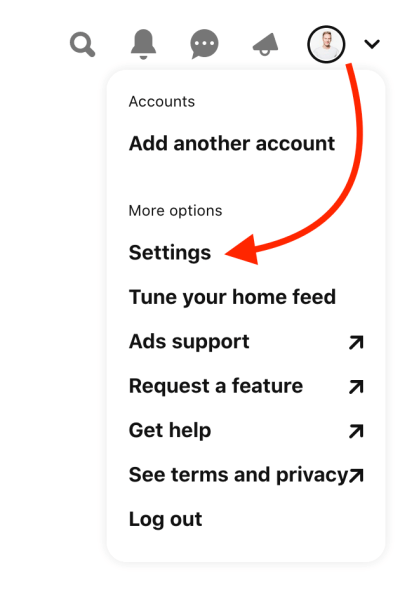
Step 1: Open your Settings
Since you will be copying and pasting stuff between Pinterest and WordPress, make sure you do this on your computer.
First, make sure you are logged in to the right Pinterest account.
Head over to your Pinterest account settings by opening the menu on the top right of the screen and selecting Settings:
Step 2: Navigate to your Claim settings
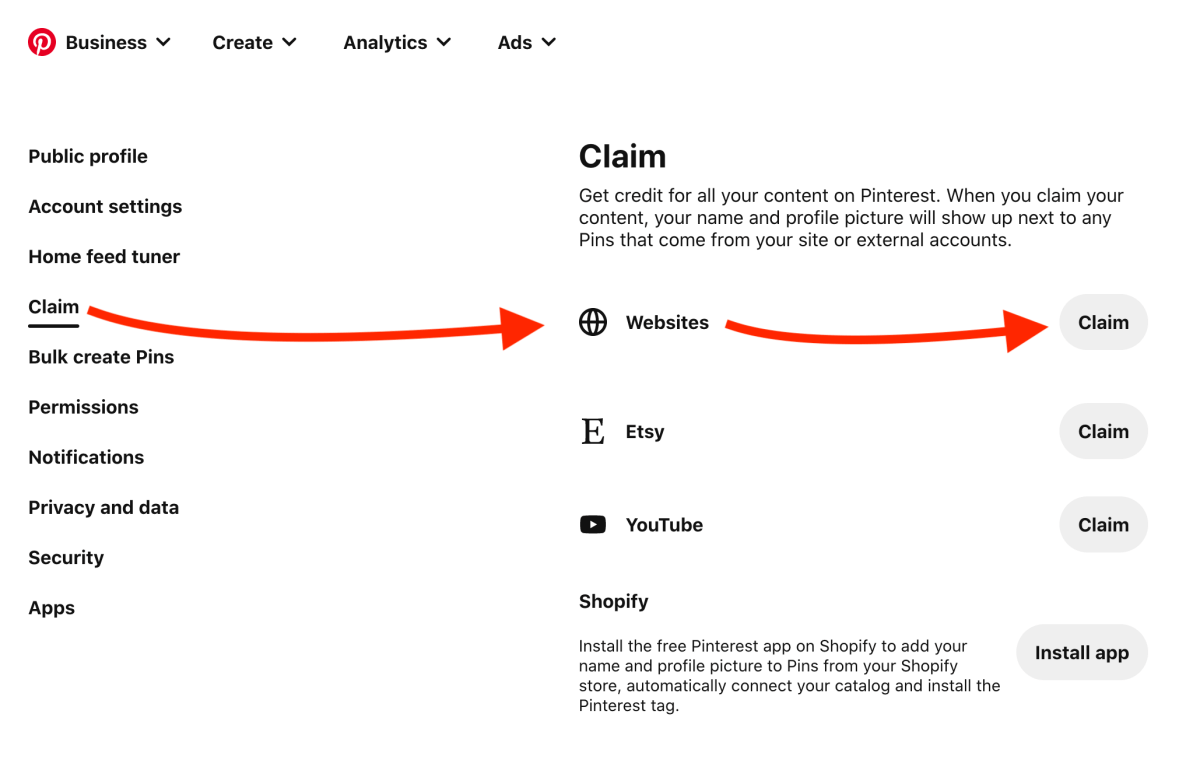
Next, choose Claim on the left-hand side navigation to open the correct settings.
Since we’re claiming your website, locate the section titled Websites, and click on the grey Claim button on the right:
Step 4: Select your claiming method
You will now see a small pop-up window with three different options for claiming your website:
- Add HTML tag
- Upload HTML file
- Add TXT record
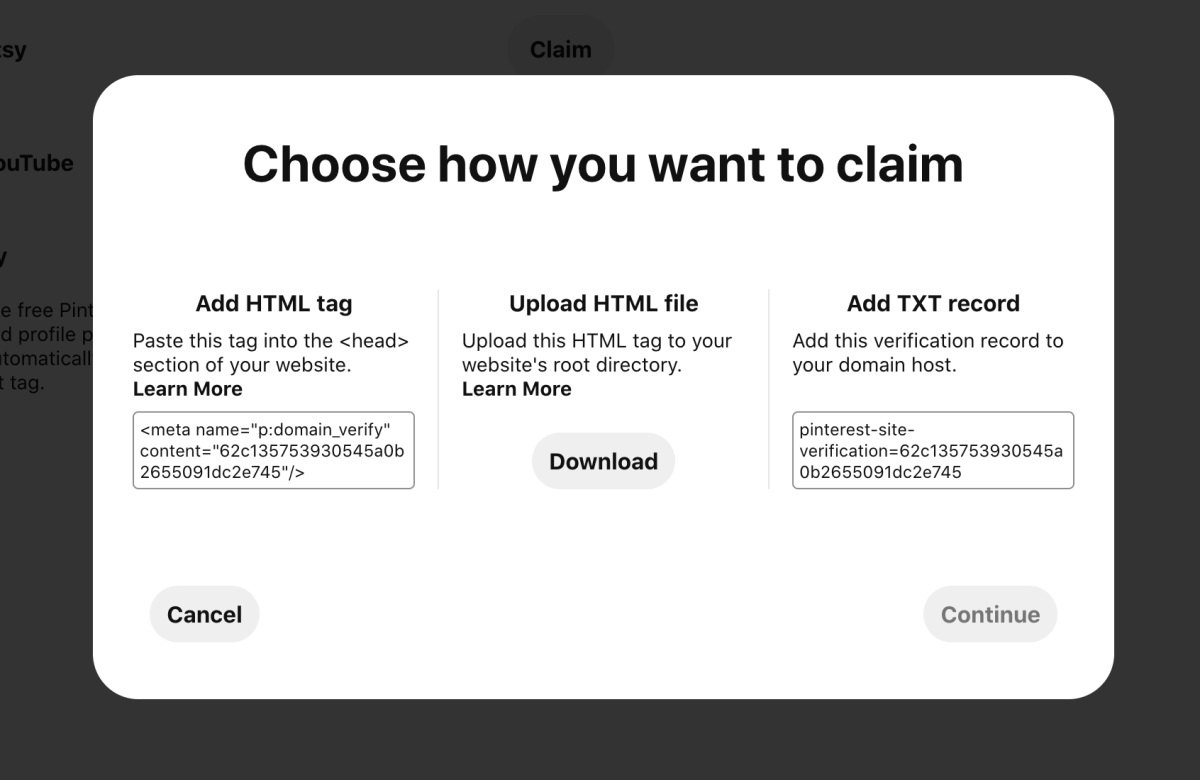
These may sound pretty cryptic and technical, but don’t worry – this will be super easy.
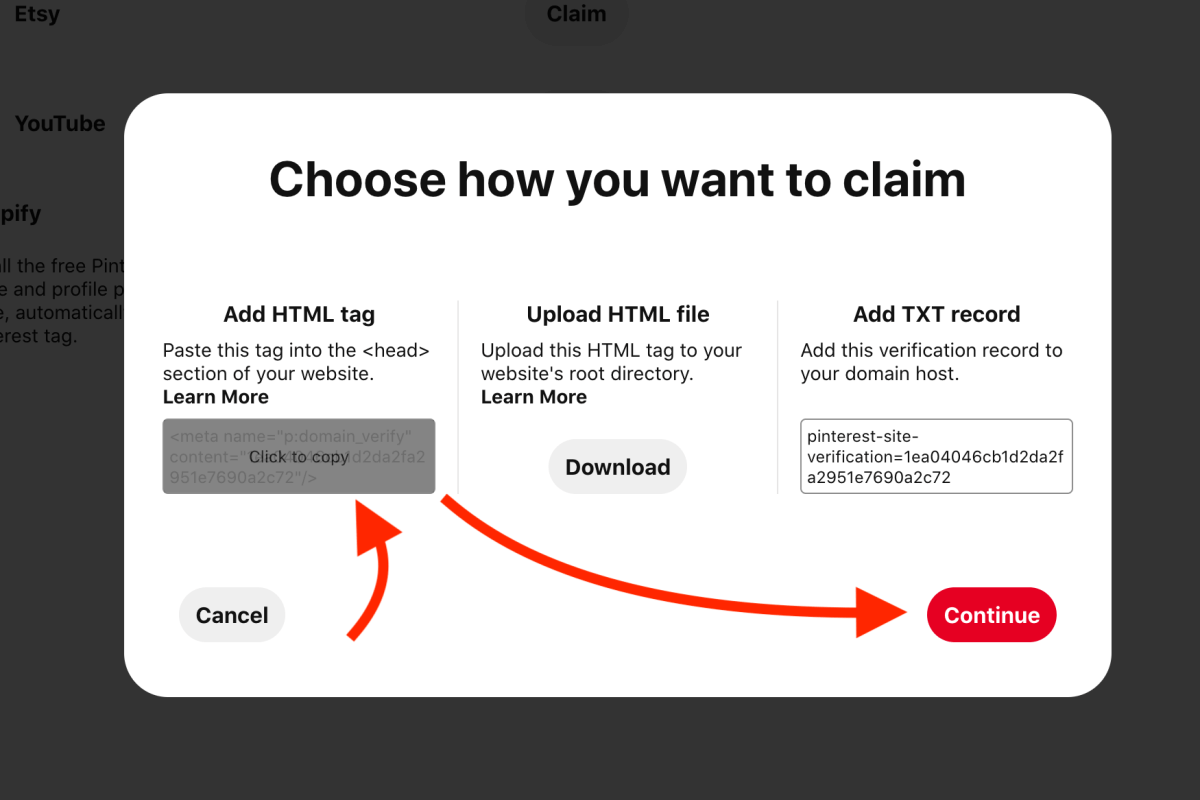
We are going to copy the HTML tag from the left-hand side claiming method.
Hover your mouse over the text field and click on it to copy the meta tag, and then click on Continue at the bottom right:
You will now see a new window where you can type your website URL for verification – which we will come back to in a minute:

Step 5: Paste your meta tag into Yoast SEO
With your meta tag copied, open a new browser tab and head over to your WordPress dashboard.
Make sure you have installed and activated the free Yoast SEO plugin. You don’t need the premium version of the plugin for this.
Navigate to Yoast SEO > Settings > General > Site connections. Paste your HTML tag or verification code into the field titled “Pinterest”:
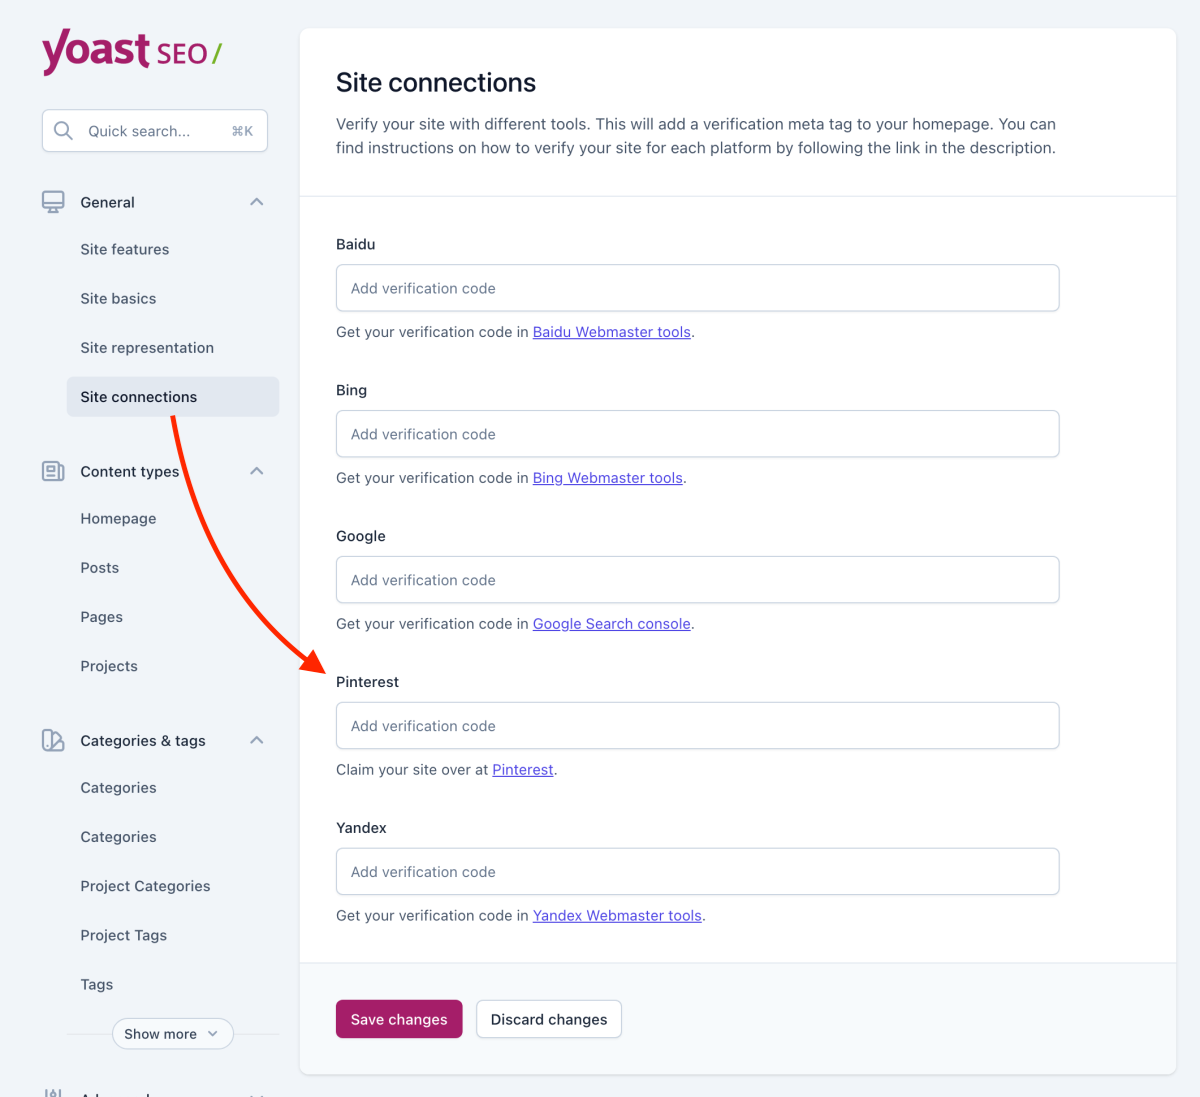
Finally, click Save changes.
Please note: After saving the changes you will only see the actual meta tag consisting of letters and numbers. This is normal, so don’t be alarmed that it’s looking different now than the code you pasted into the field.
Step 6: Verify your claimed website on Pinterest
Last but not least, head back to Pinterest. You should still see the “Verify” window there.
Type in your website URL or domain name into the verification field, and click Verify:
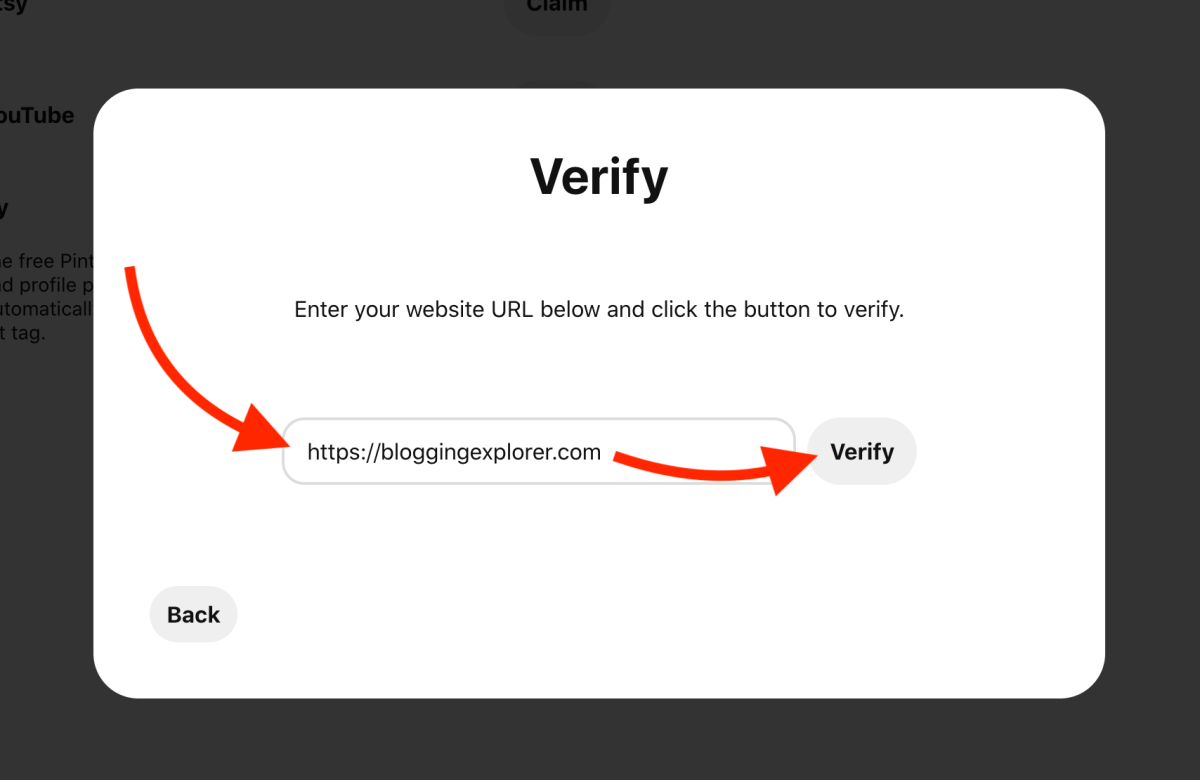
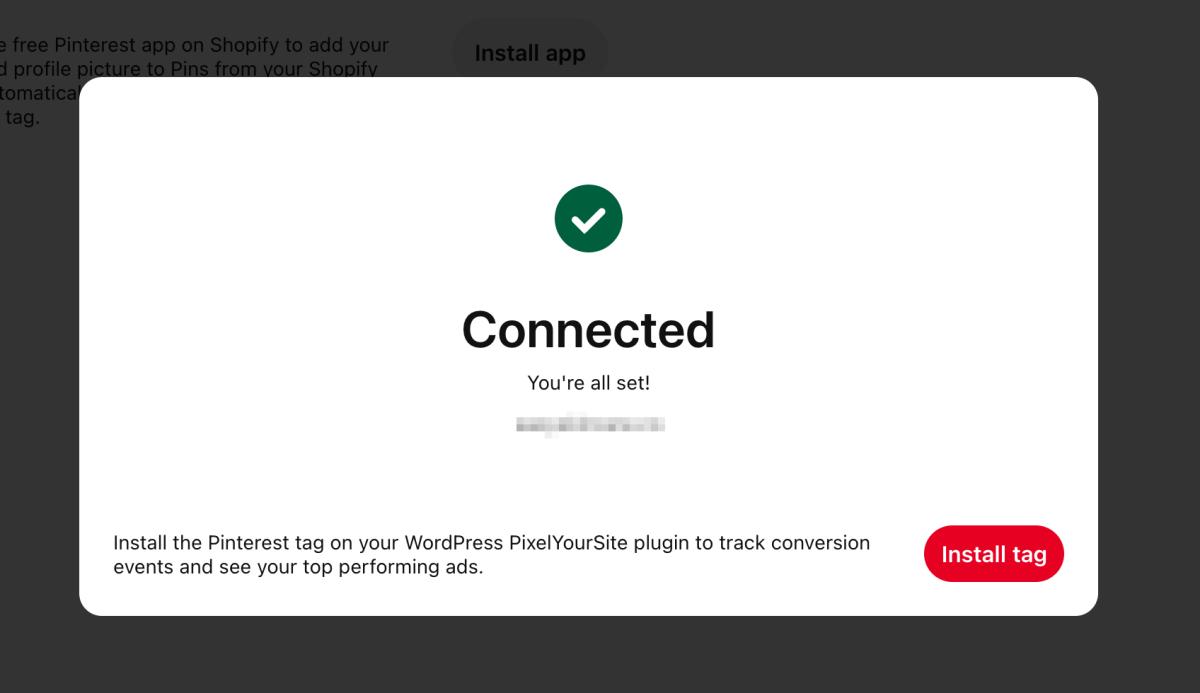
Pinterest will now check whether your HTML meta tag is working properly.
If everything’s working properly, you will see this confirmation message:
Also, you will receive an email confirmation from Pinterest saying that your website has now been claimed:
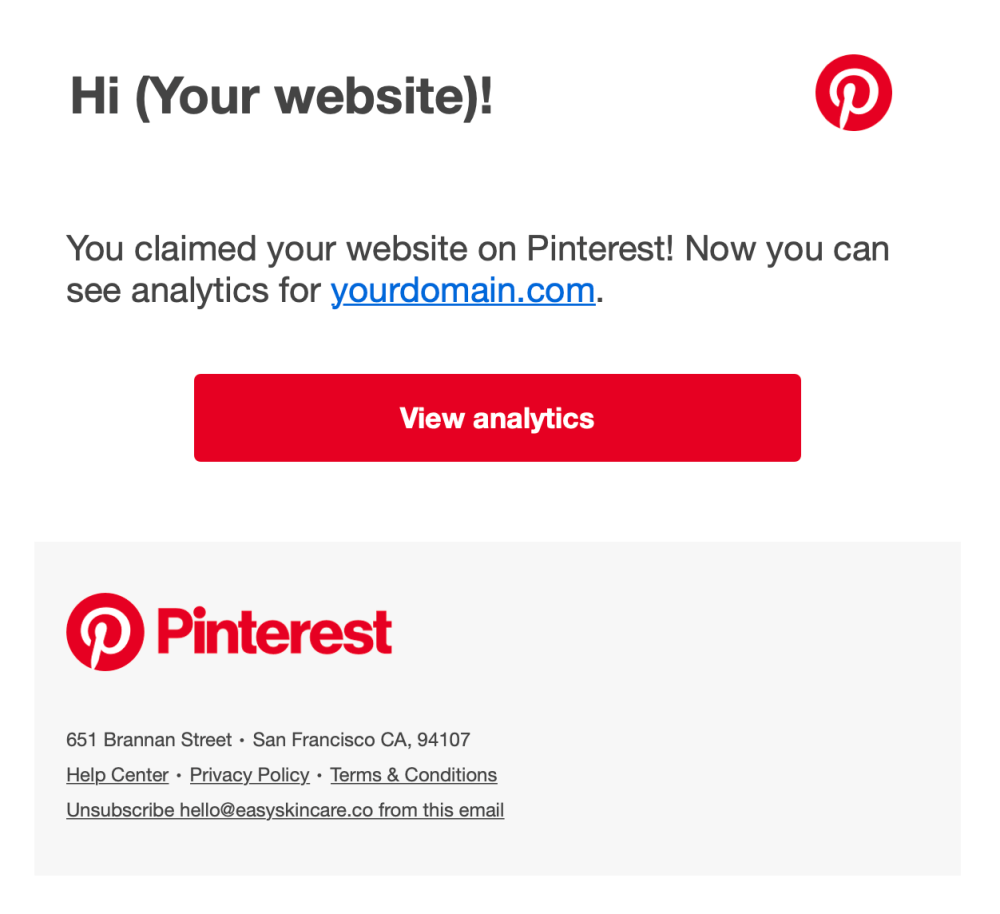
(I told you this would be easy!)
If you run into any problems with the verification process, check out this helpful article on Pinterest. Also, feel free to share your thoughts in the comments and I’ll do my best to help you in person.
FAQ: Claiming a website on Pinterest
Claiming your website on Pinterest means that you will let Pinterest know that you are the owner of the website you have linked to your Pinterest account.
Yes, you should definitely claim your website. This gives you access to helpful and valuable analytics, statistics, metrics, and tools that help you grow your blog traffic even faster using my proven Pinterest marketing strategies.
The easiest way to claim a WordPress website on Pinterest is to use the free Yoast SEO WordPress plugin. Head over to your Pinterest settings and select Claim. On the next page, click on the Claim button and select your claiming method. Choose “HTML tag”, and copy the entire tag. Now head over to your WordPress dashboard and make sure you have installed and activated the Yoast SEO plugin. Navigate to Yoast SEO > Settings > General > Site connections and paste your tag into the field labeled “Pinterest”. Finally, click on Save changes to claim your website.
Summing it up: How to claim your WordPress website on Pinterest
There ya go! I hope you found this step-by-step tutorial for claiming your website on Pinterest helpful.
Did you run into any questions along the way? Please share them in the comments below!
Claiming your website is an essential step for building a solid Pinterest marketing strategy for your blog or website.
You are letting Pinterest know that you’re the owner of that specific website URL, and you get access to valuable tools and analytics that help you generate even more visibility on the platform.
If you are new to Pinterest, make sure to follow my free Pinterest marketing strategy guide to grow your blog traffic faster this year.
Here are a few hand-picked Pinterest guides to help you get started even more easily:
- Is Pinterest Social Media? (And Why You Must Know The Answer to This)
- How to Prepare Your Website for Pinterest Marketing
- How to Find the Best Pinterest Keywords to Explode Your Blog Traffic This Year