

Writing blog posts is difficult and time-consuming. If you want to start a successful blog and make money blogging, you don’t want to waste your time writing blog posts that don’t generate traffic, right?
But here’s the good news: There are a few stupid-simple steps you can take to massively reduce the time and effort you need to put into writing your articles.
By standardizing your blog writing process you can learn how to write a great blog post–time after time. This will help you save tons of time so you can focus on promoting your content to monetize your blog.
In this post, I’ll walk you through practical steps on how to write the perfect blog post every time. This is the process I use for all my posts and it’s helped me cut down the time I need for writing articles by 50%.
At the same time, I’ve been able to make sure each article generates loads of traffic and provides value to my readers.
Sound good? Keep reading!
Here are a few related articles you should read, too:
- 6 Worst Blogging Mistakes (And How to Avoid Them)
- How to Monetize Your Blog Quickly: 5 Proven Ways to Make Money With Your Blog
- 7 Critical Things You MUST Do Before Launching Your Blog
18 practical steps: How to write the perfect blog post
If you’ve ever felt frustrated or overwhelmed by blogging, the following steps will help you regain your confidence and find your motivation again. I know how important it is to avoid wasting your time on writing articles that don’t generate traffic. That’s why I’m walking you through the exact steps I use to write my blog posts.
Before we start, keep in mind that you’ll get the best results by going through each step after the other. Of course, if you’re not using email marketing, for example, feel free to skip those steps (or start using email marketing now!).
Let’s get started!
Related: What to Blog About? How To Find Blog Post Topics That Generate Traffic
Step #1: Follow your content strategy
The first thing you should do when planning a new blog post is to check your content strategy.
Before you even log into your blog website, make sure you know what the purpose of your next post is. It should always be a cohesive part of your long-term content strategy.
Recommended: 4 Powerful Blogging Strategy Tips For Beginners
To help you get started with this step, ask yourself a few questions:
- What are your long-term blogging goals?
- Where do you stand now?
- What’s the next step you need to take to get closer to your goals?
- What’s the biggest problem your readers need help with right now?
The most important thing to remember is that all of your posts need to support your long-term plans. They need to fit into a cohesive “storyline” you’re telling. That’s the only way you can offer your readers the best, most valuable content they can find online.
The more information and knowledge you share with your readers, the more loyal they will become. With each post you write, you’re taking them along to learn more about your topic.
Step #2: Choose a category
Once you’ve checked your content strategy, it’s time to pick a category for your new post.
If you’re just starting out with blogging, you may not have too many categories just yet. And that’s perfectly fine. What’s more important is that each category develops into a comprehensive set of guides and tutorial for a specific topic.
Keep in mind that each category should follow a clear “storyline”.
Here’s what you should do:
If you haven’t already, start by creating a list of potential blog posts for each category.
Then, sort your list so that the most critical, important ones for your audience come to the top.
Your first blog post should be an overview of why this specific topic is so important to your readers. It should be a valuable, comprehensive beginner’s guide for that specific category.
List your main points in your first post and give them a promise that you’ll solve the biggest problems they have. That’s the bread and butter for creating valuable, useful content for your readers.
After that, write your following posts in a logical order. Make sure they build on the first one and remember to solve only a single problem in each post. Keep it very specific. Your readers will thank you. And so will Google!
Step #3: Determine what type of post you will write
Now that you know what you want to help your readers with. Great! Next, you should think about what type of post you want to write.
Recommended: How to Write a Blog Post in WordPress: Step-by-Step Guide
You can choose from a variety of different post types here. For example:
- List post – People love list posts! They’re easy to follow, super valuable, and you can add new points later on.
- How-to posts – Show your readers how to solve a specific problem step by step.
- Best resources – Share your favorite resources for saving time or money, or boosting productivity with something your readers deal with every day.
- Influencer round-up – Gather a selection of top-notch articles about your blog post topic to help your readers find what they’re looking for.
- Case studies – Share your findings of something you’ve been testing out, emphasizing how valuable your results are to your readers.
- Review post – Review a product or service that could solve a problem your readers struggle with. Show them how much easier their lives could be with your solution.
- Behind the scenes – Share something personal about your business or blog. For example, write about your daily routines as a blogger or share the exact steps for a task you do on a regular basis.
Found an idea for a blog post type? Great! Let’s see how you can get started with making sure your blog post will actually become popular…
Step #4: Choose your keywords
Keywords are what your potential readers are using on Google and other search engines to find your blog posts.
Thus, when you’re thinking about how to write a great blog post that your readers will find, you need to target the right keywords.
That said, let’s go through a couple of helpful points you should keep in mind when choosing the main keywords for your blog post:
First, the most important thing about keywords is to write content for human beings, not for search engines. Before you start sketching an outline for your blog post, make sure you understand what your target audience wants to read about.
Here’s what you should do:
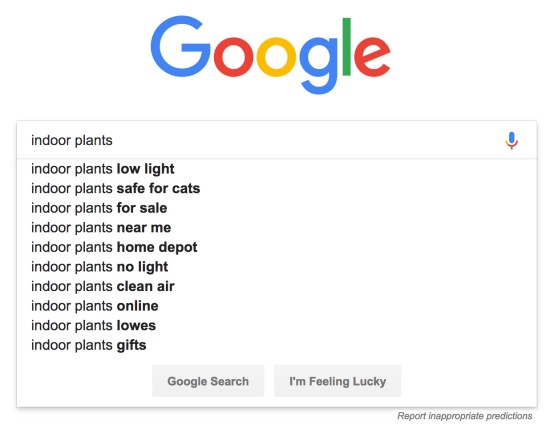
Start with a simple Google search for your blog post idea.
For example, if you want to write about “indoor plants”, type it into Google’s search field.
First, take notes of the suggested search terms:
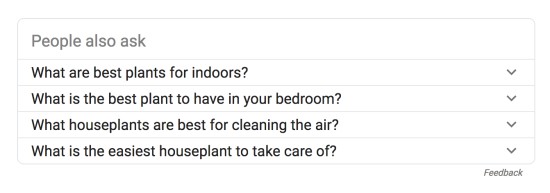
Next, on the results page, look for the “People also ask” section. The questions here are direct indicators of what users are searching for on Google:
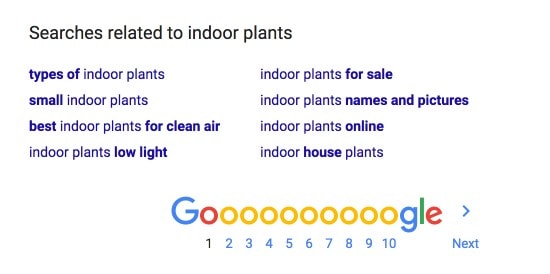
Finally, scroll down on the results page and check out the “Searches related” section. These are valuable ideas for related searches your potential readers want information about:
Of course, there are dozens of ways and tools to find great keywords for blog posts. Here are a few of my favorite tools you can try out:
- KWFinder (FREE for up to 5 lookups/day)
- Moz Keyword Explorer (FREE 30-day trial)
- Google Ads Keyword Planner Tool (FREE)
Bonus Tip: Try to find out what type of content your potential readers are REALLY looking for. There’s a huge difference between how-to posts, lists, and product reviews. If Google users are looking for “the best slow cooker”, they don’t want a list of 10 slow cookers. Instead, they rather want a comparison between the top 3.
Step #5: Research the topic and competition
So far, you know what you want to write about and which keywords you’re using. Good job!
The next step to writing the perfect blog post is to see how you can overperform your competition. With millions of blogs out there, your topic most probably already has dozens of articles available online.
Now, doing research about your competitors doesn’t mean you should go and steal their ideas. Quite the opposite: the point is to see what’s missing.
Here’s what you should do:
Start by doing a simple Google search with using your main keyword. Browse through 5-10 relevant articles in the top results and see what points they cover. Is there something important missing?
Take whatever is out there and improve it by:
- Updating it with the most recent trends and findings
- Making it longer and more comprehensive
- Including more detailed solutions and answers
- Improving the design and readability
- Including real-world results from your own case study
It takes some hard work to create a blog post that beats the competition, yes. But it’s worth every minute, trust me.
Step #6: Create a post outline
The biggest secret about how to write a great blog post time after time is to prepare a solid outline first.
Before you start writing, make sure you think of a clear structure for your blog post in advance. It’ll help you save time, write faster, and keep your thoughts organized. Your text will also be easier to read and follow if you use an outline.
If you’re not sure how to create an outline for your blog post, here are a few ideas to get you started:
- Write a draft for a benefit-driven blog post title
- Research similar posts for inspiration (what’s missing?)
- Write an engaging intro to hook the reader
- Choose the main points to include in the body
- Write subheadings for each main point
- Sum up your thoughts in the conclusion (link to your intro, emphasize the main promise of the post)
- Close with a call-to-action (CTA)
A clear blog post outline will help you convey your main message and benefit to your readers. When your posts have a clear structure they’re much easier to read.
Step #7: Write an epic blog post title
When it comes to attracting massive traffic to your blog, your article title is the single most important part of your entire blog post.
It is, after all, the first thing your potential visitors see. Needless to say, your blog post title has to catch their attention – every time. If your titles sound like dead fish, that’s what your blog will turn into, too.
Here are a few helpful tips for writing an epic blog post title:
- Be honest – Don’t promise anything your post can’t deliver. Respect your readers and make sure your article fulfills their expectations.
- Emphasize the benefit – Whatever problem your blog post solves, make sure you include the main benefit in your title.
- Keep it short – Cut out any fluff words you don’t need to increase readability. Search engines may cut off anything above 70 characters in their search results.
- Include your main focus keyword – Whatever your target audience is looking for, you want to deliver just that.
- Use numbers – If you can, try to include a number at the beginning of your title.
For a few more helpful tips, check out this infographic on HubSpot.
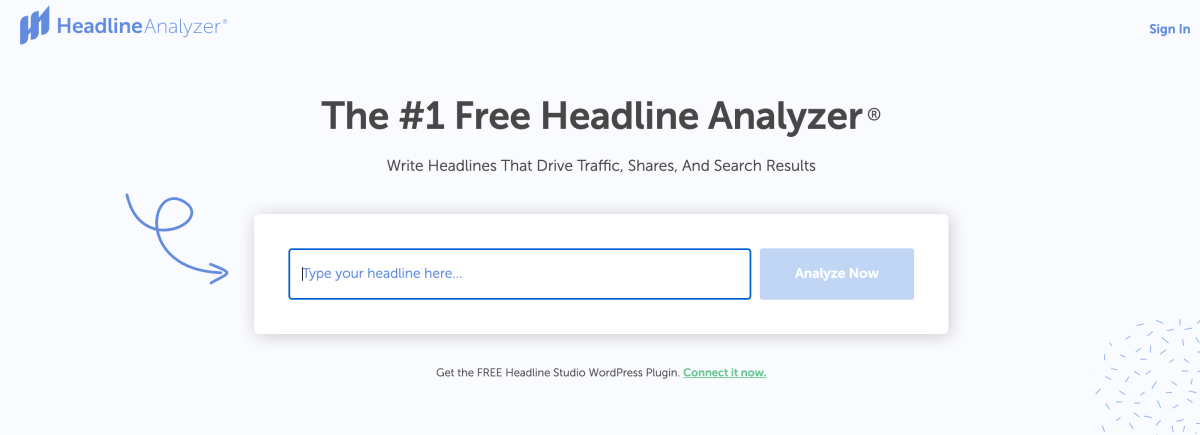
To make sure your title is top-notch, you can use the free CoSchedule headline analyzer. Just enter your title into the field and click Analyze Now to see tips to improve it:
For this blog post, my score was 72/100:
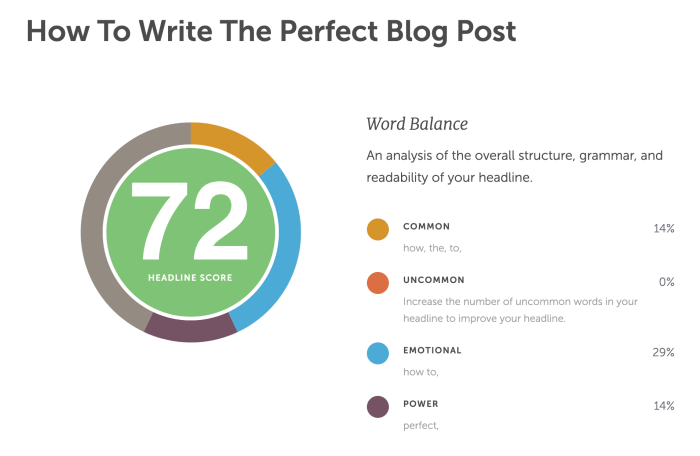
Definitely some room for improvement there!
Step #8: Draft a stellar introduction
Once you have a rough outline for your blog post title, you should think about your introduction next.
Now, some bloggers like to write their introduction first, while others prefer to write it once they’re done with the actual body of their post.
Try both methods and see what suits you best. If you ask me, I’d suggest writing at least a rough outline for your intro before starting with your body.
Here’s why:
Your blog post should solve a specific problem for your readers. Therefore, you should promise them a solution right away in the introduction. Once you have a draft for your intro, it’s so much easier to stay focused on that solution while writing your article.
So how do you write the perfect introduction, then?
The best solution I’ve discovered so far is the Agree-Promise-Preview (or APP) formula.
With the APP method, you divide your introduction into three consecutive blocks:
- Agree: Start with an idea your readers will agree with. Show them you understand what they’re struggling with.
- Promise: Then, paint a pretty picture of how you can solve their problem. Tell them how their world will be a better place when they use your solution.
- Preview: Finally, show your readers exactly what they’ll get from your article. Use exact numbers or figures if possible and tell them what they can achieve after reading your post.
Have you used an introduction formula like the APP method? What do you think? Please share your thoughts in the comments section below!
Step #9: Write the post
Ok, we’re finally at the most critical, most dreaded part of the process!
But hey, don’t worry about it! I know you’ll do a great job, every time. Just follow the tips in this article and you’ll see how much easier the actual writing process becomes.
The best advice I can give you is this: When you write, then write.
Don’t do anything else. By now, you should have a clear outline for your posts. You know your keywords. You know which points to discuss. All you need to do now is to cover all the points you want to include, that’s it.
Thus, here are the best tips for writing faster like a machine:
- Eliminate distractions
- Write in 30-minute sessions
- Forget editing (you’ll do that later)
- Use dictation tools
I know the writing part is often the most difficult one when you’re creating new content. But if you follow these blogging tips when you’re writing, it’ll be much easier, trust me.
The trick is to understand how critical it is to really focus on what you’re doing right now. So, when you’re writing, you don’t want anything to distract you. Whatever thoughts may occur to you, just push them aside for a bit.
You’ll only need about 30 to 60 minutes to finish the actual writing process. When you’re done, the hardest part of it all is over. Congrats!
Step #10: Edit and proofread your post
Yay, you’re ready to start fine-tuning your blog post now!
However, even though you already have all the content you need, you still have a bunch of stuff to do before you can publish your post.
Editing and proofreading are often overlooked by bloggers. (And I’m not sure why.)
If you do it properly, your content will automatically become evergreen and more valuable to your readers.
So, where should you start?
Here are a few helpful tips to help you with your editing process:
- Check your intro – Does it address the problem your blog post wants to solve? Does it promise a valuable solution to your readers?
- Finalize the body – Are your points cohesive and logical? Does the reader get a practical tip at the end of each sub-section?
- Finish the conclusion – Does your conclusion connect to the intro? Do you end your post with a positive outlook and another practical tip?
- Create a CTA – Each blog post should finish with a call-to-action. In short: What do you want your readers to do after they’ve read it?
- Check your links – Are there any broken links in your blog post? Check each of them manually!
The final thing you should do is to proofread your article. Pay attention to the flow of your text and make it easy to read for your visitors.
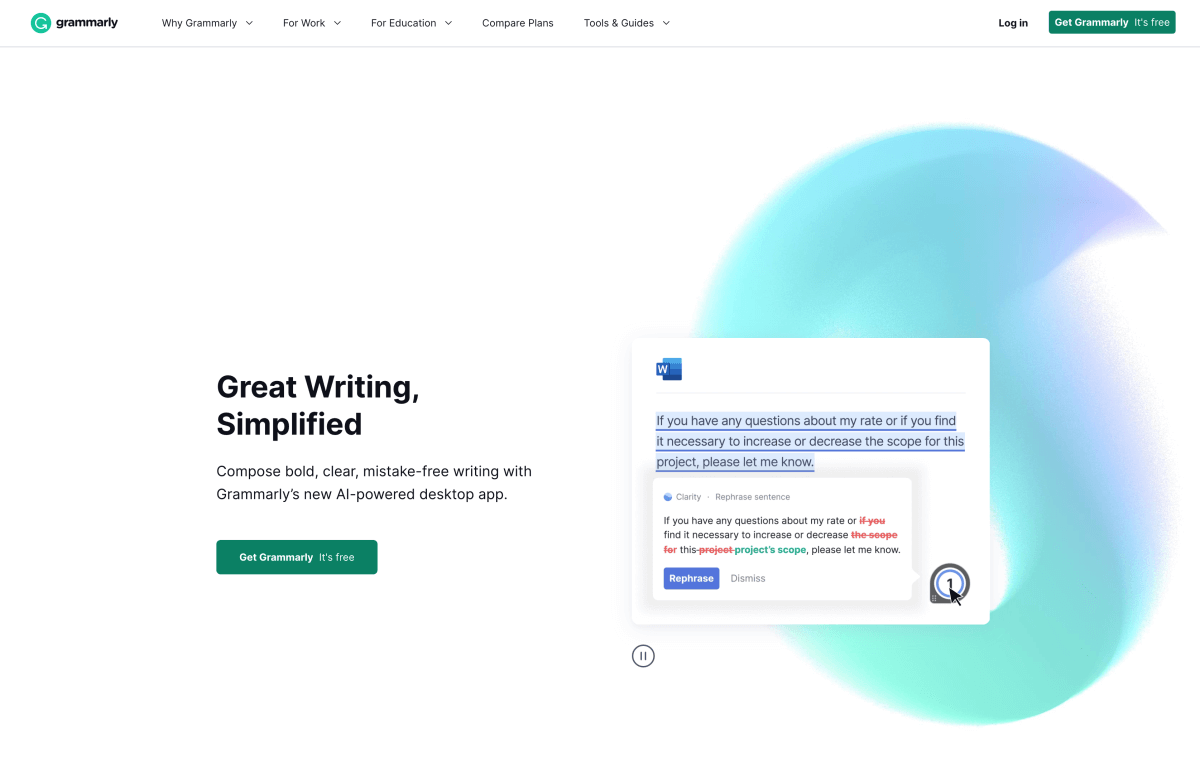
If you’re looking to save time with proofreading, check out Grammarly. I use it to proofread and check every article I write. Grammarly is super easy and fast to use and the free version has more than enough tools to get you started.
Step #11: Link to related posts
Now that your post is all polished and edited, it’s time to link it to other relevant posts on your blog.
This is a hugely important step here for two reasons:
- Your readers will stay on your blog longer – This is a good thing! You want them to spend as much time on your blog as possible.
- Google knows what your post is about – When you link to other, related posts, you’re helping Google understand it better.
The best way to do this is to create links wherever you think your reader could benefit from navigating to another post. For example: If you mention a topic you’ve covered in an earlier post, only share the most valuable point in it here and create a link to the post.
I find the best way to link to related posts is to use them in three spots in each post:
- After the introduction – Create 2-3 links to other, related posts.
- In the body – The more relevant links you can include in the first parts of your post, the better.
- After the conclusion – Just in case your CTA isn’t working for every reader, give them a few helpful posts to read after this one.
How do you link to related posts on your blog? Drop me a line in the comments section!
Step #12: Check your SEO
If you’re new to blogging, SEO might seem like a scary thing, I know. I was you not too long ago and quite honestly I had no clue about search engine optimization – zero.
But here’s the good news:
With just a few easy steps you can achieve great SEO results in the long run.
And even better: we’ll go through the most important SEO steps you should take before you publish your blog posts together.
First, check out my free SEO guide for bloggers to learn what SEO is all about.
Then, follow these easy steps to optimize your blog post like a pro:
1: Install and configure the Yoast SEO plugin
The very first thing you need to do is to install the Yoast SEO plugin in your WordPress admin dashboard.
Yoast will help you achieve better SEO results in just a fraction of the time it will take without a plugin.

2: Include your main keyword in your blog post title
Make sure your blog post title includes your focus keyword. Ideally, you want to place it at the beginning of your title.
3: Divide your blog post into sections using headings
Whether your blog post is long or short, you should use plenty of sub-headings to divide your post into individual sections.
Lots of your readers will just scan through your post if they’re looking for an answer to a specific issue. Having benefit-driven sub-headings increases readability and helps them find what they’re looking for.
4: Write an eye-catching meta description for search engines
Whenever you search for something on Google, the text below the blue result titles are the meta descriptions for those individual results.
What you want to do is to write a meta description that really catches the attention of your target audience. Tell your potential visitors what your blog post is about and make sure you focus on the benefit of reading it instead of some of the other search results.
Read also: 10 Powerful WordPress Plugins to Boost Your Blog (All Free!)
Step #13: Change the permalink to include your main keyword
Blog post permalinks are just that: permanent links to your articles.
They are the URLs you can share with your readers and post on social media to attract visitors to your blog. Needless to say, each permalink is unique.
Your permalink should always include the main keyword for your blog post.
Since you should only write one article for each main keyword in your niche, you don’t have to worry about having duplicate permalinks.
Also, permalinks should be as easy to remember and read as possible. Therefore, you may want to consider using just your main keyword as the permalink sometimes.
Here’s how you can adjust your blog post permalink in WordPress:
When you’re done writing your article and you’re ready to publish it, you can change the permalink in the Document settings column on the right-hand side of the edit post view:

Step #14: Create social media images
If you’re serious about generating massive traffic to your blog, you want to use social media to attract readers to your new post.
The first thing you should do is create and set a featured image for your blog post. Most social networks will show the featured image as a preview to your followers when you share your blog post with them.
Here are a few helpful tips for creating awesome featured images for your blog posts:
- Use simple and clean images – It certainly helps to have an eye for aesthetics and design here: You want to capture your potential reader’s attention in an endless feed of content. Therefore, use images that are clean and easy on the eye, but still strong enough to tell them what your blog post is about.
- Choose relevant, high-quality images – This one’s a no-brainer, really. If your blog is about food, don’t use wedding photos.
- Include branding (logo, font, colors) – Staying consistent with the design and feel will help you build your brand and following.
- Make sure you can use the image – ALWAYS check the legal rights before using images. The best choice is to use stock photos. Never copy or download images directly from other websites or Google image search results.
These tips work well for networks like Facebook, Twitter, and Google+. Here’s an example of how Twitter displays a featured image from my blog when I share a link to it with my followers:

If you’re using Pinterest, you need to create a separate image for pinning your blog post. But trust me, that little bit of extra work will pay off.
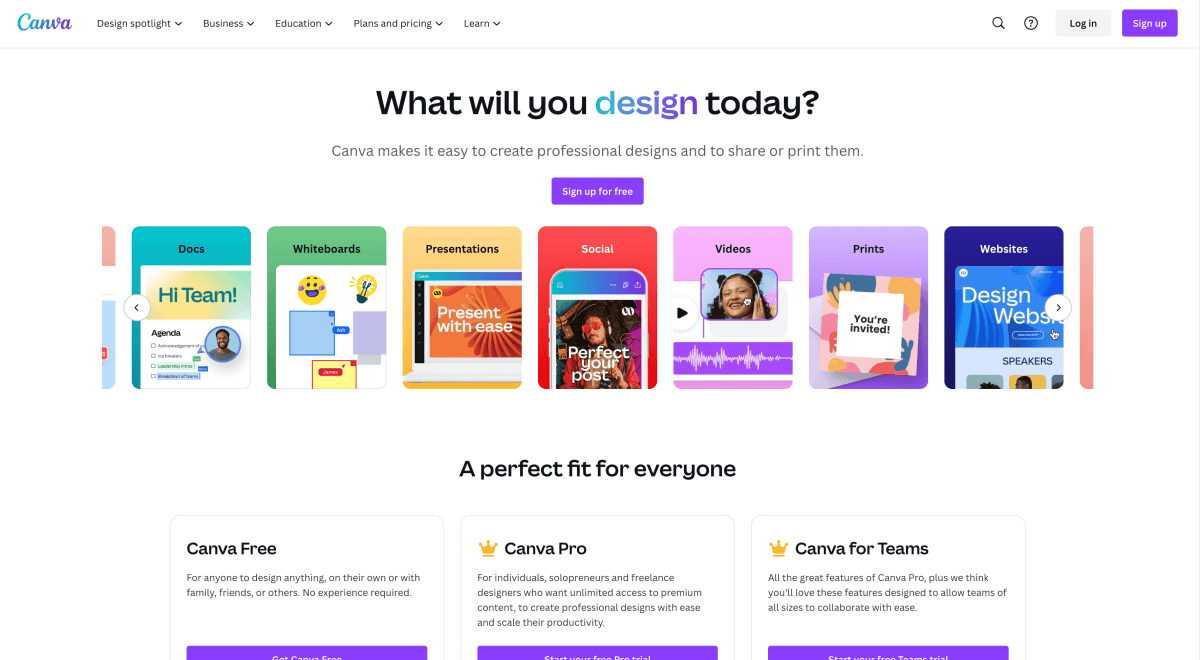
I use Canva for all my pinnable images. It’s free to use and they even have a selection of pre-made pin templates for you.
Step #15: Create a content upgrade
Are you using email marketing to capture email addresses from your readers? If not, today is the perfect day to get started!
Having an email list with your loyal readers will help you grow your blog and make money blogging in the long run.
The best way to capture email addresses from your readers is to offer them something in return.
You don’t want to give away anything too valuable, like an entire ebook.
What works best is a little content upgrade that they can consume quickly right away. It could be a short list of practical tips to use with your blog post, for example.
If you’re new to email marketing, follow my free email marketing guide for beginners.
Here are a few steps you should walk through when you’re creating a content upgrade:
- Solve the biggest problem your readers have – What do they need after reading the post to use your tips in practice?
- Keep it short and simple – Your readers need to get something they can use and consume right away.
- Build an automated email for delivery – Use your email marketing service to create a message with your content upgrade attached to it.
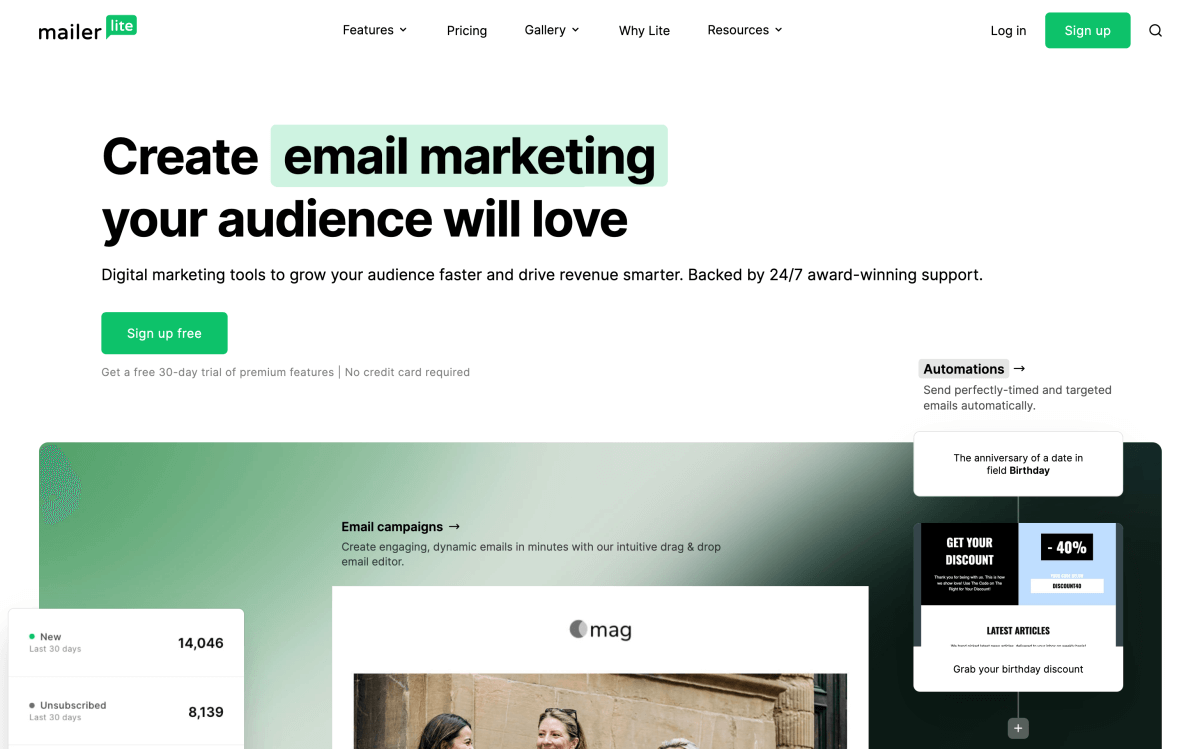
The best free email marketing tool out there is MailerLite. It saves you tons of time, allowing you to collect, manage, and monetize email addresses from your readers quickly and easily.
Step #16: Add categories and tags
Time to finish your post! In the first steps above, you chose a category for your post. That’ll be the primary category for it.
However, I often feel like as you write your post, you somehow venture into other categories, too. At least to a certain extent. So, now is the perfect time to check if you can select any additional categories for your post.
Also, if you’re using tags in WordPress, now is a good time to check them, too.
Step #17: Schedule or publish your post
When would you like to publish your new blog post? Right away or later?
Ideally, you’ll have at least a few posts scheduled and lined up. If that’s the case, use the calendar function in WordPress to select a suitable publishing date for the new one.
When you’re done writing your post, navigate to Document > Publish on the right-hand side:
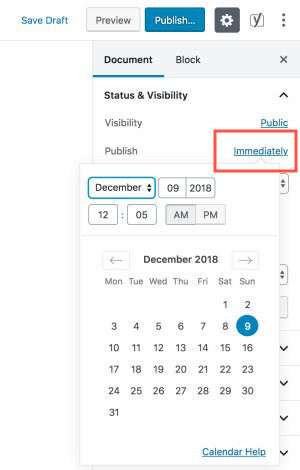
By default, you’ll see it says to publish “Immediately”. To pick a publishing date in the future, click on Immediately to open up a calendar. Simply choose a date and time you’d like and you’re done!
Step #18: Share and schedule on social media
You’ve written a stellar blog post and now you need to get it in front of as many curious eyes as possible.
The quickest way to generate traffic to a fresh blog post is to leverage your social media reach right away.
Depending on which networks you use, you should share and re-share your blog article actively so that your followers and contacts see your post at the right time.
For most bloggers, the most powerful traffic tool is Pinterest. And although it’s not a social network but a visual search engine instead, I’ll still include it here.
I’ve had incredible results with Pinterest lately using my foolproof Pinterest traffic strategy.
I actually thought there was something wrong with my analytics at first. Then, I was afraid to share my trick–maybe it wouldn’t work anymore if others used it, too?
How I doubled my blog traffic in six weeks
So here’s what happened:
I doubled the traffic to a blog I’ve been running for a couple of years in just 6 weeks.
Here’s how it looked in Google Analytics:
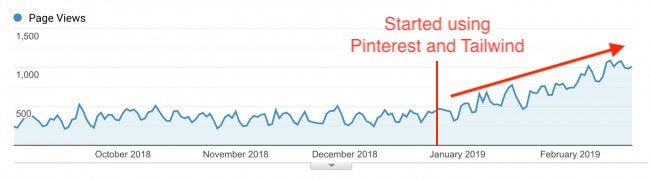
How did I do that?
By using the most powerful social media automation and scheduling tool out there: Tailwind.
I started with a free Tailwind account to see how it works, but I didn’t have high expectations at all. I was a tad skeptical about Pinterest in general (big mistake!).
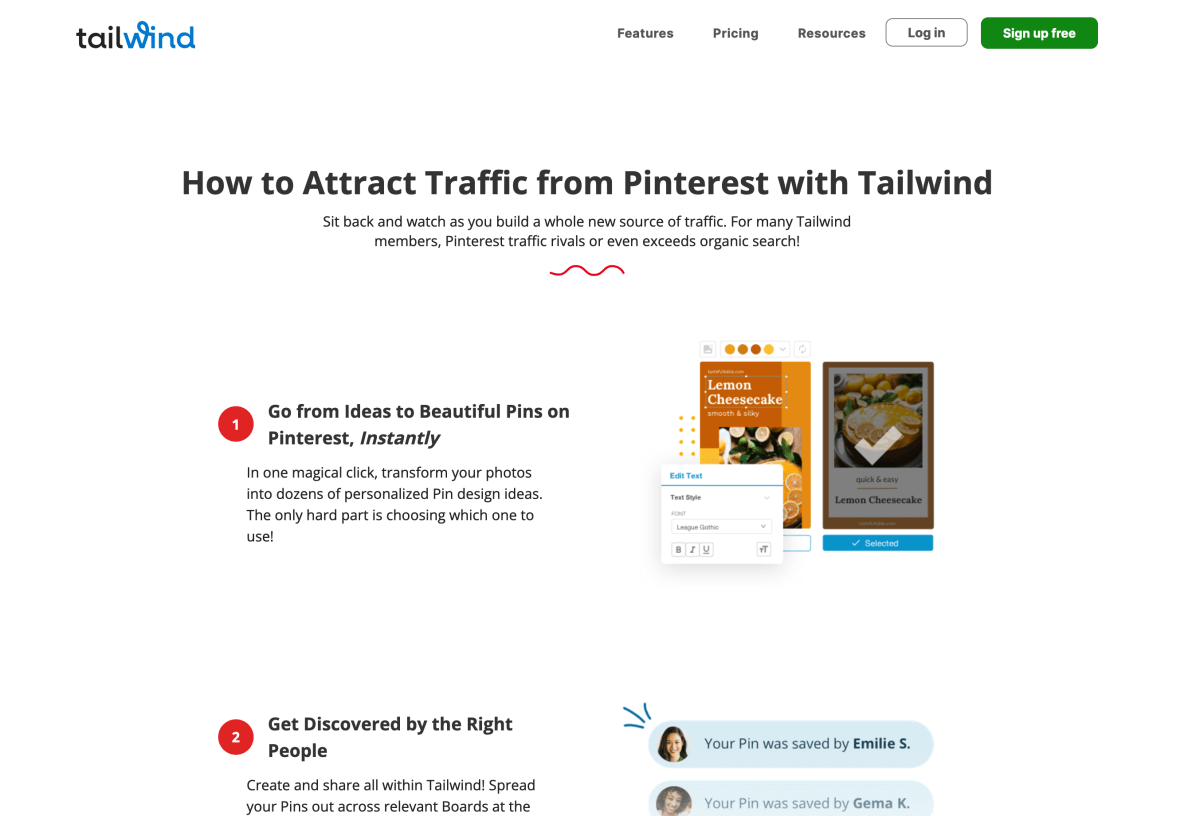
But before long, I noticed how much time I saved by using Tailwind. I was able to schedule pins for several months ahead in a matter of minutes.
And since Tailwind automatically creates a schedule with the optimal time slots for my pins, I no longer needed to second-guess the perfect timings for pinning my blog posts manually.
If you’re new to Tailwind, create your free account here.
Final thoughts: How to write a great blog post
Writing great blog posts time after time can be time-consuming and overwhelming. As there are more blogs out there than ever before, your articles need to be top-notch to help you grow your traffic and ultimately make money blogging.
Also, as search engines become smarter, you can’t just focus on keywords and wait for your article to appear at the top of the search results anymore.
That being said, this article should help you achieve better results with your blog posts in less time. You can learn how to write a great blog post with a solid routine to save tons of time.
Just remember that whatever you write about, you’re doing it to help your readers.
Find out what they’re struggling with, what problems they have, and what questions they’re asking.
Then go out there, do your research, and write the best blog post about your topic you can!
To get started, check out this post with 5 powerful ways of finding blog post ideas that generate heaps of traffic.
I know you can do this!
Here are a few helpful posts you may want to read:
- How to Find the Perfect WordPress Theme For Your Blog Quickly
- 6 Simple Secrets to Blogging Success For Beginners
- 5 Powerful Tools For Exploding Your Blog Traffic
If you found this post on how to write the perfect blog post helpful, drop me a line in the comments below! I’d love to hear your thoughts!
P.S. If you enjoyed this article, please share it so that others can find it, too! Thanks for your support!