

Your blog content is everything. It will either make you or break you. But how do you get started with WordPress as a total beginner? It’s easy to lose yourself in the endless features and options when you start using WordPress for the first time.
To help you save time and get it right the first time around, I’ll help you get started with blogging! In this post, I’ll show you how to write a blog post in WordPress – easy and quick.
If this post is your first blog post in WordPress, congrats! It’ll be the first solid step you’ll take towards blogging success.
Luckily, WordPress makes it easy for you to start creating awesome content right away. As long as you have a good amount of blog post ideas that generate traffic, you’re good to go!
Let’s go!
Here are a few related posts you may find helpful, too:
- Why Start a Blog? 12 Reasons to Start a Blog TODAY
- 10 Easy Tips for Writing an Awesome Blog Post Every Time
- What to Blog About? How to Find the Perfect Blog Topic
Please note: This post contains affiliate links to products I use, trust, and recommend. If you choose to purchase a helpful product using these links, I may receive a small commission for referring you – at no extra cost to you. These funds help me keep this blog up and running.
What you need first: Domain name, blog hosting, WordPress installation
Before you can write your first blog post, let’s make sure your blog is set up properly first.
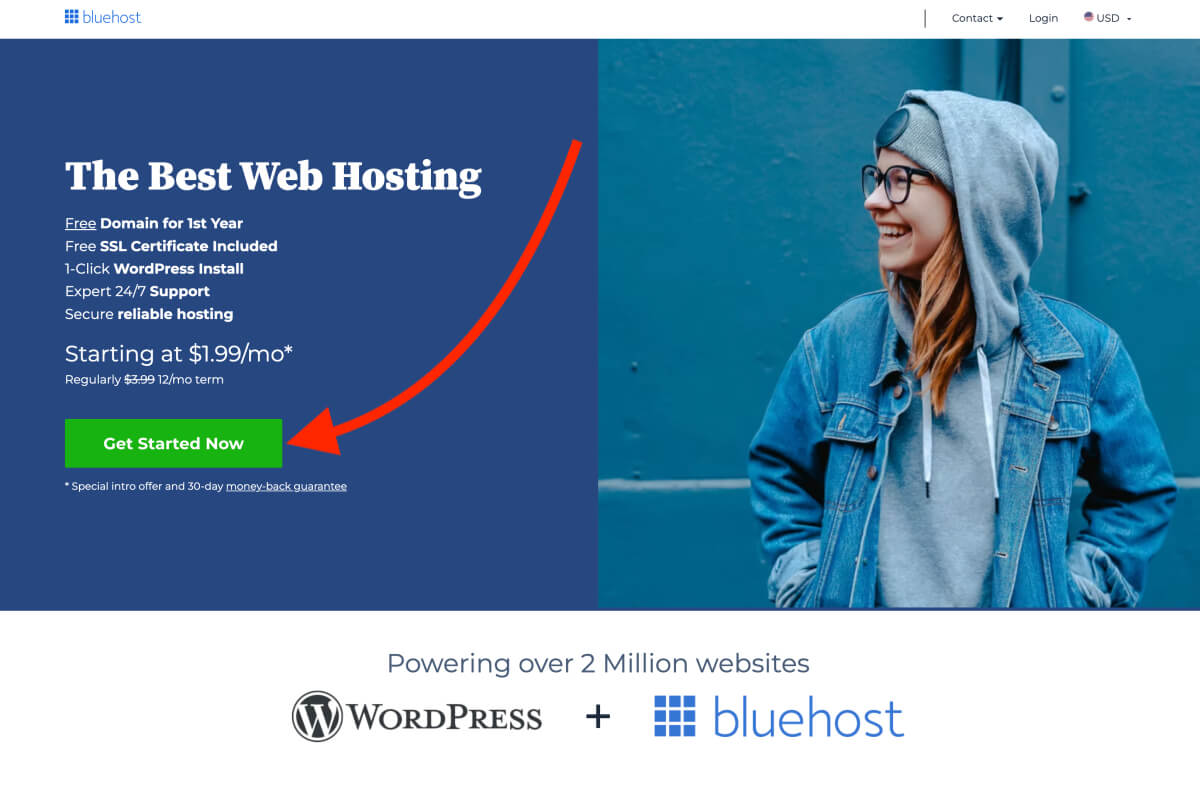
In this article (and many others), I recommend Bluehost to start your blog.
Of course, you’re free to choose any provider out there. Bluehost is simply the one I’ve had the best overall experience so far.
Exclusive blog hosting deal for my readers:
As if Bluehost wasn’t amazing enough already, here’s something to make your decision even easier: I’ve negotiated a limited offer with them for my readers.
You can claim access to an exclusive hosting package offer starting at just $1.99 per month here:
What makes Bluehost the best blog hosting provider for beginner bloggers?
If you’re wondering why I use Bluehost for my blogs and recommend it further, check out my post Start a WordPress Blog on Bluehost: Step-by-Step Tutorial for more details.
In short, this is why Bluehost is my #1 recommendation for domain names and blog hosting:
- FREE domain name for your blog
- Easy and quick sign-up
- No hidden costs
- Free, automatic WordPress installation
- FREE SSL certificate for your blog
- FAST and friendly 24/7 support
The most important thing you should know now is this: Bluehost has an incredibly easy and beginner-friendly setup. Thus, if you feel overwhelmed with the technical part of starting a blog, don’t worry. You’ll get it right, I promise.
And when your blog starts to grow, you can be sure their hosting has enough power to accommodate your massive traffic.
All in all, you’ll simply save countless hours of work and sleepless nights in the long run. That’s all.
Ok, let’s get going! Here’s what you should do before we start creating awesome content:
1: Choose your domain name
Your domain name is the name and brand of your blog. It’s what your readers type into their browsers’ address bar to visit your blog.
You’re free to choose your domain name, of course. As long as no one else has registered it before you, you can get it right away.
If you’re not quite sure about your domain name yet, check out my post How to Choose the Perfect Domain Name in 20 Minutes (opens in a new tab).
Found one you like? Awesome!
Now try the Bluehost domain name lookup below to see it’s available:
And that’s all there is to it, really!
2: Set up your domain name and hosting
When you’ve got your domain name sorted out, you need to sign up for web hosting. Again, feel free to compare different hosting companies to find one that suits you best.
I recommend signing up for blog hosting with Bluehost over and over again.
To walk you through the easy and quick signup process, head over to my article How to Start a WordPress Blog on Bluehost: Step-by-Step Tutorial.
3: Install WordPress
Once your hosting is set up, you only need one more thing: install WordPress.
Here’s one more reason why Bluehost is the easiest choice: they install WordPress automatically for you during the signup process.
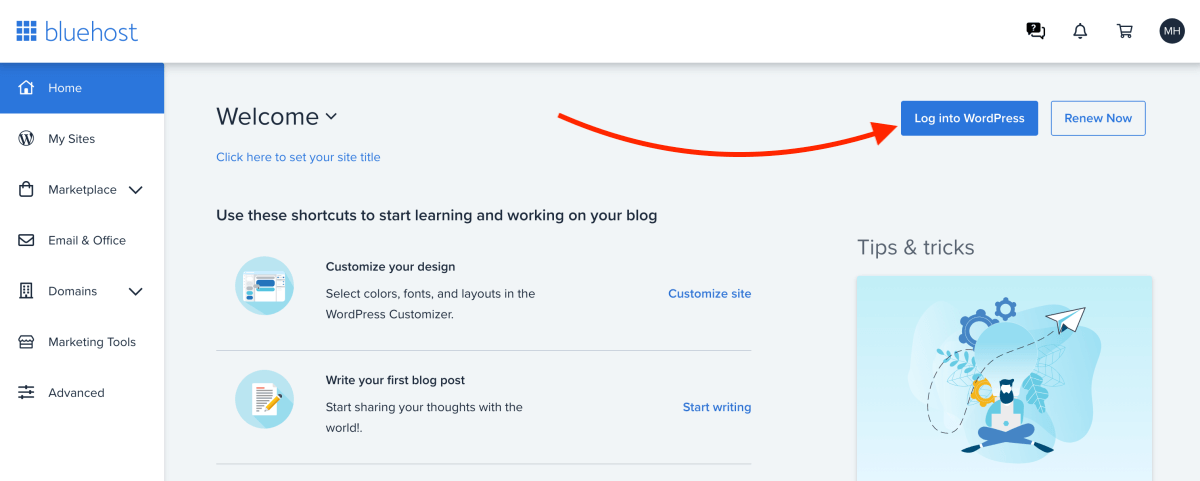
You can access your WordPress blog directly from your Bluehost Portal dashboard. In your Home screen, simply click Log into WordPress:
With other hosting providers, you will most likely find a 1-click installation tool that’s easy and quick, too.
If you can’t find where to do it, simply contact your hosting provider or head over to their support page for a detailed manual.
When you’re done, you’re all set for writing your first blog post! Good job!
How to write a blog post in WordPress: Step-by-step tutorial
Needless to say, your blog posts and your blog content will be your most valuable assets as a blogger. That’s what will keep your readers engaged and coming back to your blog over and over again.
Therefore, you want to make sure you start your blogging journey by learning how to write a blog post in WordPress. You will spend a lot of time with the blog post editor, so let’s start with the basics!
Don’t worry, writing blog posts in WordPress is incredibly easy! I’ll walk you through it step-by-step.
Here’s how to write your first WordPress blog post step-by-step:
- How to log in to your WordPress dashboard
- How to create a new blog post in WordPress
- How to add a blog post title
- How to add headings and text
- How to format paragraphs
- How to create links
- How to add images and media
- How to proofread and check your grammar
- How to publish your blog post
Alright, let’s get started!
Step 1: How to log in to your WordPress blog dashboard
Start by logging into your WordPress dashboard. You can access it either via your Bluehost hosting account dashboard or directly via your blog URL.
For the latter, simply type your blog domain name into your web browser and add “/wp-admin” to it. If your blog domain is “myniftyblog.com”, just type in:
http://myniftyblog.com/wp-admin
Hit Enter and you’ll be taken to the login screen of your Bluehost WordPress blog:
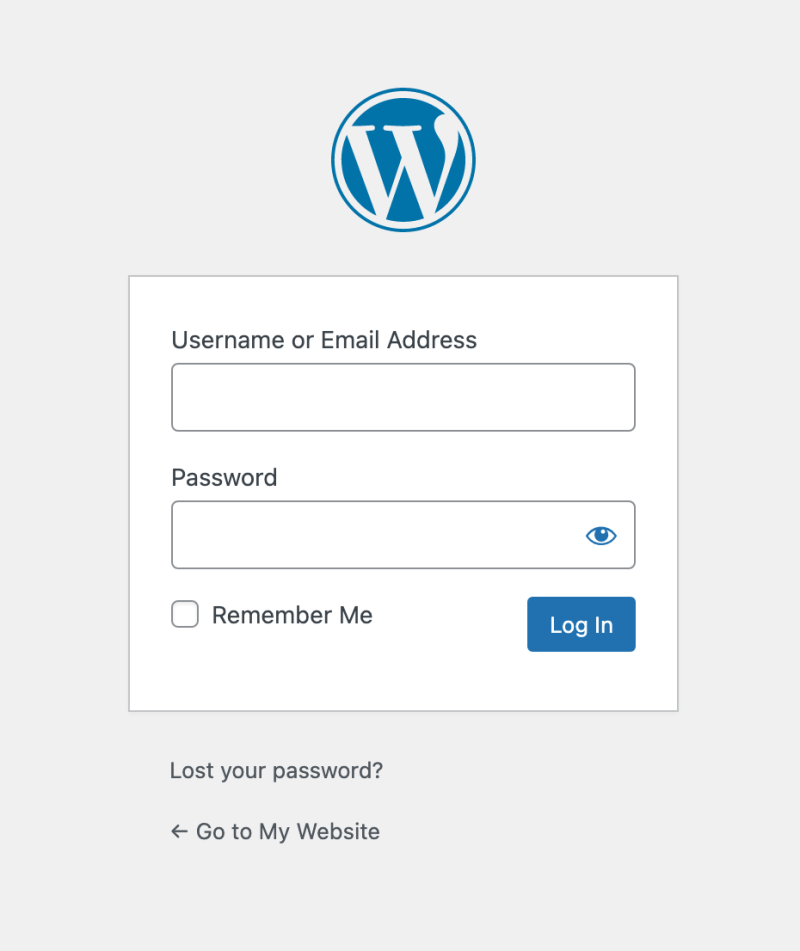
Enter your login credentials, click Log In, and you’re ready to start!
If you’re not sure about your login credentials for your WordPress blog, check with your blog hosting provider.
If you’re using Bluehost, you received a welcome email from them when you signed up. You’ll find your login details at the bottom of the email.
Step 2: How to create a new blog post in WordPress
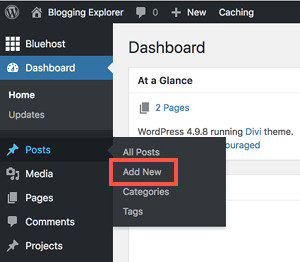
Once you’re in your WordPress dashboard, you want to find the vertical dark navigation bar at the left. To add a new blog post, hover over “Posts” in the vertical menu, then click “Add New”:
This will take you to the standard WordPress blog editor (also known as the Gutenberg editor):
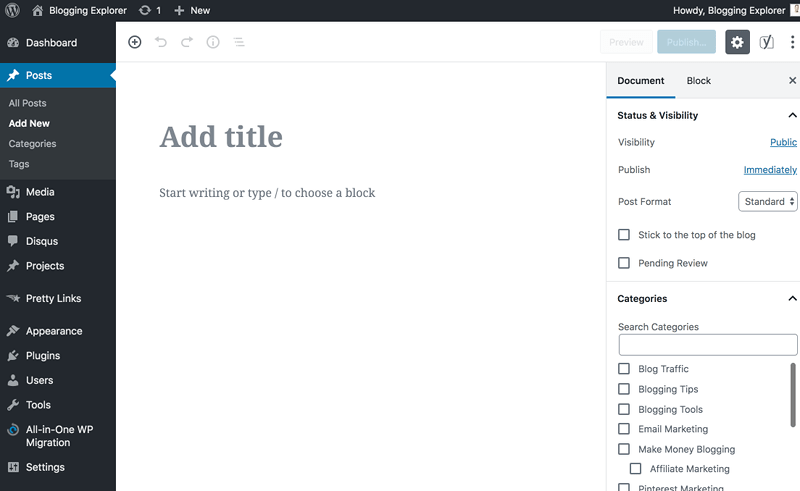
Here you can do everything you need to write your first WordPress blog post.
Step 3: How to add a blog post title
Let’s start at the top, where you see a field for the post title:
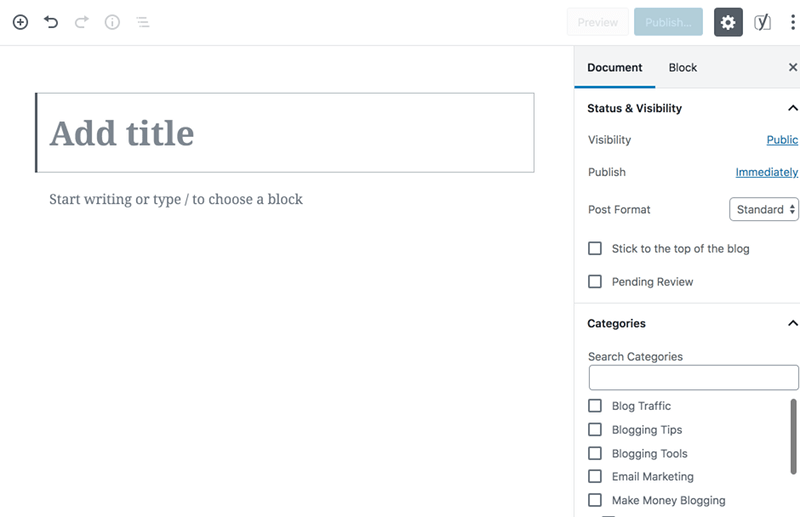
Here’s what your title will look like:
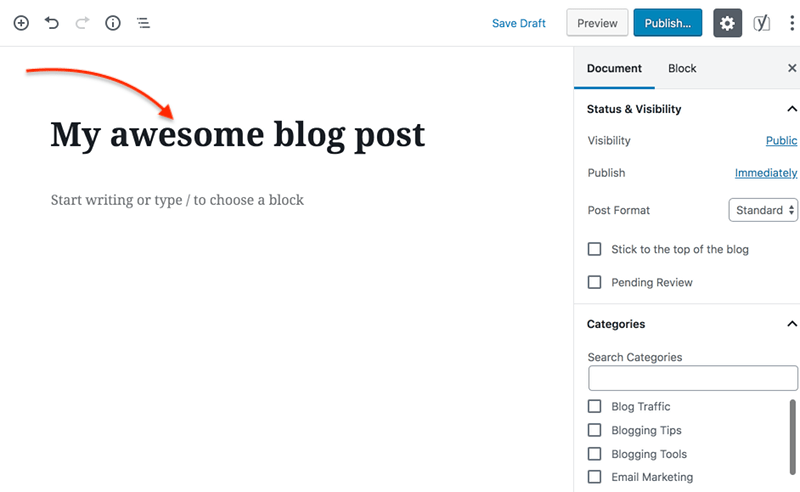
Ok, that’s obviously a horrible title. But you get the idea 😉
You want to keep your title short and snappy, but still click-worthy. Make sure people can understand what your blog post is about just by reading the title.
But don’t worry about this first blog post too much. Keep it fun and casual!
I’d suggest you write a short post about yourself and why you’re starting this blog. Share a few fun facts or short stories about yourself and what’s motivating you!
Step 4: How to add paragraphs and headings
Once you’ve given your post a catchy title, you can start adding paragraphs and headings to the body of your blog post.
Yikes! What should my first blog post be about?!
If you’re having a bit of a writer’s block, just take a deep breath and relax.
Your first WordPress blog post should simply be something fun and personal!
Feel free to write a few lines about yourself and why you’re starting this blog. Write as if you were talking to a good friend! This will add a personal touch and vibe to your text–which is what you want!
Start by placing your cursor in the field that says “Start writing or type / to choose a block”. It’s just below the title you just typed in.
Now, you want to keep your blog post easily readable. People love to scan through your content instead of reading it from start to finish.
That’s why you want to make your posts scannable and avoid long paragraphs.
The easiest way to break up your text is to:
- Keep your paragraphs short
- Add headings and subheadings
- Use images and media (if needed)
When you’ve written your first paragraph, let’s add a heading underneath it.
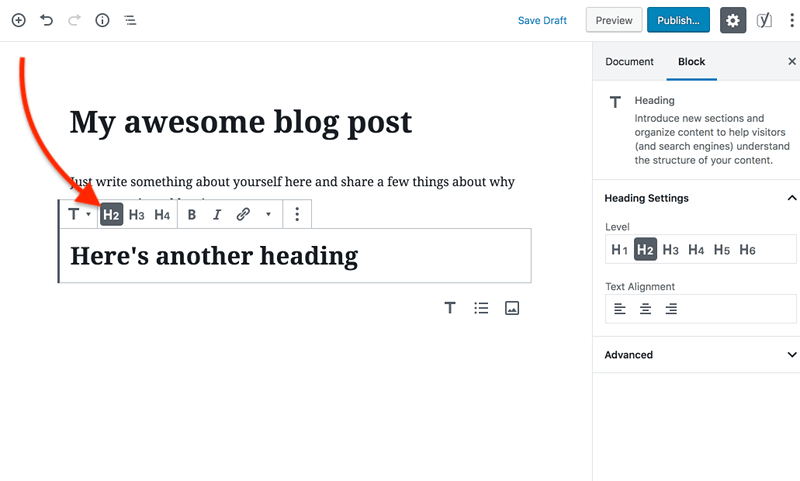
Hover your mouse below the paragraph block. In the small toolbar that pops up, choose “Add Heading”:
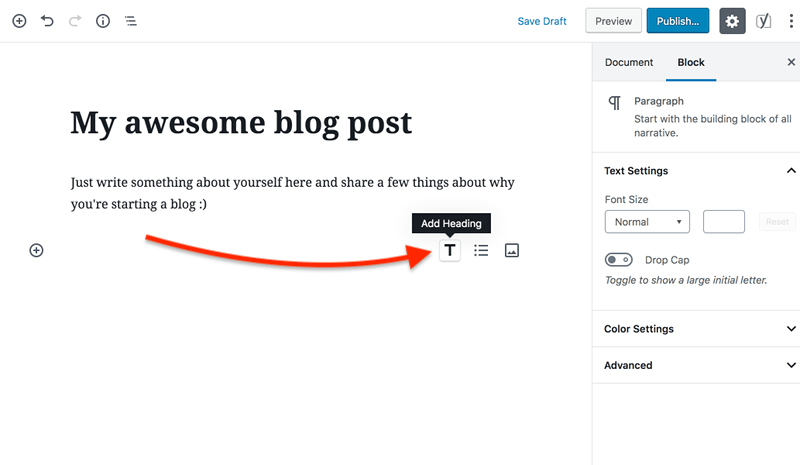
Now that block is a heading element, ta-dah!
Headings come in a few different sizes: H2, H3, H4. You see these three options when you’re inside the heading block:
So how should you use these headings the right way?
Think of your headings as somewhat of a hierarchy:
Your blog post starts with your post title – that’s your H1. It’s the biggest, most important heading element of this article.
Then, inside your blog post body, you can use lower-level headings in a hierarchical way. Divide your article into equally important sections using H2 elements.
If you need to divide those sections into sub-sections, use H3 and H4 elements for breaking up your text.
Again, all H3 elements should be equally important. And so should your H4 headings, too.
Keeping your headings organized like this help you rank better in search engines. Also, adding enough headings is a great way to make your posts easy to scan through.
Step 5: How to format text paragraphs
Adding some subtle formatting to your blog post body is another great way to make it easier to read and scan through.
Luckily, the WordPress Gutenberg editor comes with a few super easy tools to style your text.
Start by setting your mouse cursor inside a normal text element. You’ll see a small toolbar right above your text with a few formatting options:

- “B” stands for bold – use it to highlight individual words or sentences
- “I” stands for italics – great for emphasizing individual words
Also, you have the option to align your text: left, center, or right.
Step 6: How to add links to your blog post
Adding links to other relevant posts and pages is a great way to keep your readers engaged. You want them to find other articles that could be interesting and valuable to them, right?
The easiest way to keep your visitors on your blog longer is to add links to related content. You can either link to your own posts or add links to external pages your users could find helpful.
To add a link to your WordPress blog post, highlight the words you want to turn into a hyperlink first.
Then, click on the link symbol in the toolbar to open a separate field where you can enter the URL you want to link to:
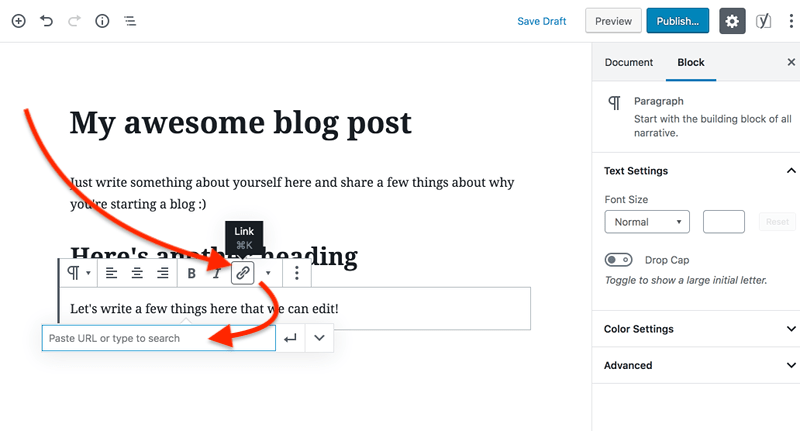
Simply type or paste the URL into the field and hit Enter to save. Now your link will appear underlined and the text is in a different color (blue or purple).
Good job!
Step 7: How to add images to your WordPress blog post
Adding images or videos is a great way to make your blog post more interesting and readable!
The best part?
Uploading media files to WordPress is super easy!
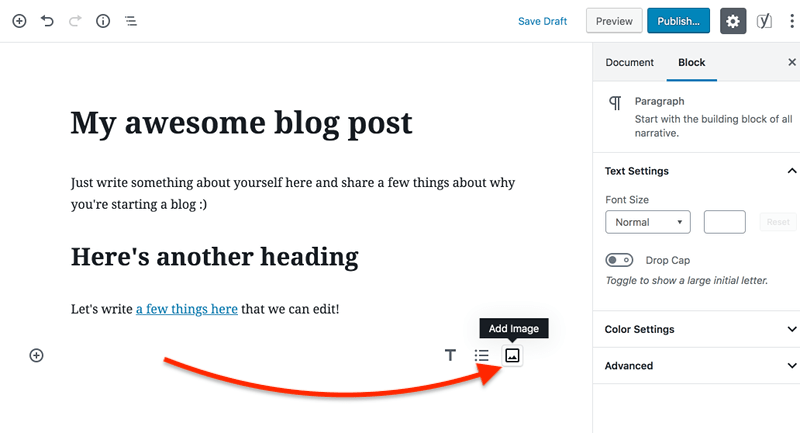
Start by adding an image block to your WordPress blog post. Hover your mouse underneath a paragraph element and click the Add Image button:
This will add an image block to your blog post. Now you can either upload a new file, choose an image from your WordPress Media Library, or insert an image from a URL:
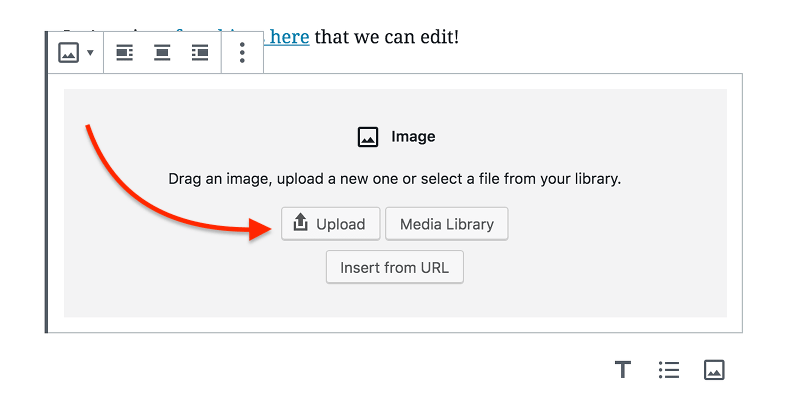
If you haven’t uploaded images to your WordPress blog, just click Upload. This will open an interface where you can either drag-and-drop an image file or select one from your computer:

When you’ve selected a file to upload, you’ll be taken to an overview with all your image files in your Bluehost WordPress blog so far. Of course, if this is your very first upload, you’ll only see a single image here.
To insert the image to your blog post, click on the thumbnail to highlight the file. Then, click the blue button that says Select in the bottom right corner:
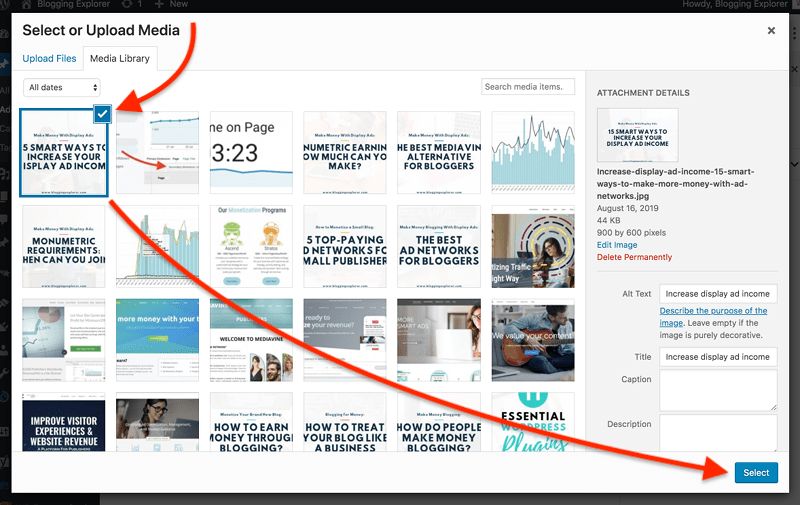
(I have tons of images in my Media Library, which is why there are so many thumbnails to choose from.)
Your image should now appear in the blog post editor! Yay!
Now feel free to add a few more paragraphs, headings, and images to finish your first WordPress blog post. Try out some of the formatting tools and don’t get scared if something goes wrong! You can always add new blocks and delete the ones you don’t need anymore.
Step 8: How to proofread and check your grammar
When you’re ready with your first WordPress blog post, give yourself a pat on the back. Nice job!
Now you want to make sure it’s 100% ready for the entire world to see and read.
Go through this little checklist before you hit Publish:
- Check your spelling:
Take your time and read your post like it was written by someone else. Use a free grammar and spelling check tool for this to save time. - Preview the post:
Click the Preview button in the “Publish” menu widget in the upper right corner of the blog post editor. - Test your links:
In the preview window, check if all your links are pointing to the pages they should link to. - Remove any editing remarks:
Check that your post doesn’t have any editing notes you’ve added while writing and editing it.
Step 9: How to publish your blog post
Are you ready to publish your first blog post? This is exciting!
Let’s see how you can share your first article with the world:
You’ll find all the publishing options in the top right corner of your WordPress blog post editor.
By default, your blog post will be published right away. In the Document option on the right-hand side, you’ll see this under Status & Visibility:
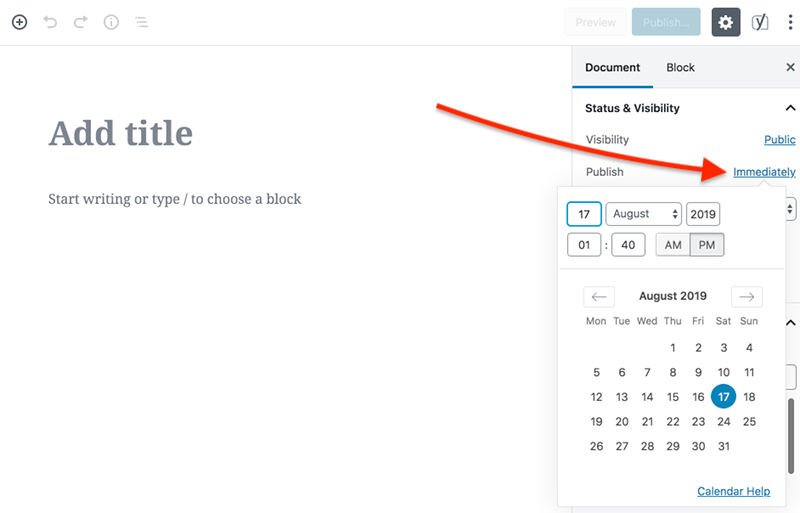
This means that when you click the blue Publish button in the top right corner of your screen, your blog post will become visible to your readers immediately.
You can find and edit your post by navigating back to the “All Posts” section in the vertical menu on the left-hand side of your WordPress dashboard.
If you want to schedule your first blog post to publish later, just click on Immediately and pick a date and time from the calendar that pops up.
Scheduling blog posts like this is super easy. If you write a couple of blog posts on the same day, you don’t want to publish them neck-to-neck right away. Instead, try to publish your posts at regular intervals.
How often should you publish new blog posts?
This is a question I get asked almost daily. But the thing is: it’s 100% up to you how often you want to create and publish new content on your blog.
You don’t need to publish new content every day. Just choose a schedule that you can stick to. If that means you’ll publish a new post every two weeks, that’s perfectly OK.
The most important thing is to stay consistent with your schedule.
One of the worst blogging mistakes is to publish tons of new content within a week and then let your blog hibernate for six months. You readers will think you’ve abandoned your blog. (And so will Google!)
To avoid this, you don’t want to set your expectations too high. You’ll just end up feeling totally overwhelmed with blogging.
So, figure out how much time you can dedicate to writing blog posts. Then, start creating great content and stick to your plan!
Tip: If you don’t want to schedule or publish your post just yet, just click Save Draft. You’ll find the button in the same menu bar on the top right as the Publish button.
Another tip: To see how your blog post will look like to your readers, click the Preview button in the same menu bar on the top right. This will open your article in a new window.
Summing it up: How to write a blog post in WordPress
Your first piece of content is out there and you’re all set for blogging success! Nice job!
From now on, make sure you focus on creating useful, valuable content for your readers. That’s what’s going to keep them coming back to your blog time after time. Use this ultimate guide to write the perfect blog post every time!
If you need some inspiration for blog post topics, make sure you check out my article What to Blog About? How to Find Blog Post Topics That Generate Traffic
Also, here are a couple of related posts you should read, too:
- How to Start a Successful Blog? 6 Essential Steps for Blogging Beginners
- 10 Tips for Writing an Awesome Blog Post
- 101 Profitable Blog Niche Ideas That Make Money
If you enjoyed this post on how to write your first blog post in WordPress, please share your thoughts in the comments below!
P.S. If you found this article helpful, make sure you share it with others so that they can find it, too! Thanks so much!